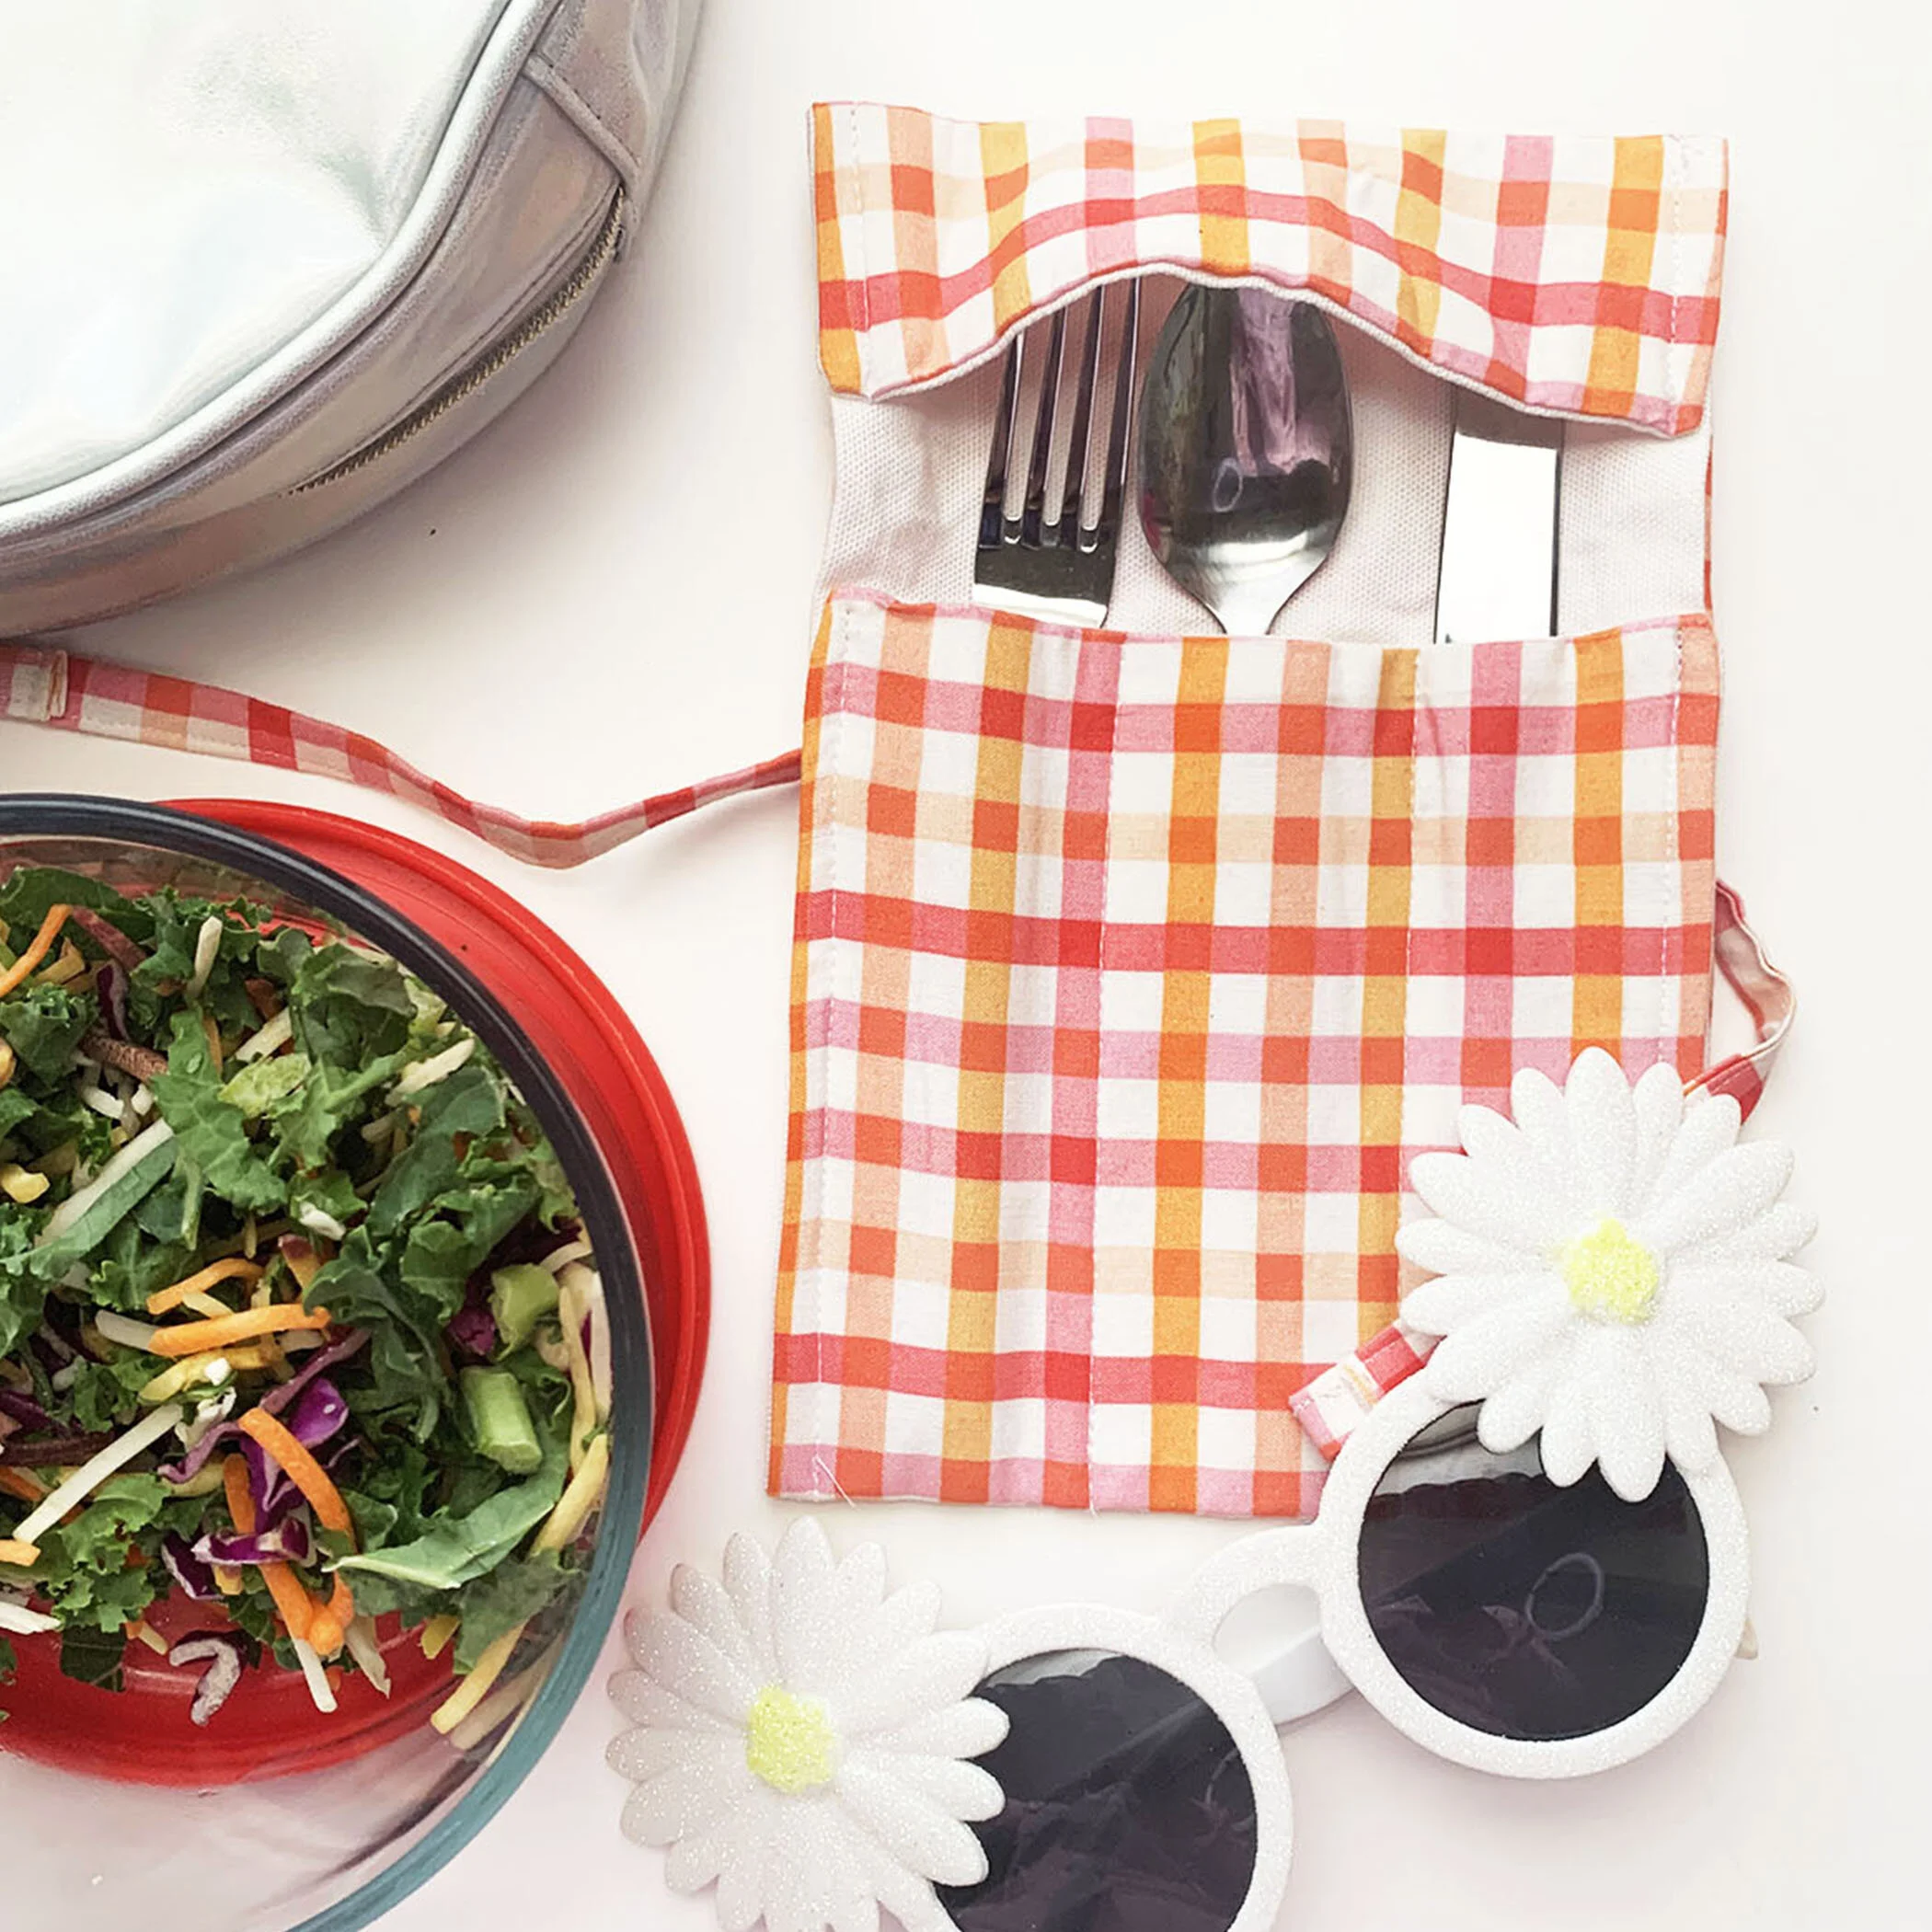
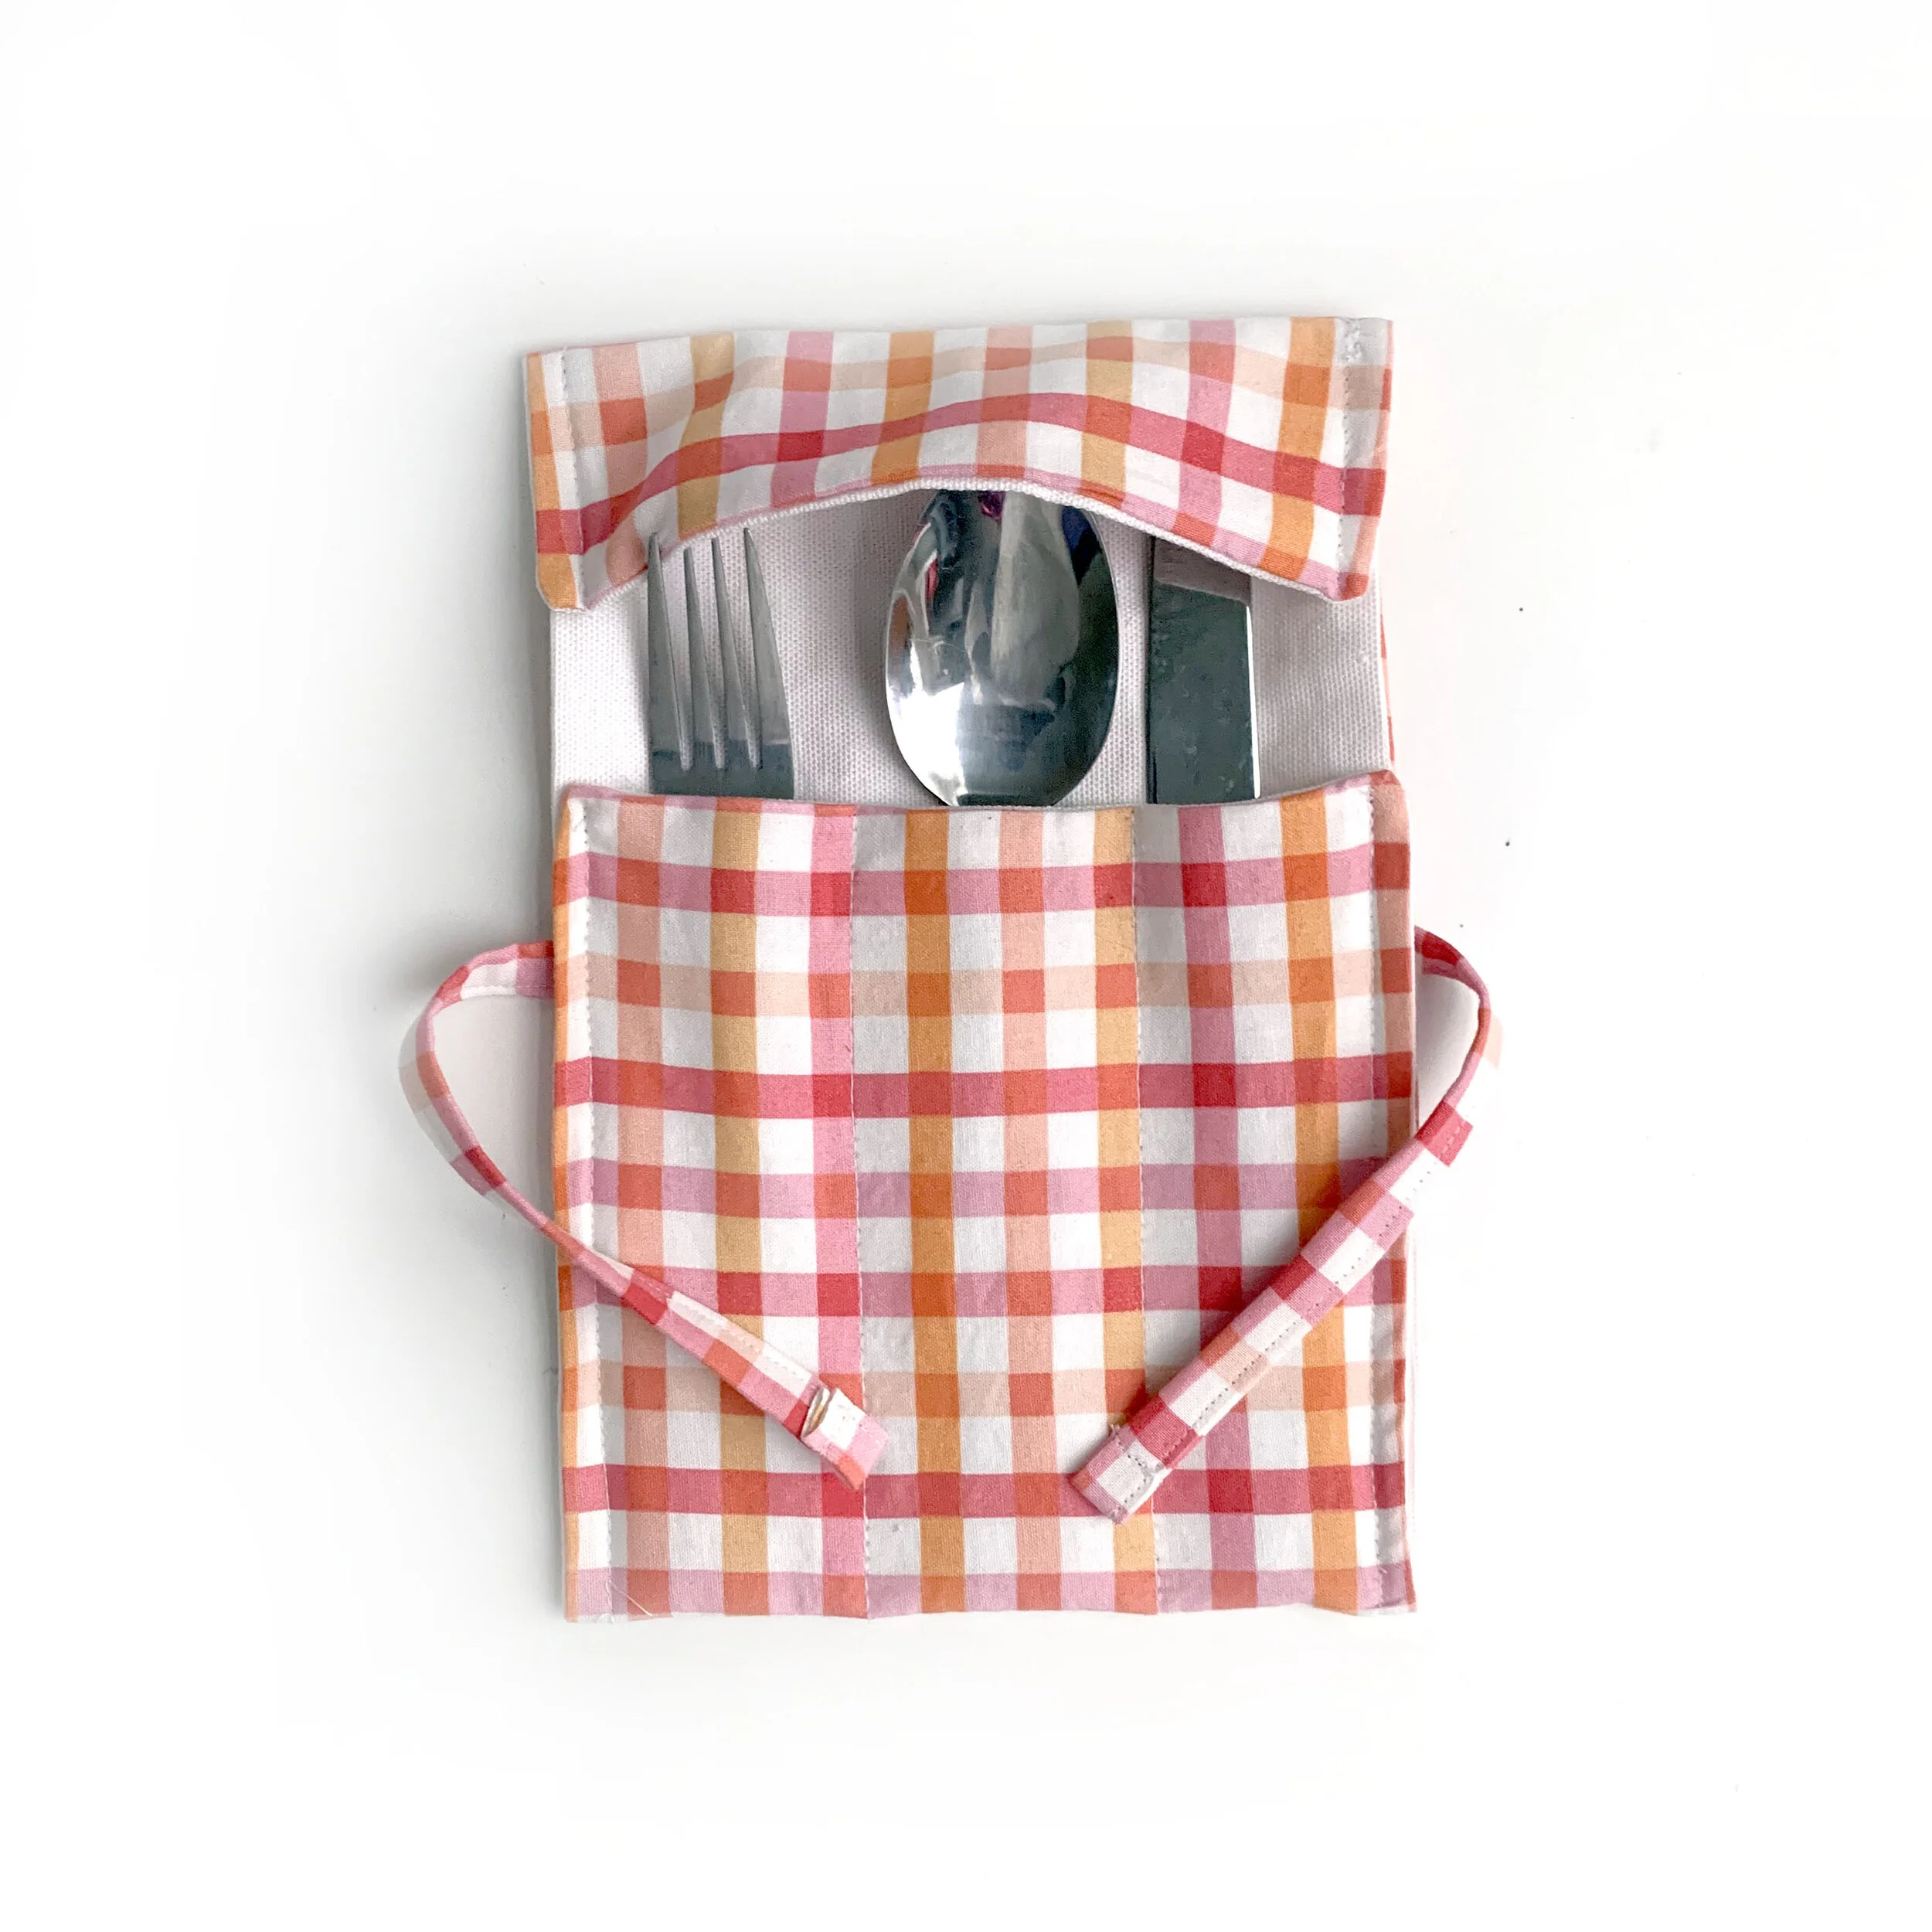
Reusable Utensil Wrap
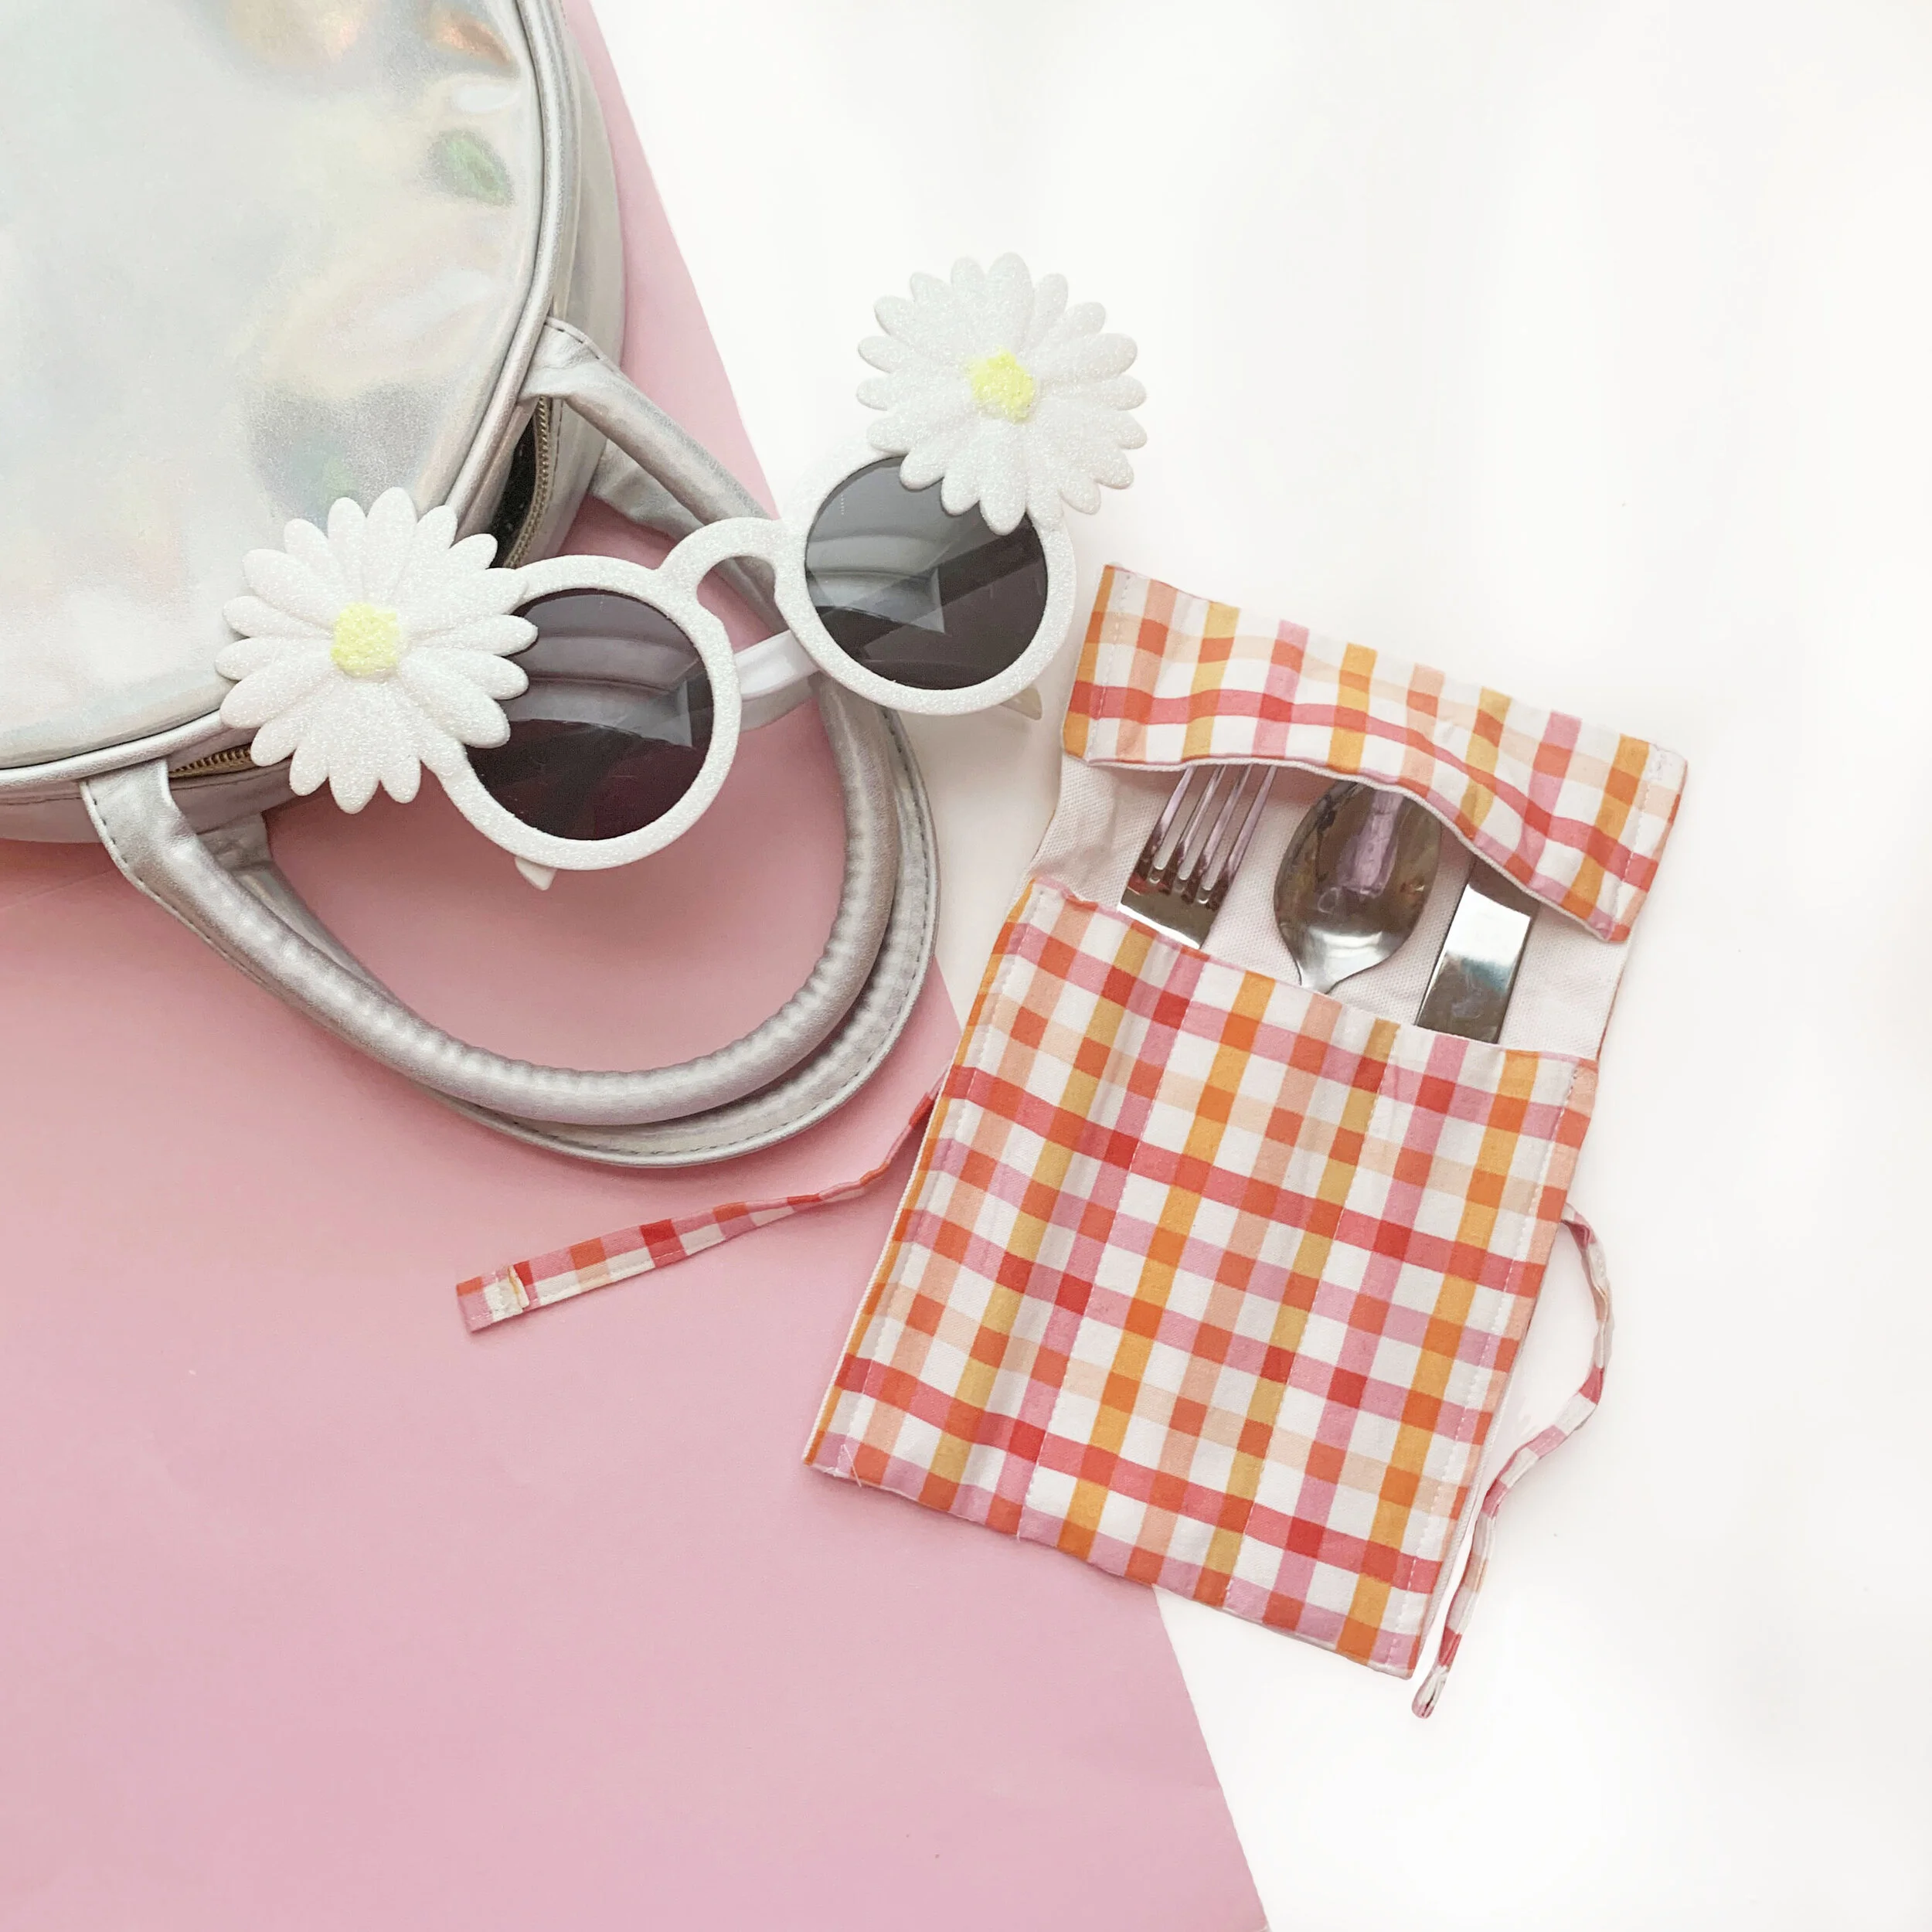
I’ve been trying to take small steps toward a more eco-friendly lifestyle. I’m not quite ready to go to zero waste, but when possible I make the conscious choice to recycle or reuse. This project was inspired by that sentiment and my need for silverware on the go.

With our heightened awareness of germs since earlier this year, I wanted a safe, reusable way to transport utensils for my lunch when I’m in the office. Honestly, I would frequently forget a fork or spoon, and end up grabbing a plastic one from the cafe. I didn’t want to keep using plastic utensils. So I started sketching, and designed this handy wrap to keep them clean from point A to B.
My favorite thing about this DIY is that it's so versatile in end use. Aside from using it for work, it’ll be great for picnics or the beach (whenever I get to see one again). I also think it makes a great gift for friends, whether they are eco-conscious or not. Best of all, you can pick fabric combinations to fit their personalities.
Materials and Equipment:
1/4 yd Exterior Fabric
1/4 yd Lining Fabric
Coordinating Thread
Scissors
Sewing Machine
Ball Head Sewing Pins
Ruler
Fabric Pen
Pin Cushion (optional)
Double Fold Bias Tape (optional)
Tape (optional)
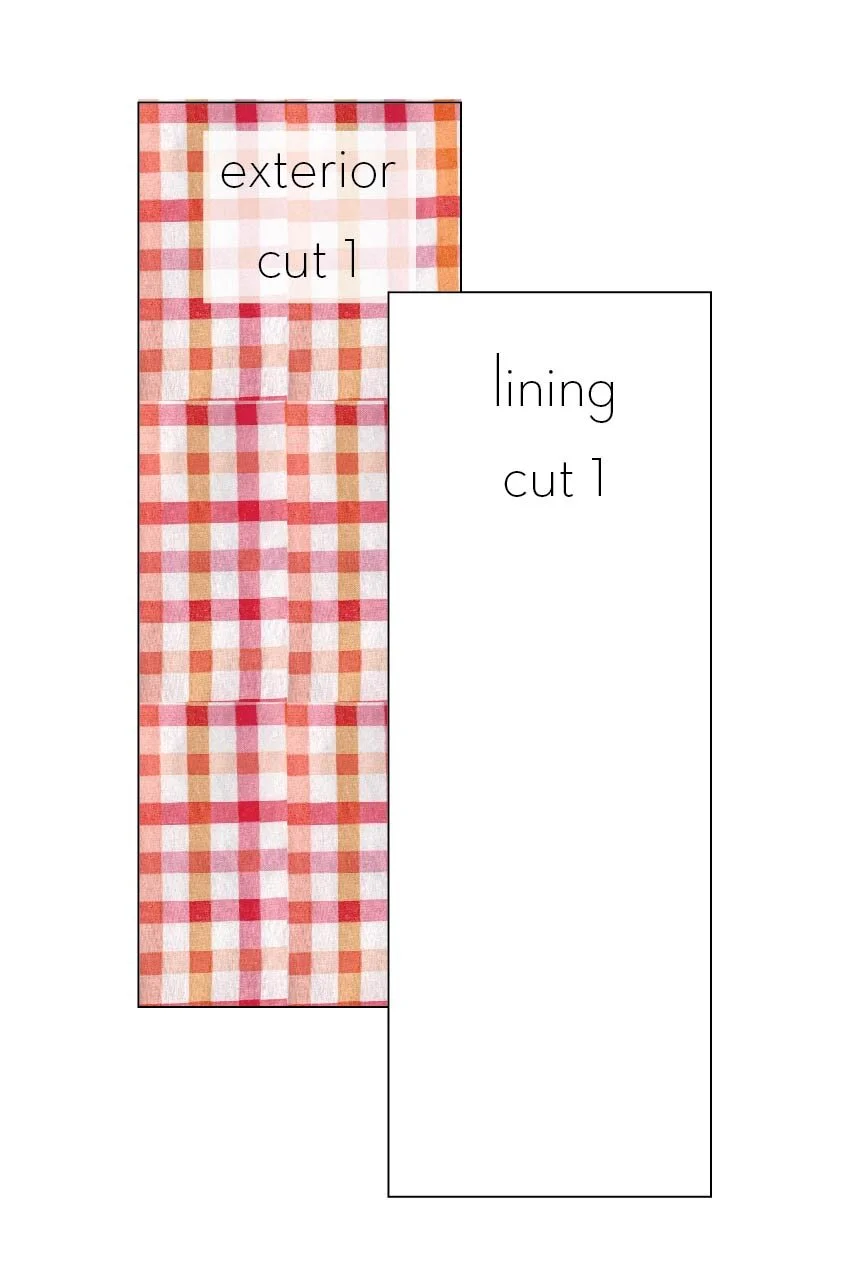
Cut out the paper patterns and tape them together. Check to make sure they match the measurements I have listed on them.

Lay them on top of your fabric. Pin rectangle pattern your fabric. Cut one piece of the exterior fabric and one piece of your lining. TIP: If you don’t want to print the patterns, you can draw a 6 3/4"” X 17” rectangle directly on each of your two fabrics. Then cut out the pieces.
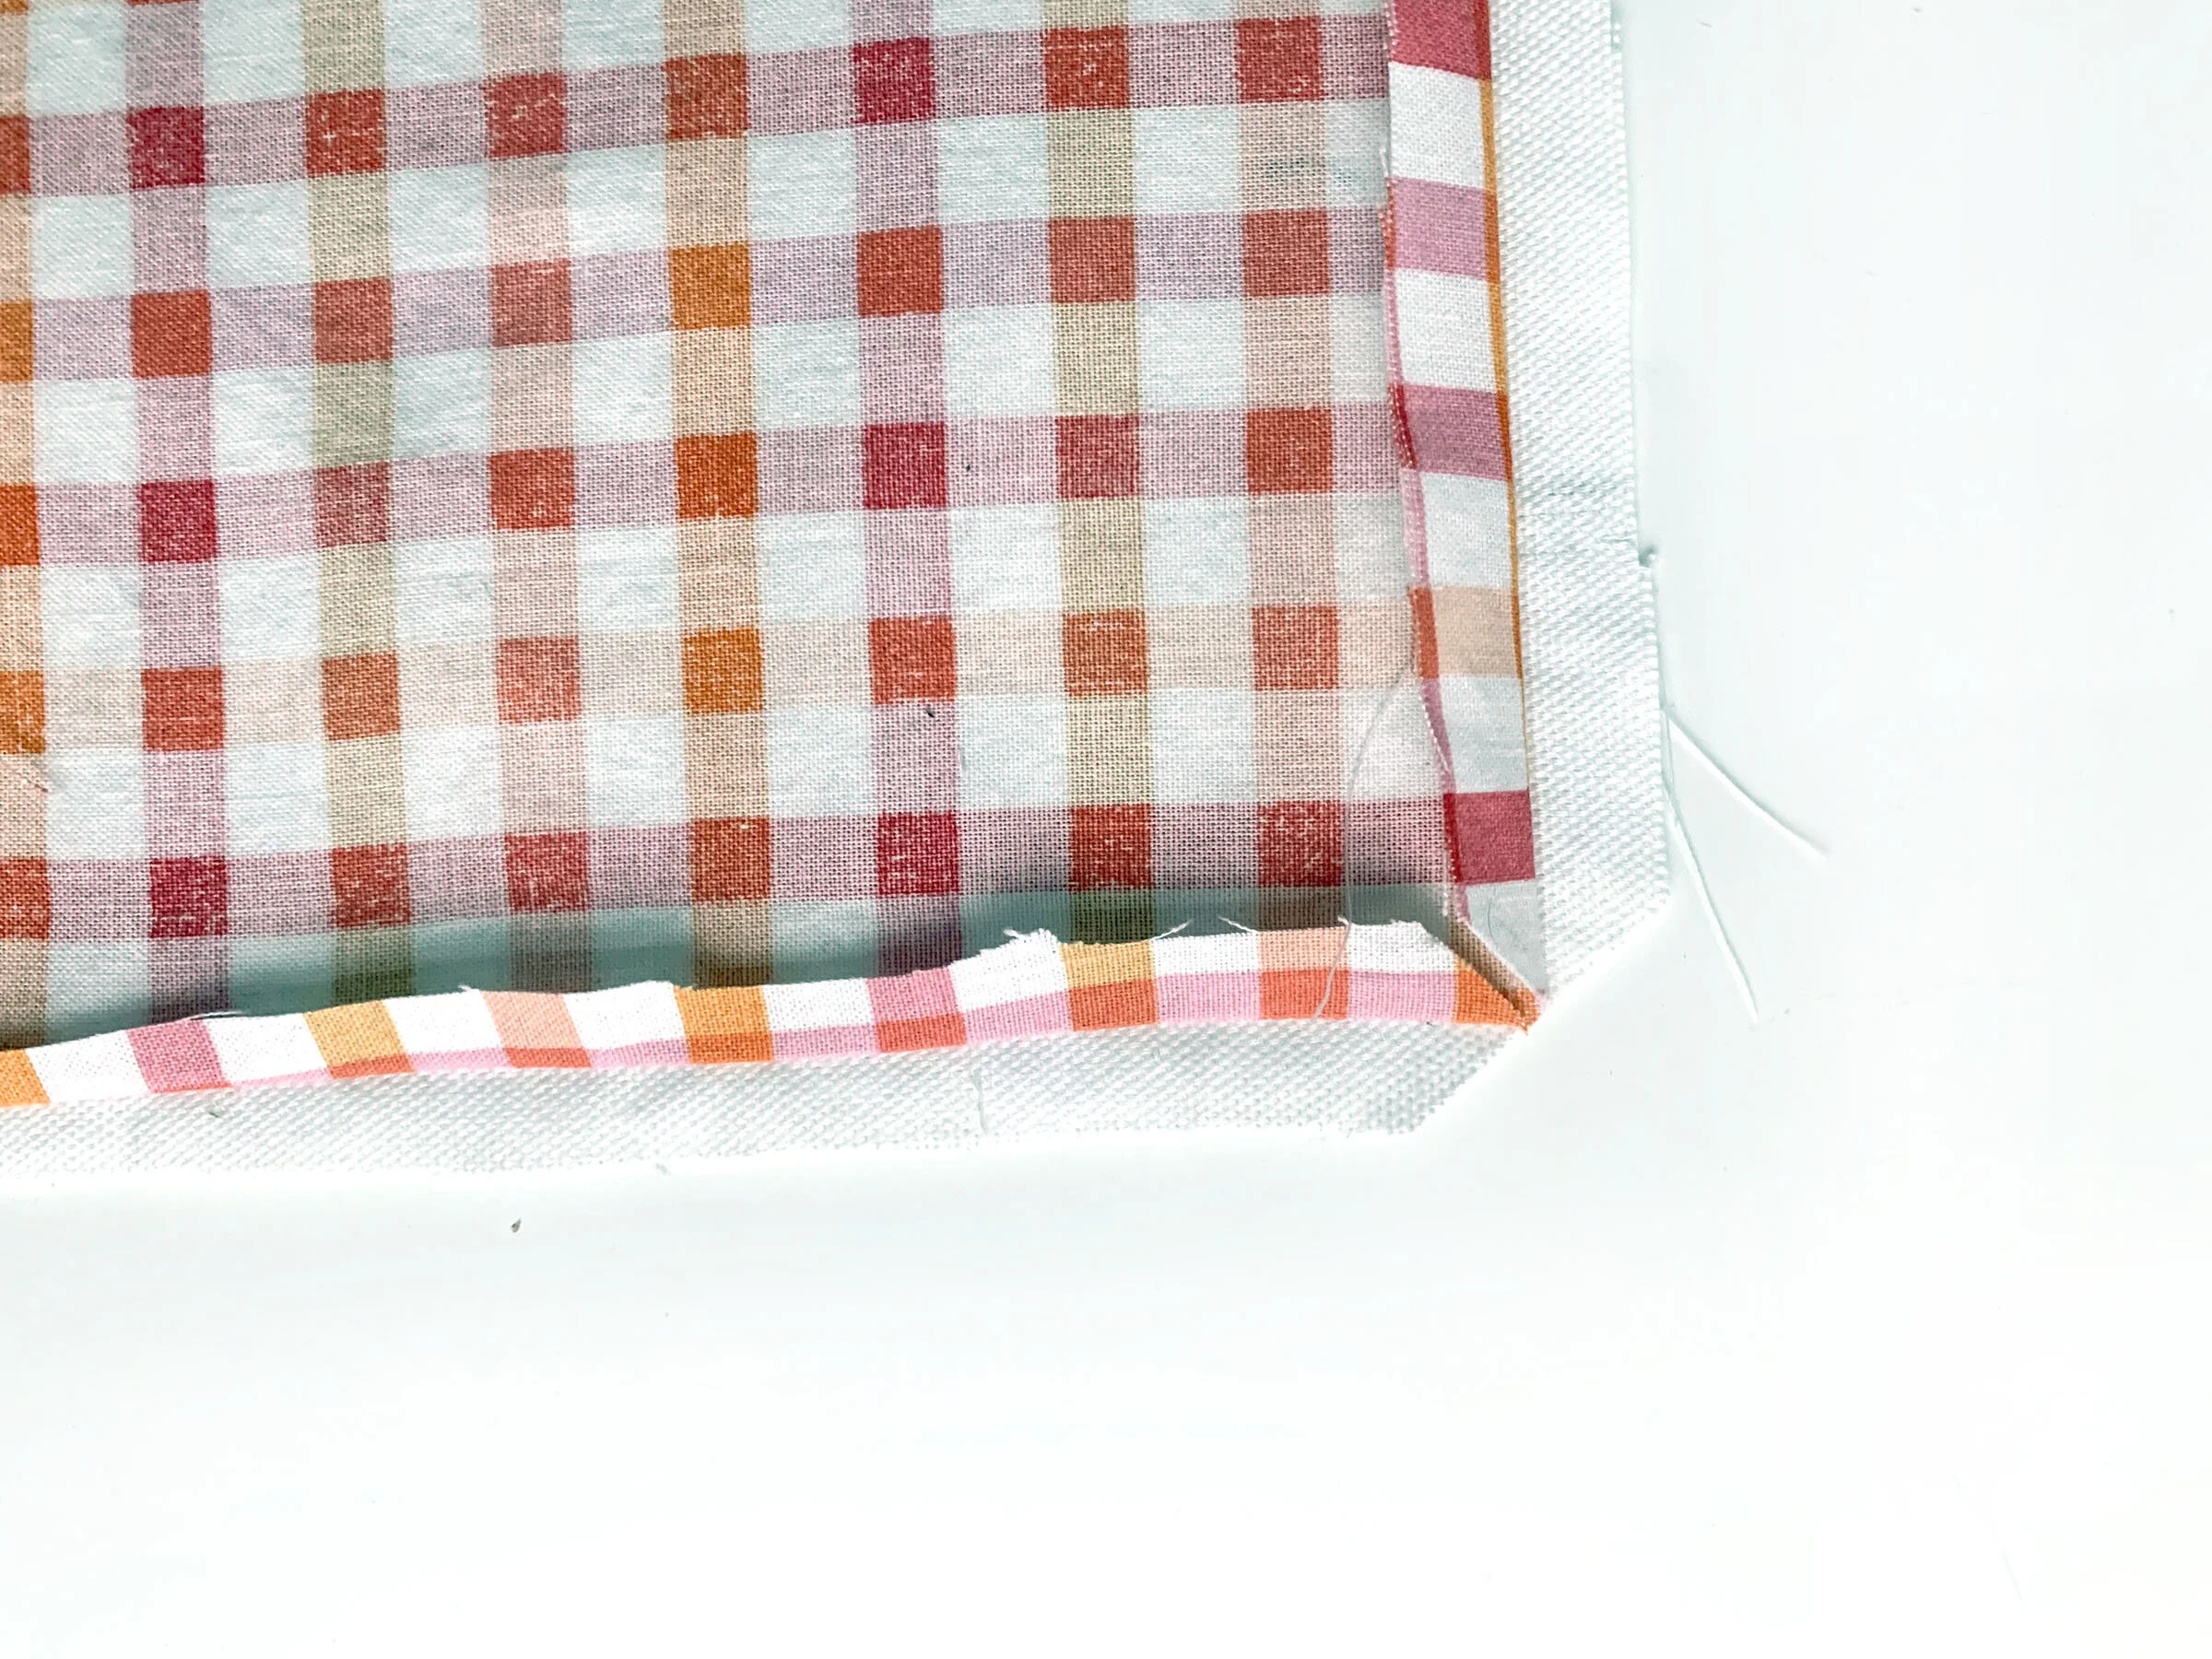
Lay fabric with pretty sides together, and pin all the way around. I was so excited to start sewing, that I didn’t take a photo of it pinned before I sewed mine. Below is a visual of how your pins should look. On one of the longer sides, mark a 3” space with fabric pen.
Once you have it pinned, stitch around the edge at ½” from the edge. Do not stitch where you marked the 3” . We need this hole to turn the wrap inside out.

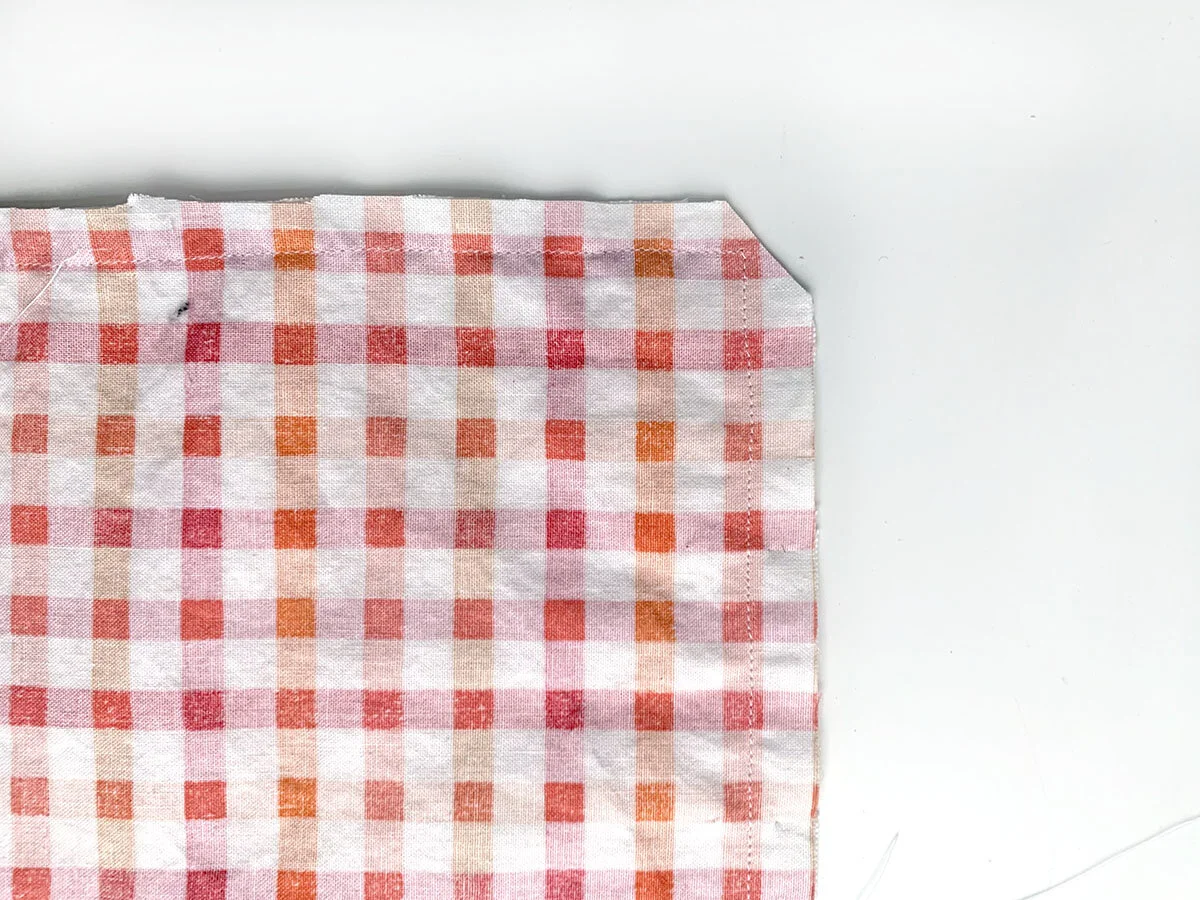
Cut the corners off at 45 degree angle. Do not cut through your stitching. TIP: Doing this reduces the bulk inside when we turn it pretty side out. It will give your wrap nice crisp corners.
Press the seam allowance open like below. TIP: Pressing open the seam allowance will give you a smooth appearance on the pretty side.
Now it’s time to turn it inside out. I like to start with a corner and push it through the hole. Then continue pulling gently until the entire thing is flipped (with the pretty side of your fabric facing out).
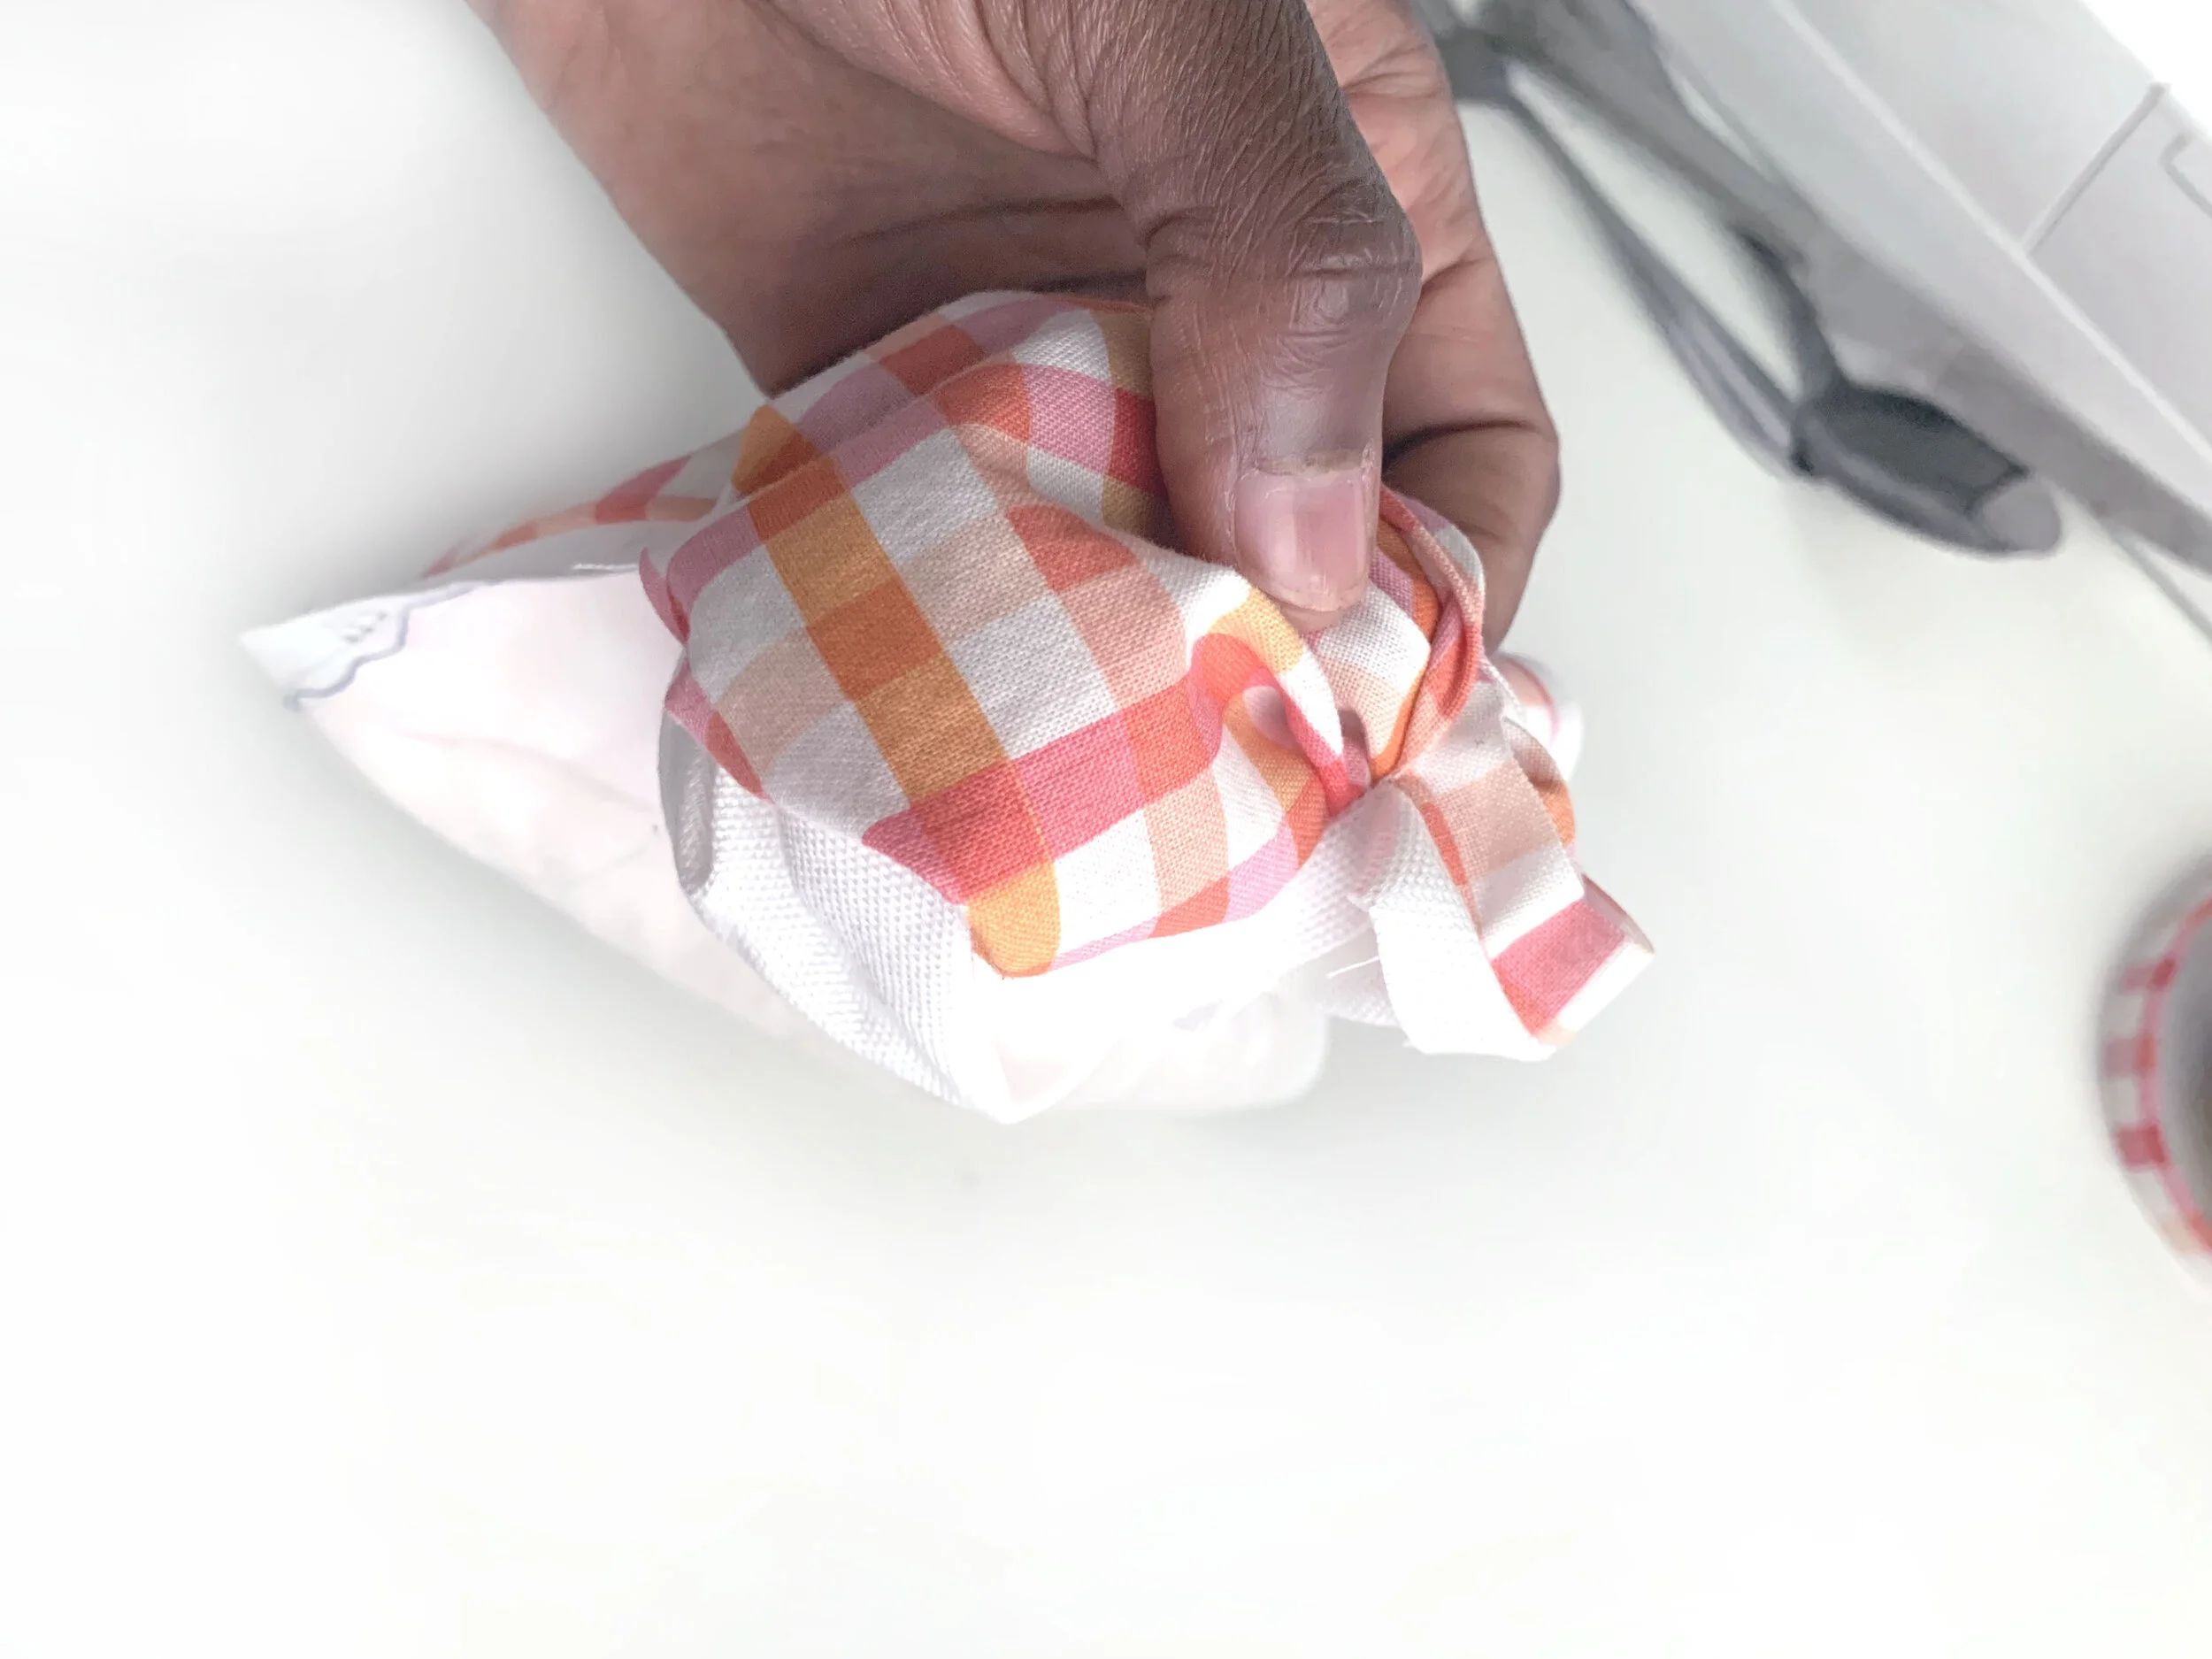
Use a corner turner or blunt pencil to poke out corners. Be careful not to poke all the way through.
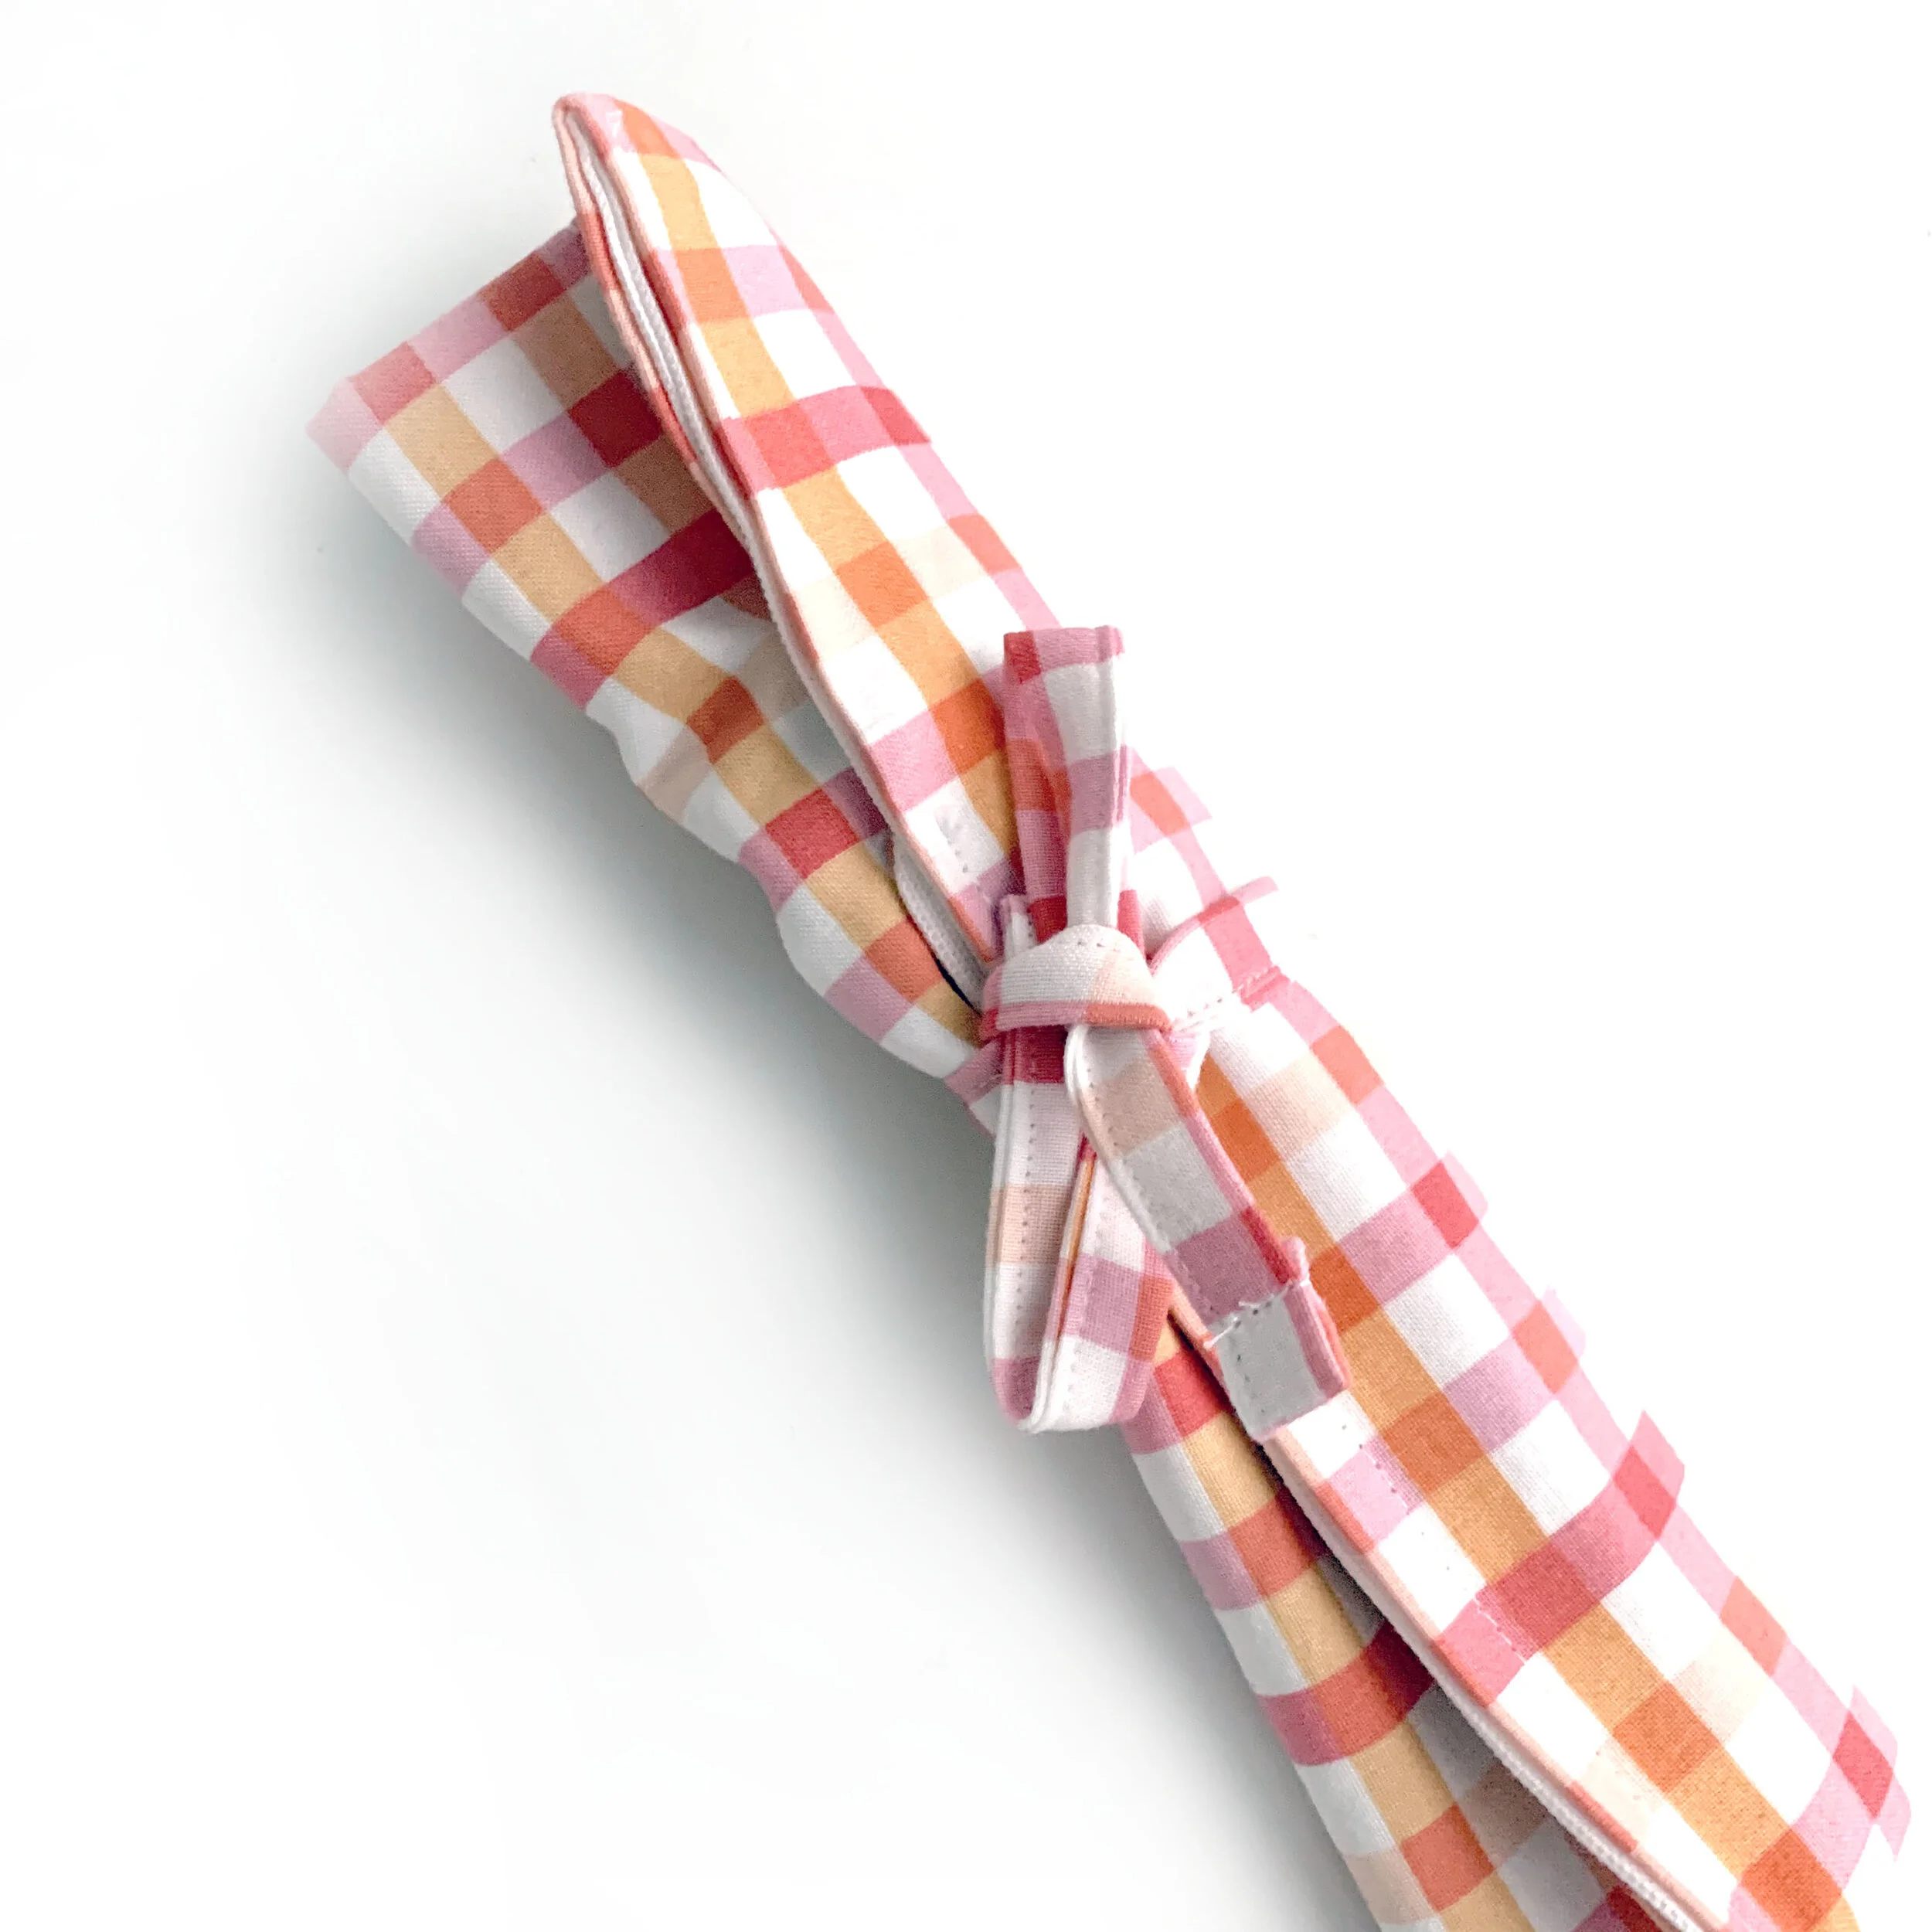
For the wrap tie, draw a 1” x 17” rectangle on your fabric. Cut out the rectangle. Fold the fabric in half lengthwise. Then fold edges toward middle fold line (on length). Then fold them in half again. It’ll look like the below, but not sewn. Run the iron along the tie so it’s nice and pressed. This will make it easier to sew.
TIP: You can use 1/2” double fold bias tape for this step if you prefer a solid tie. If you go this route, cut tape 17” long. Then jump to step below.
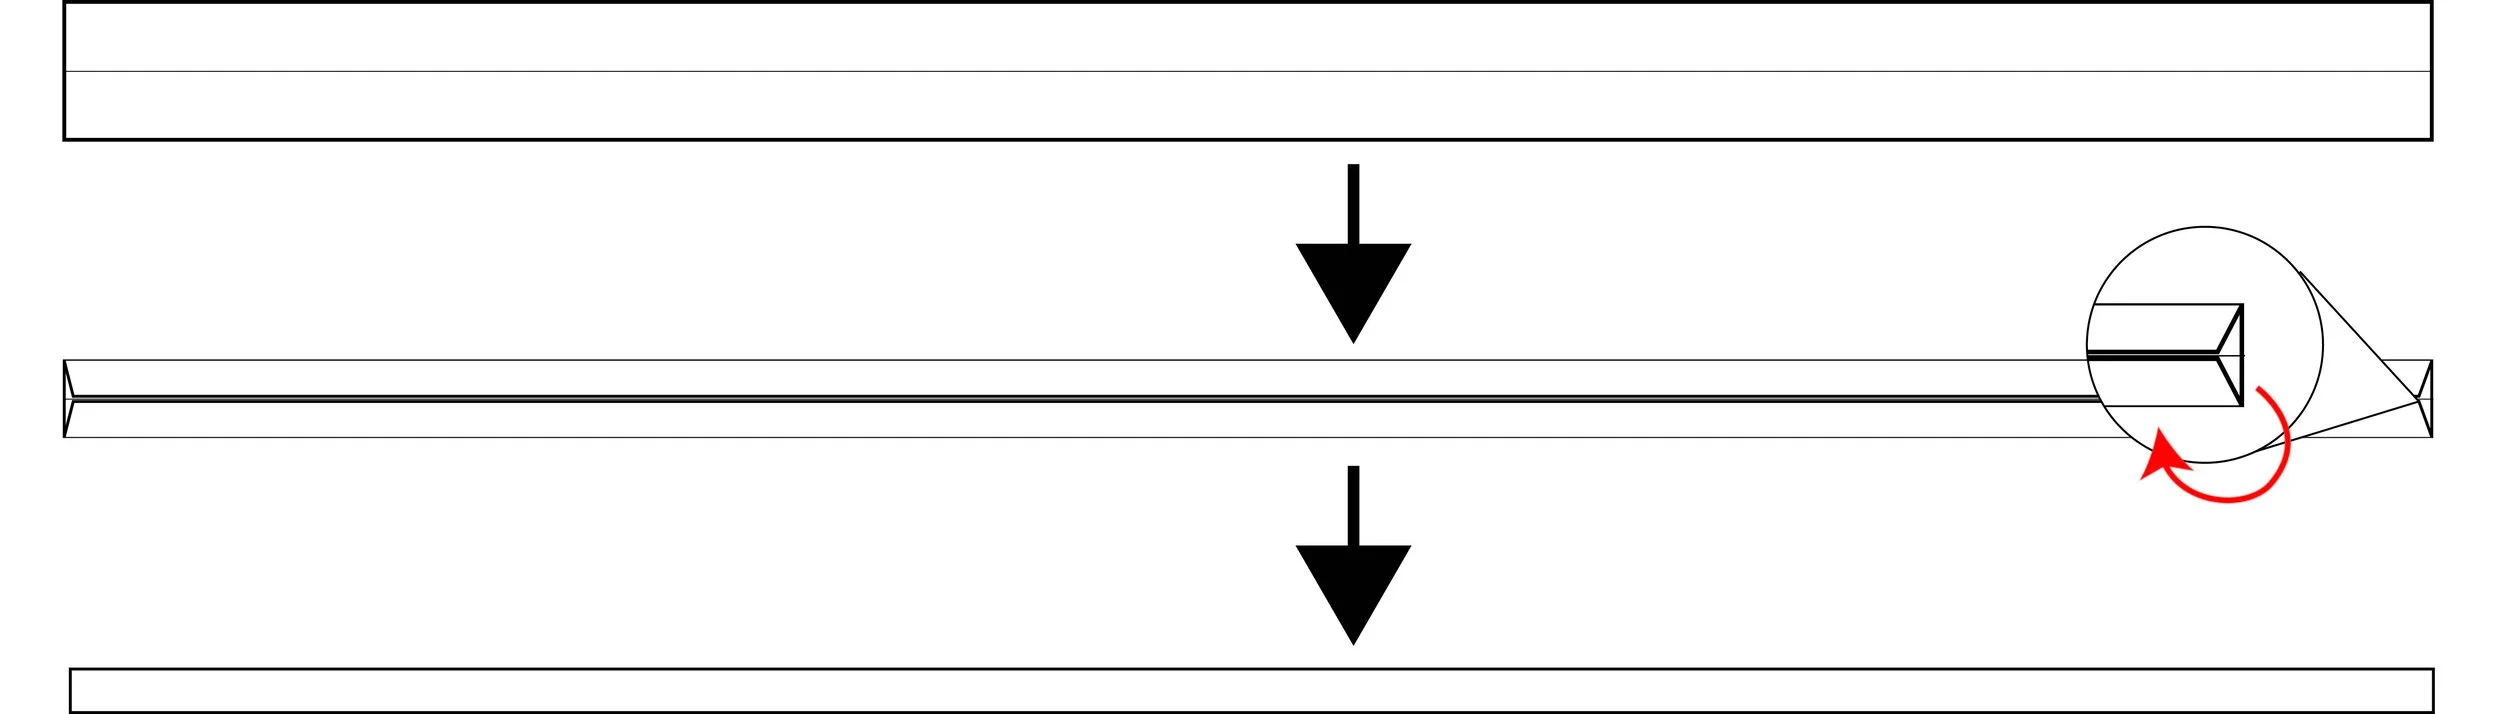
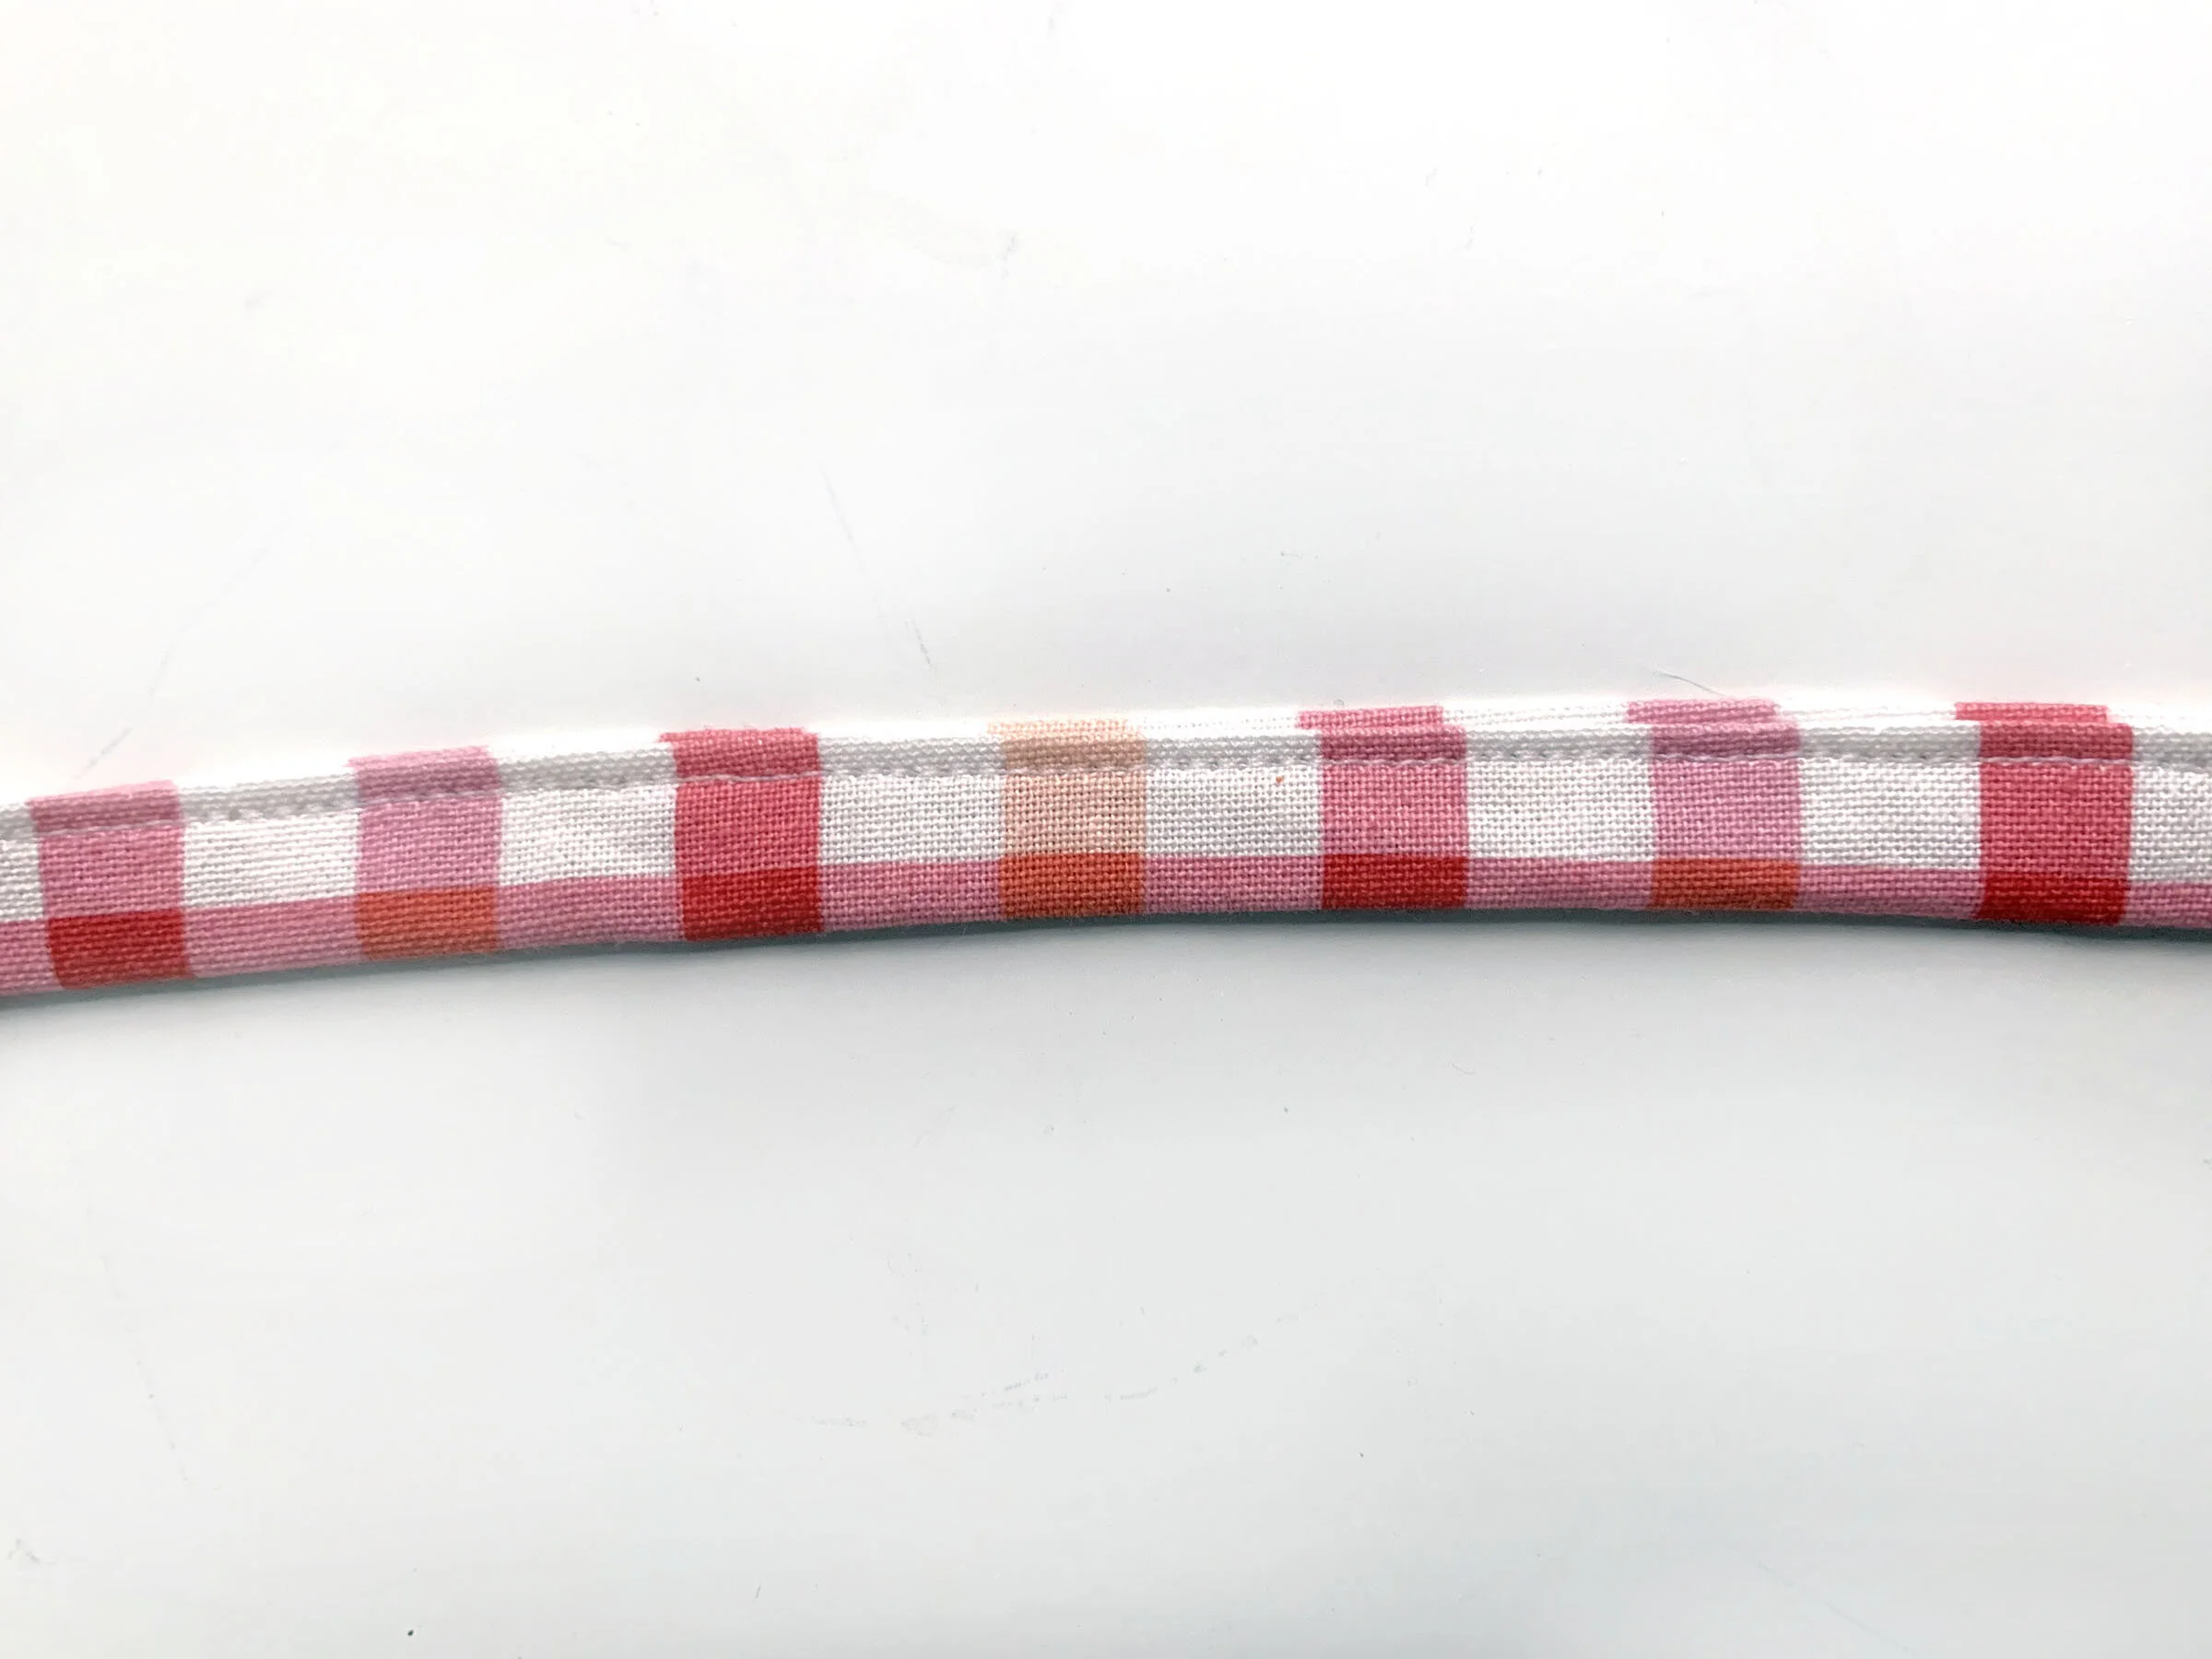
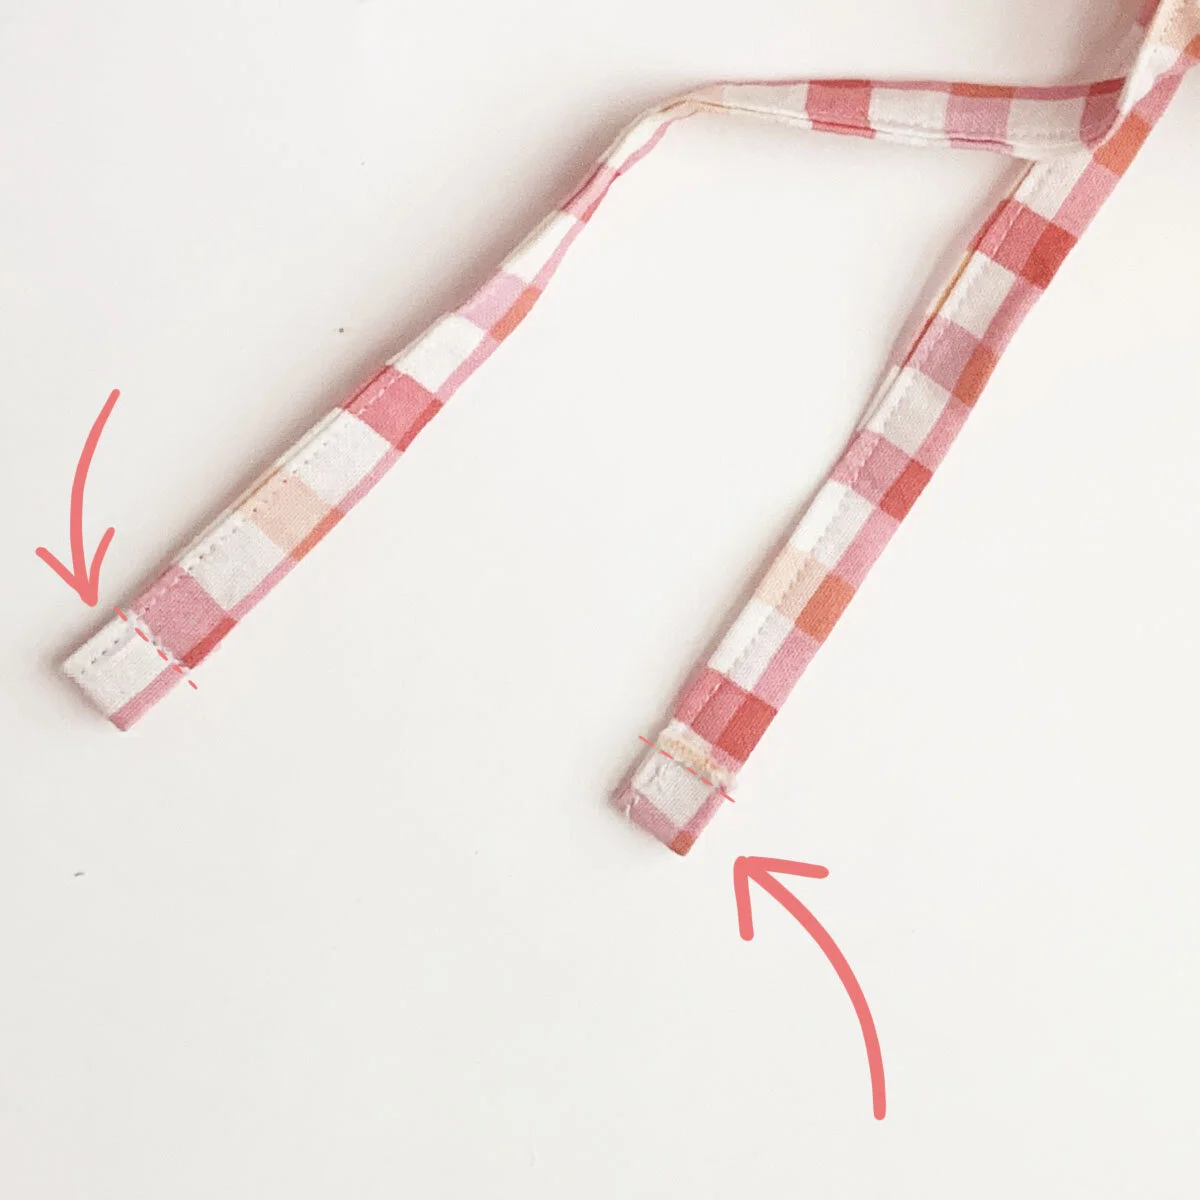
Sew along the edge of your tie making sure to capture both sides of the tie. Fold end of tie in 1/2” and stitch across. This will keep the tie from fraying when you wash. Repeat on the other end.
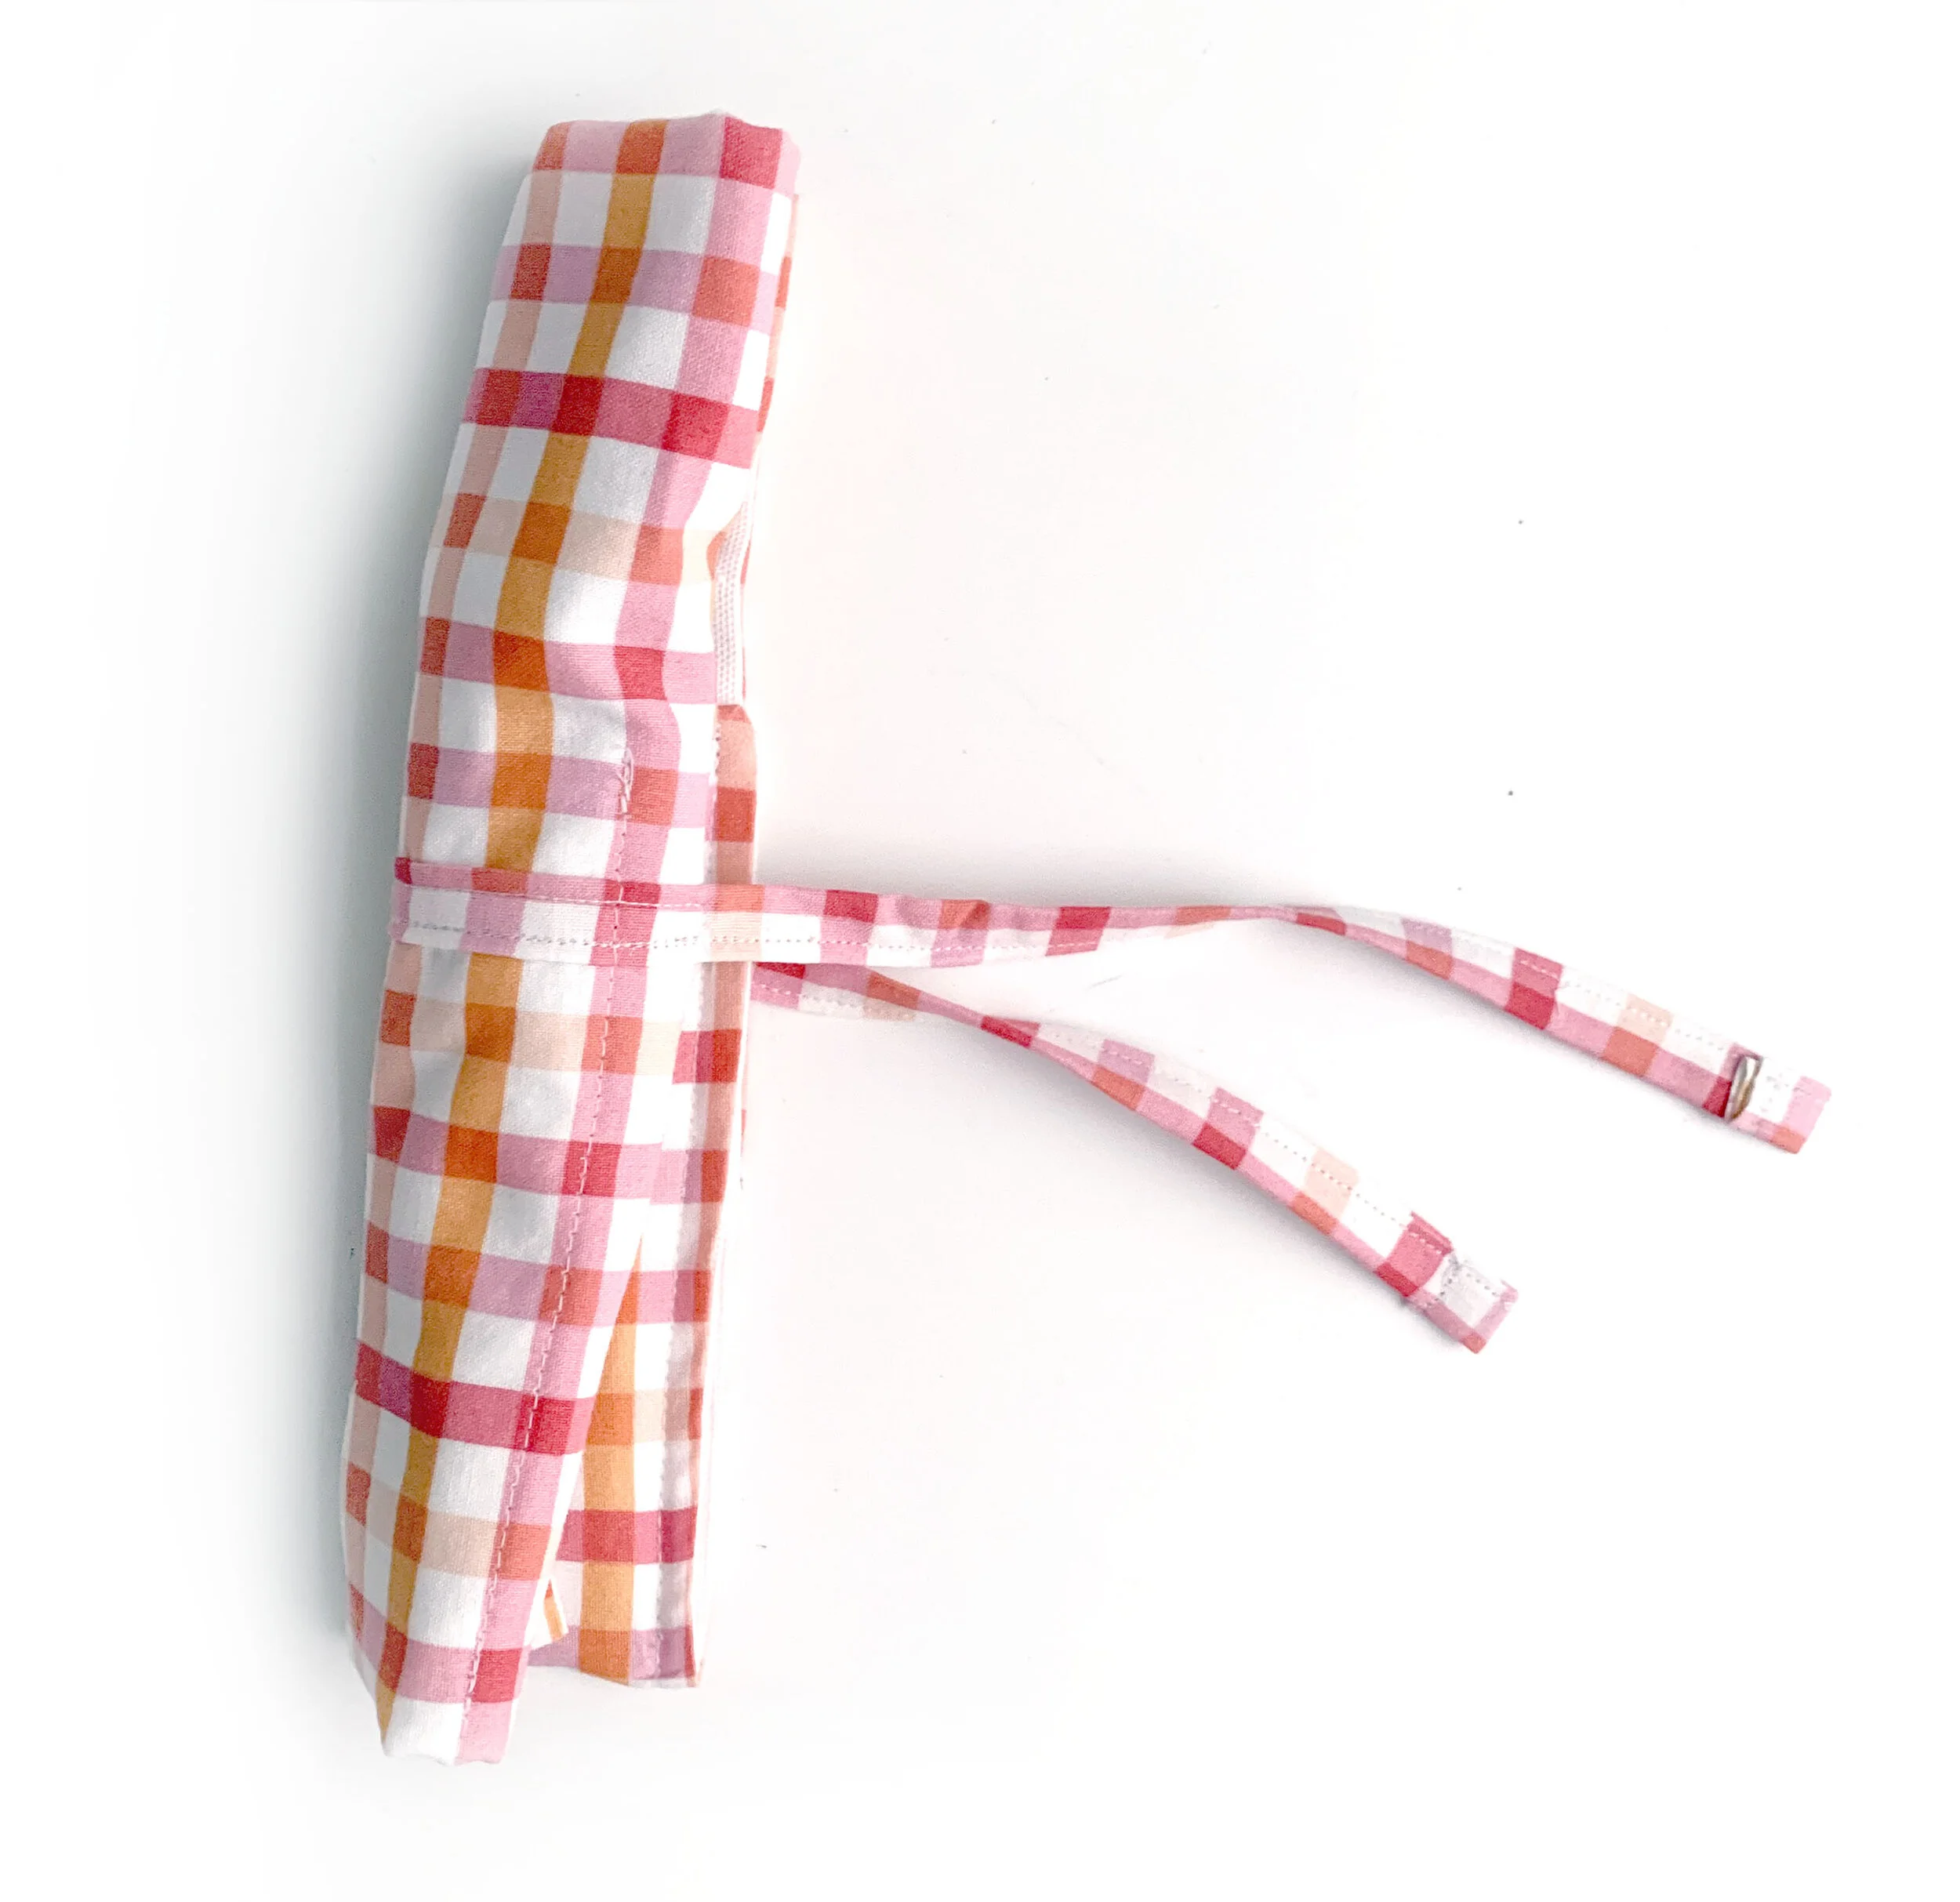
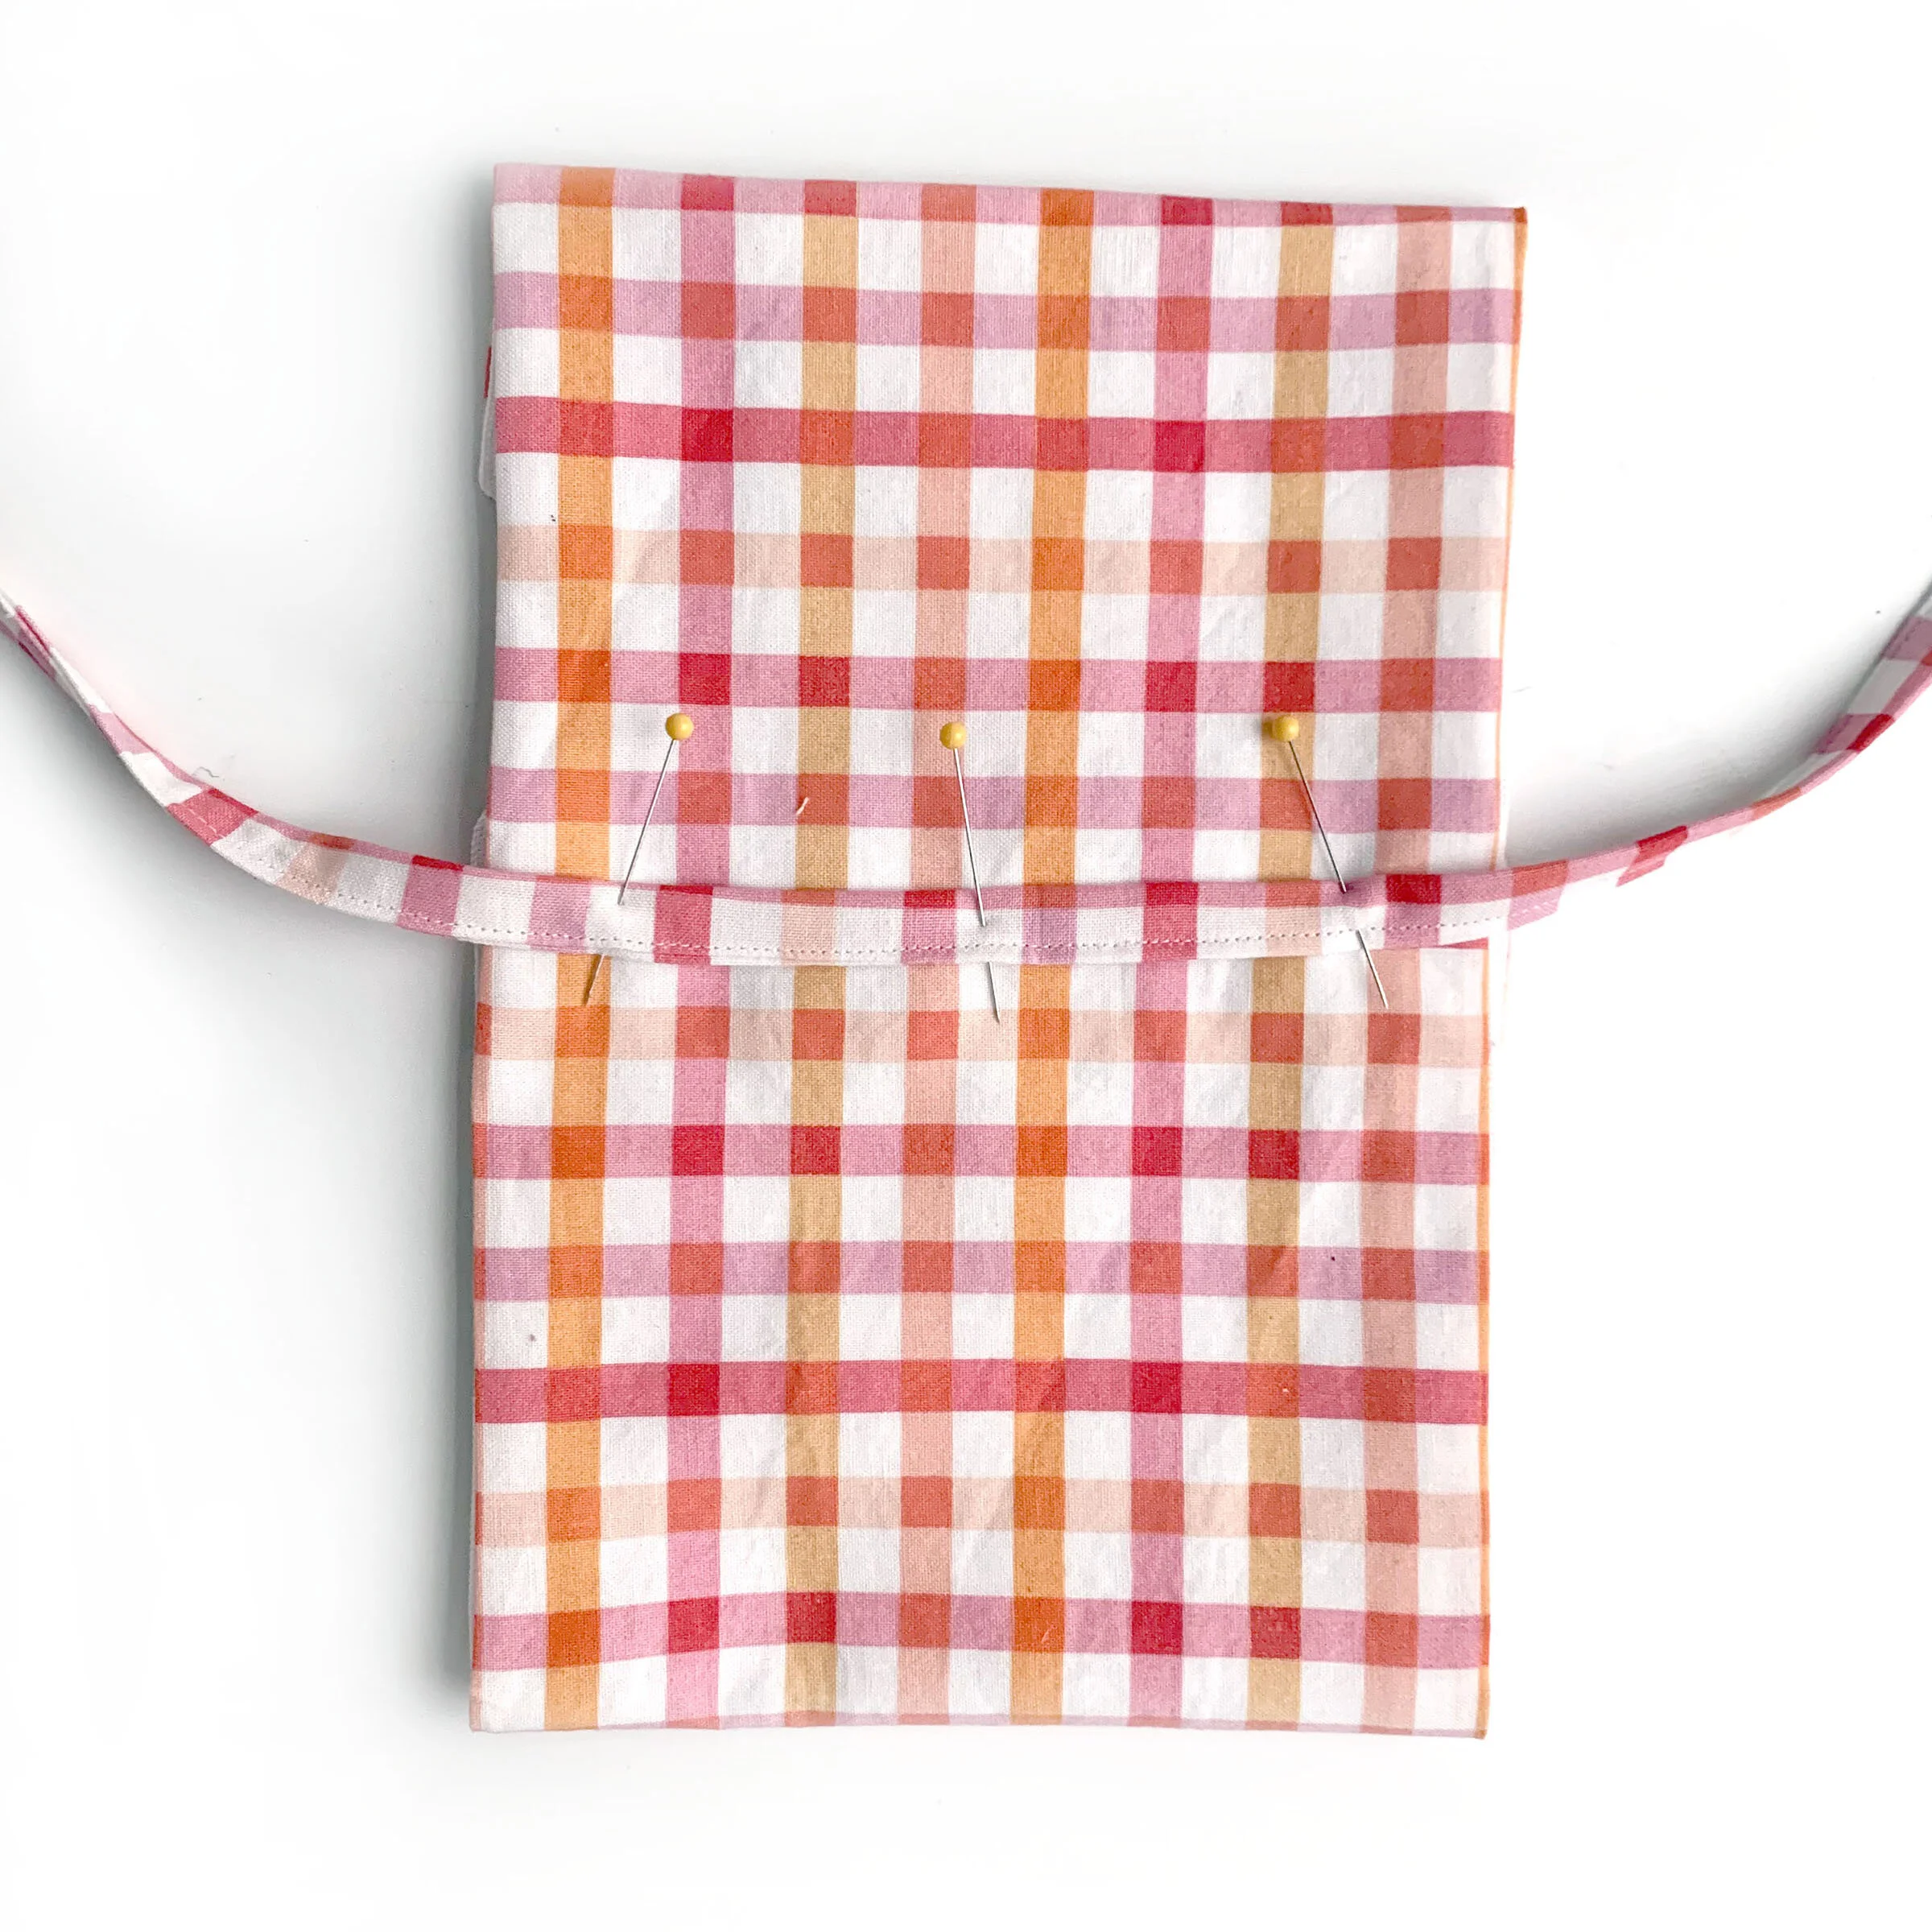
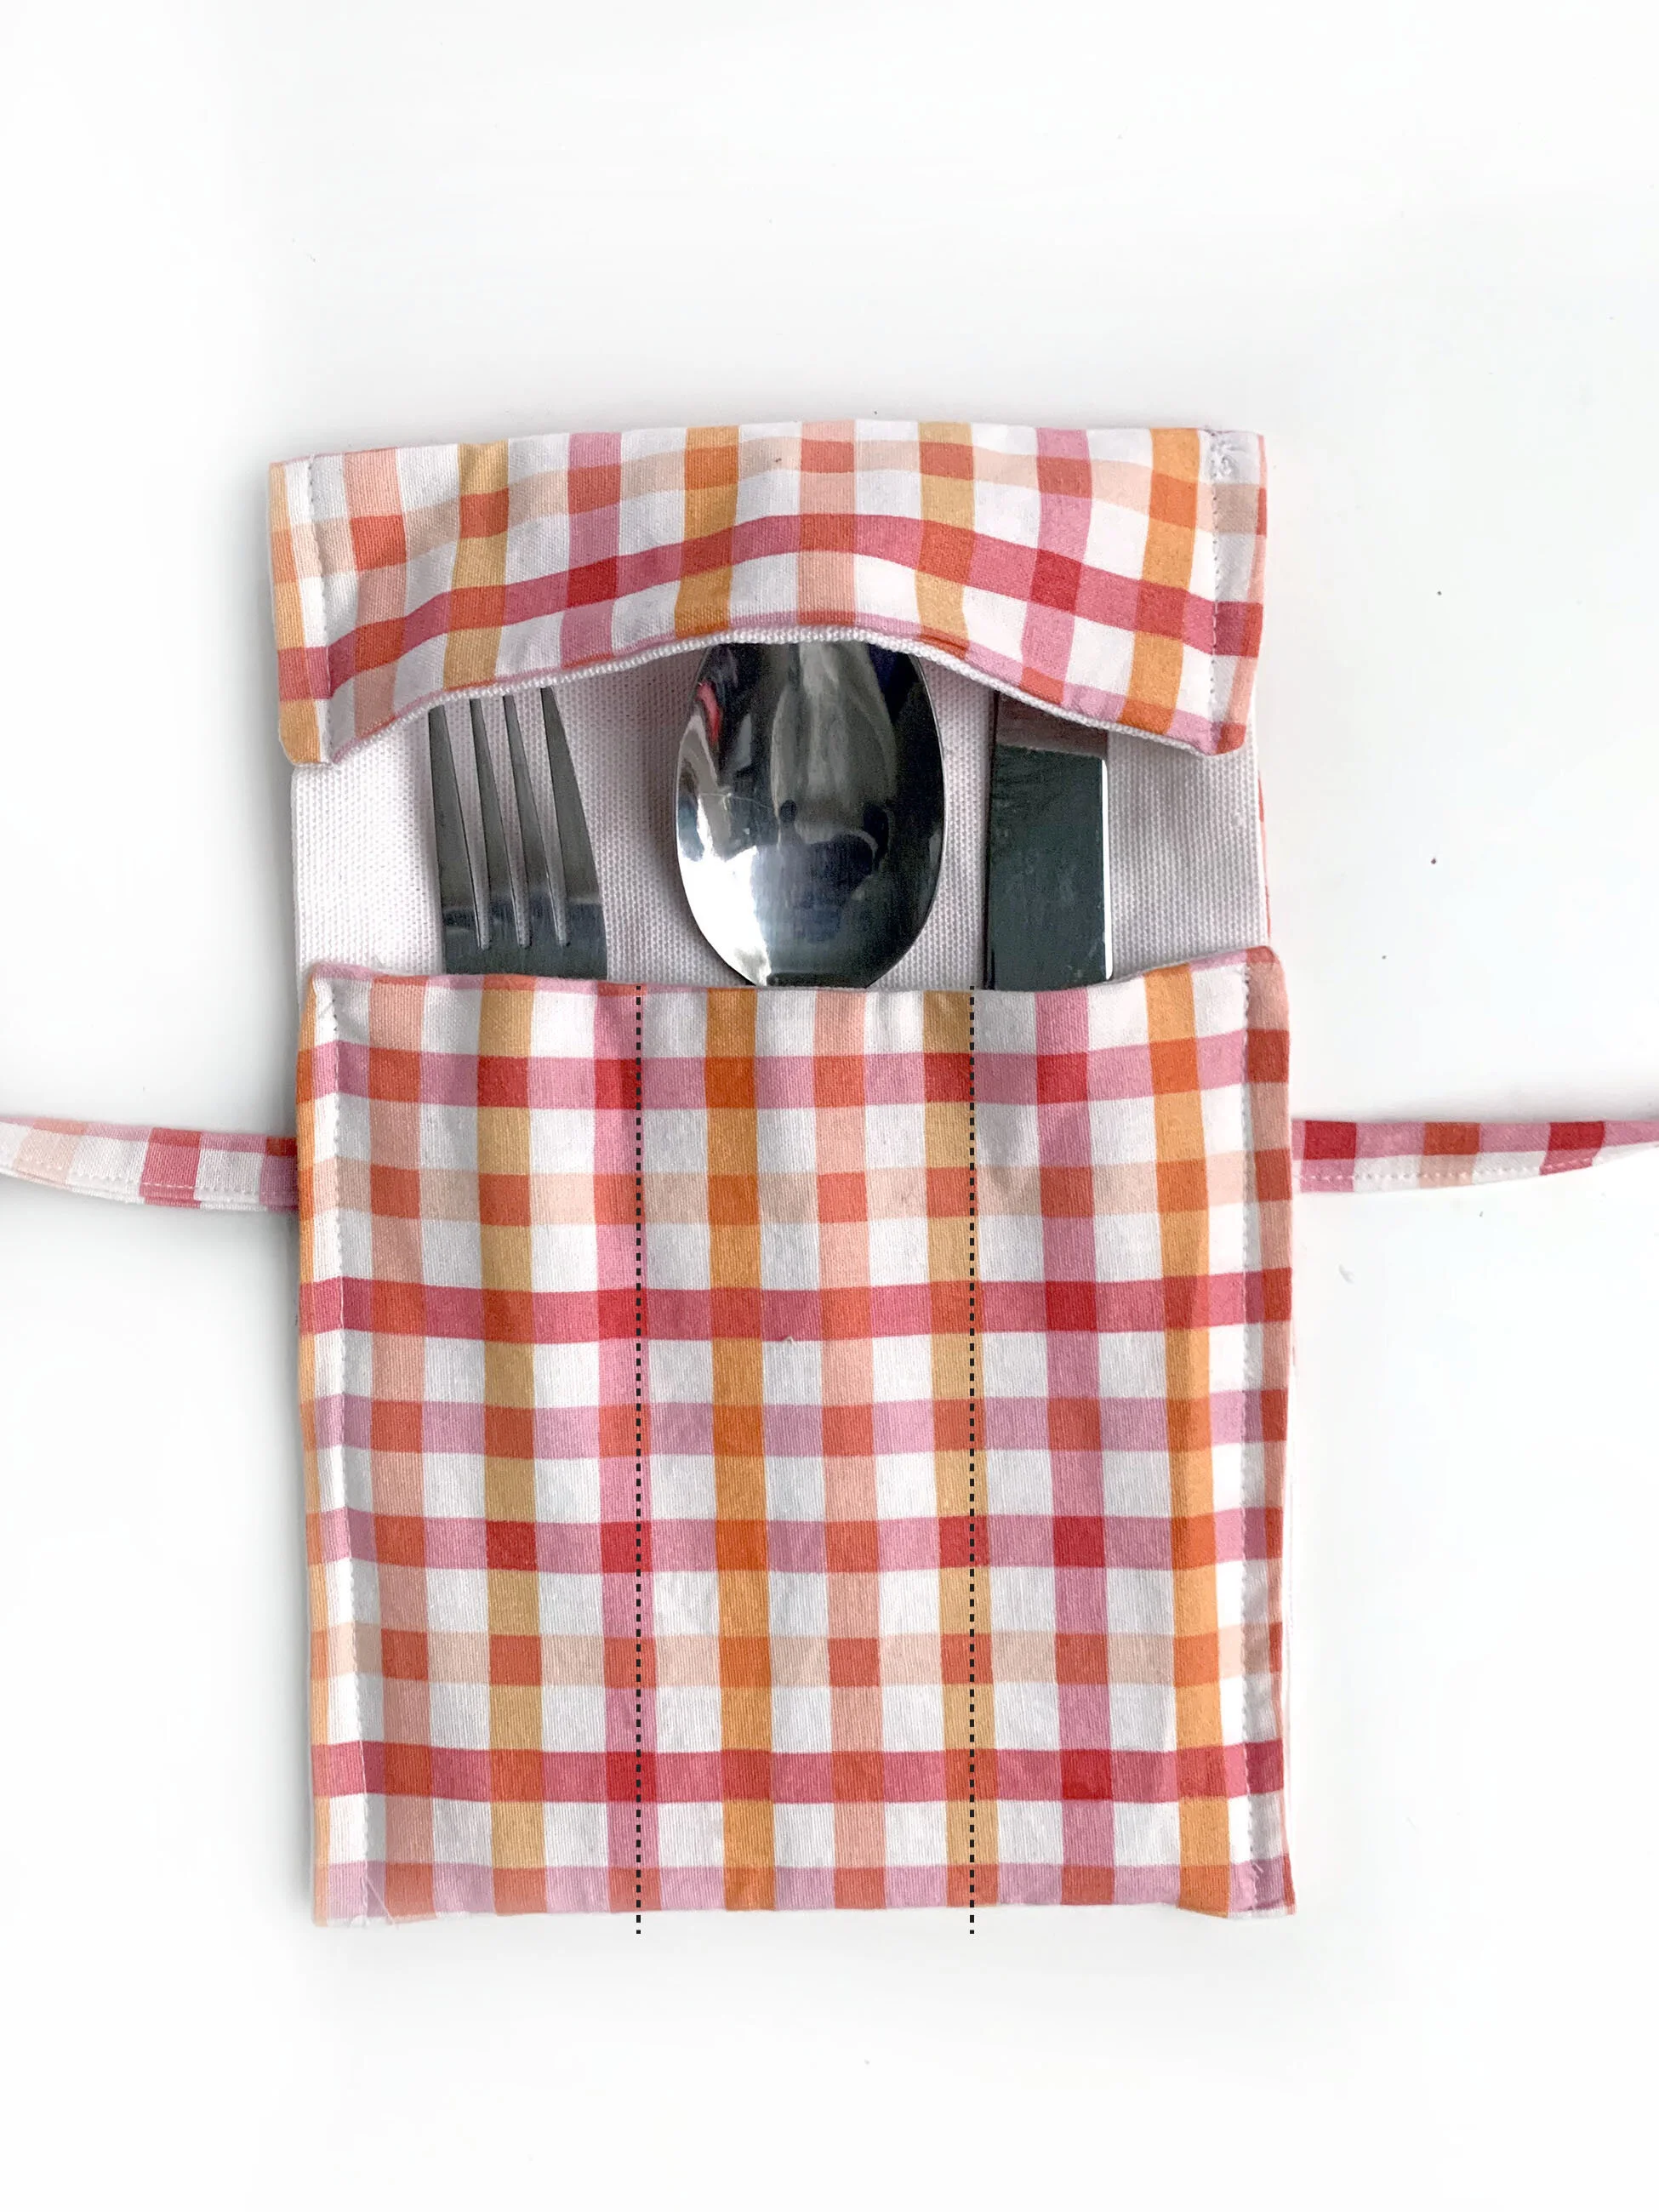
Pin your tie to wrap 6” from the top edge. In my image below the top flap and lower edge are folded up. Make sure when you pin and sew the tie on, these are extended out flat. You don’t want to sew through the flaps just yet. TIP: If you want the ties to be longer, you can increase the length of rectangle.
Fold in each of the tie and pin. Use sewing machine to stitch down. This finishes the ends so they will not unravel when you wash it.
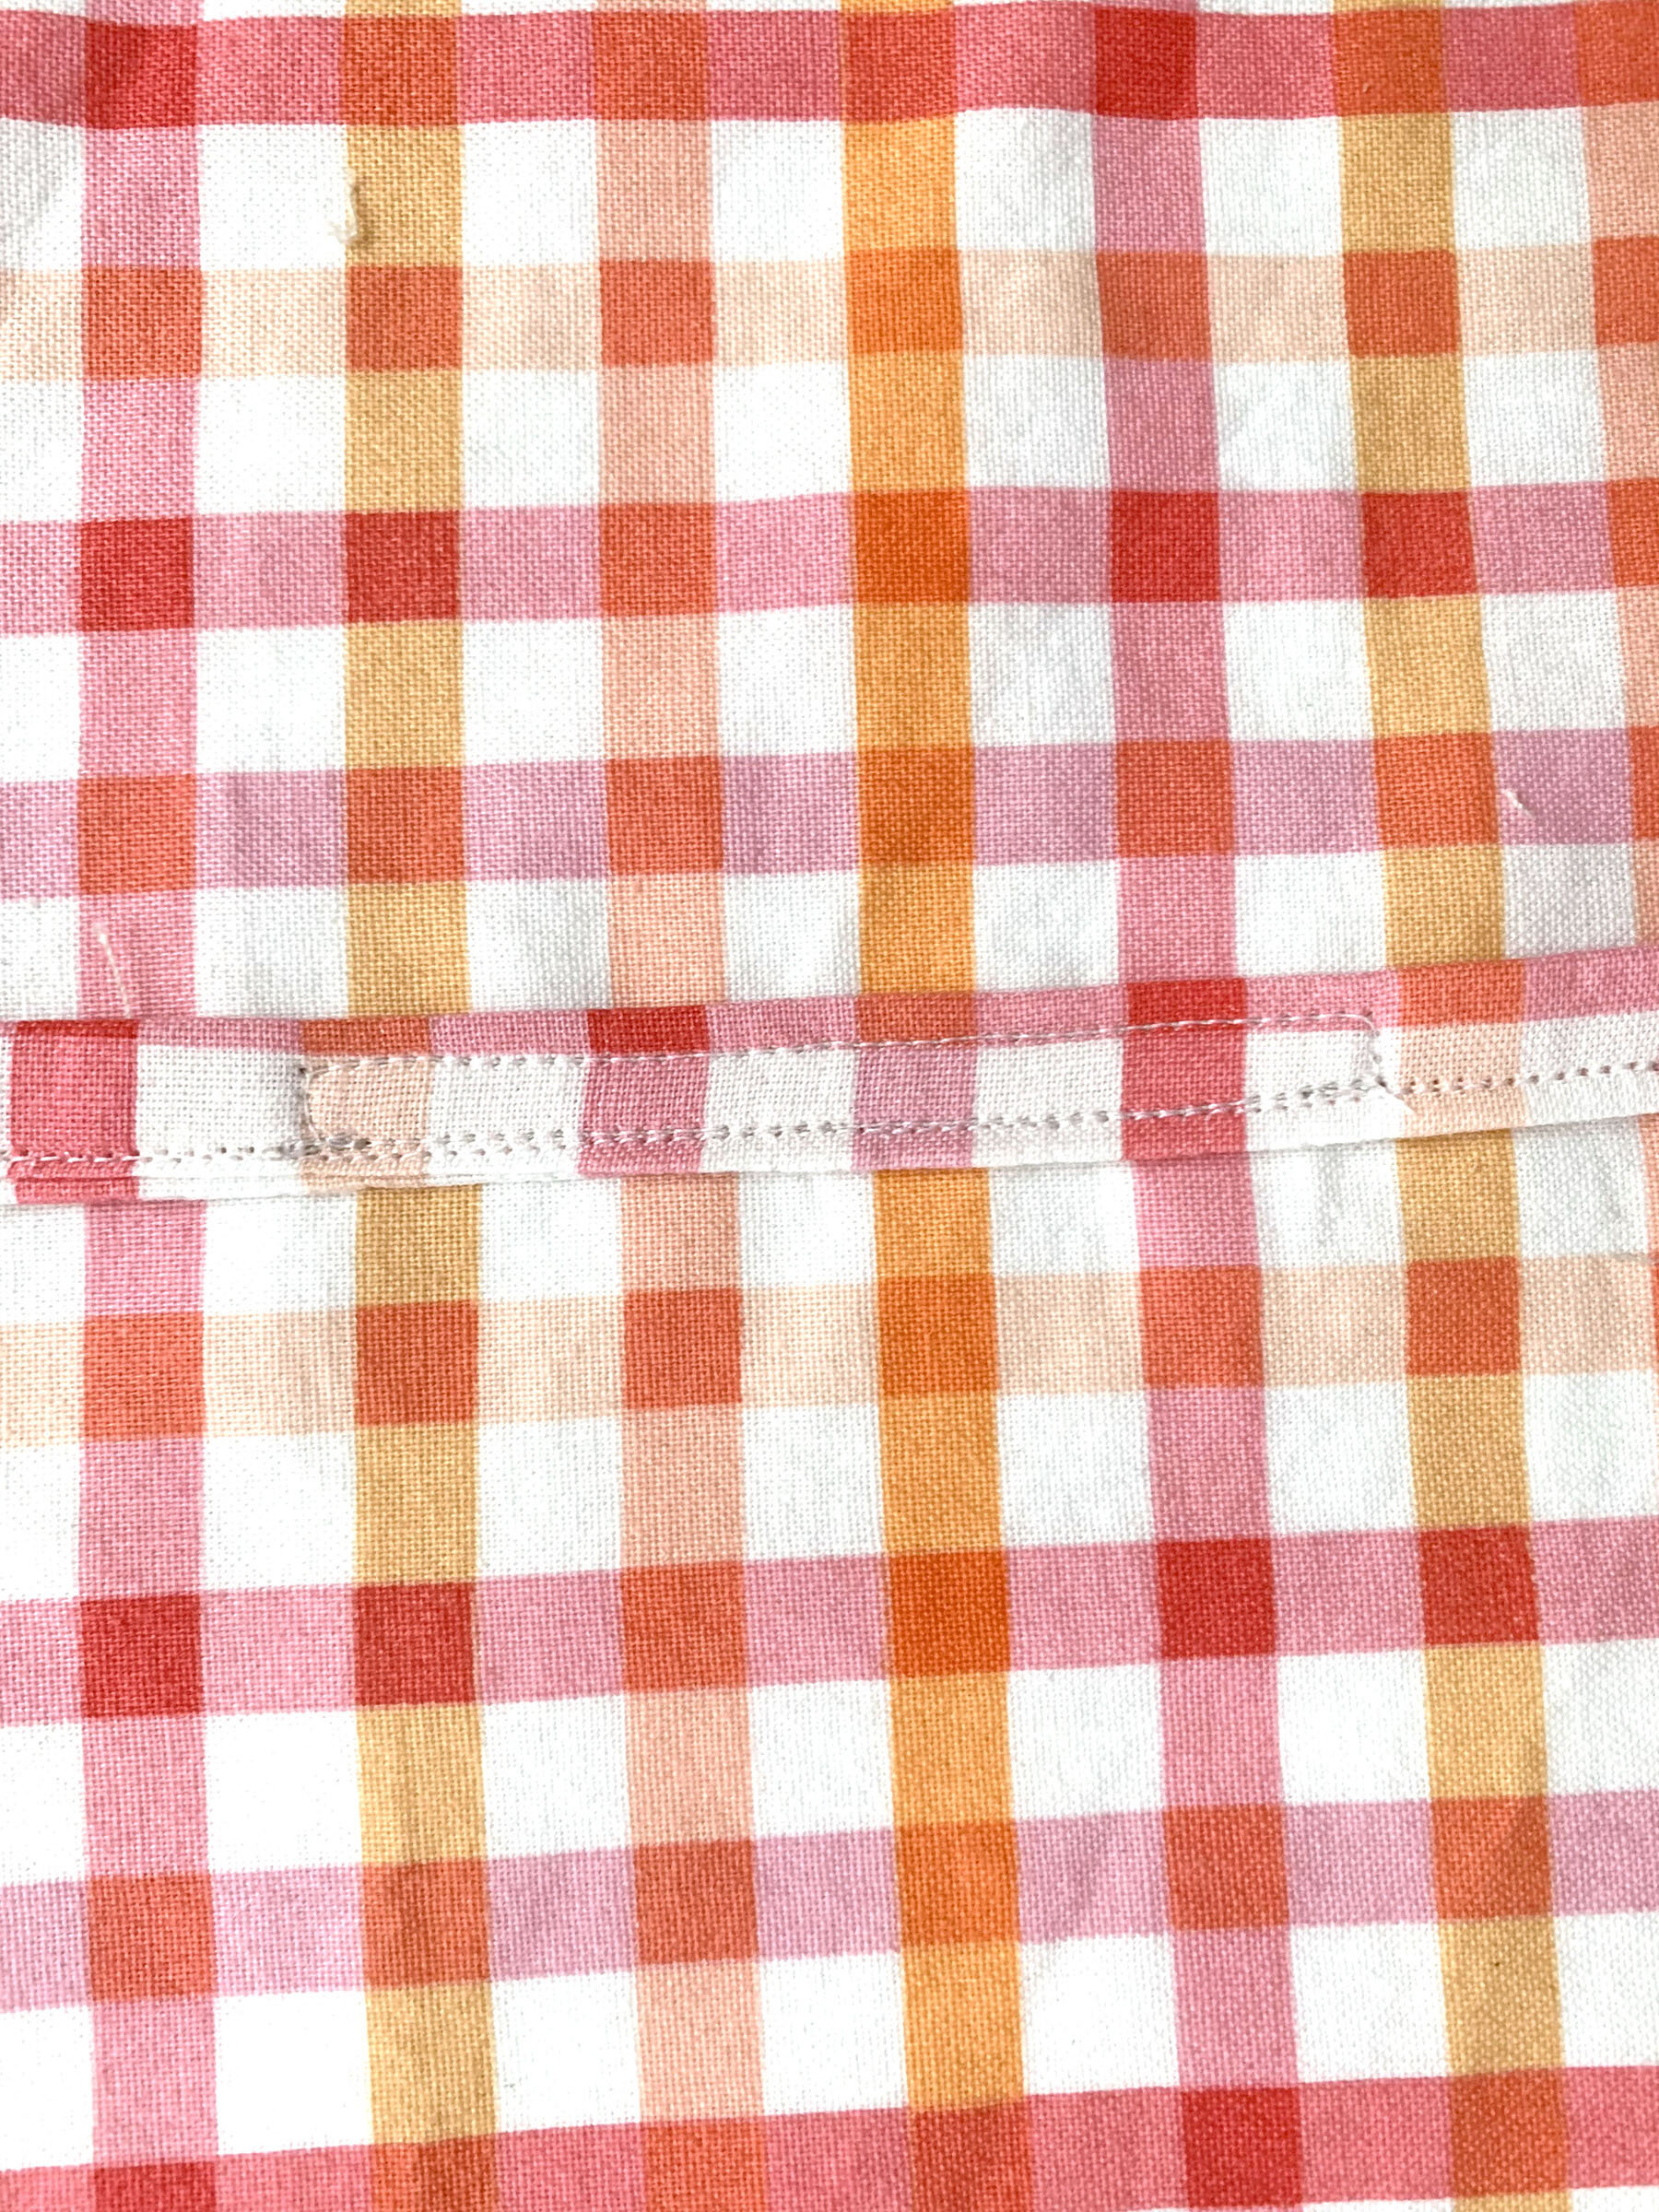
Stitch a small rectangle like below to attach tie to wrap.
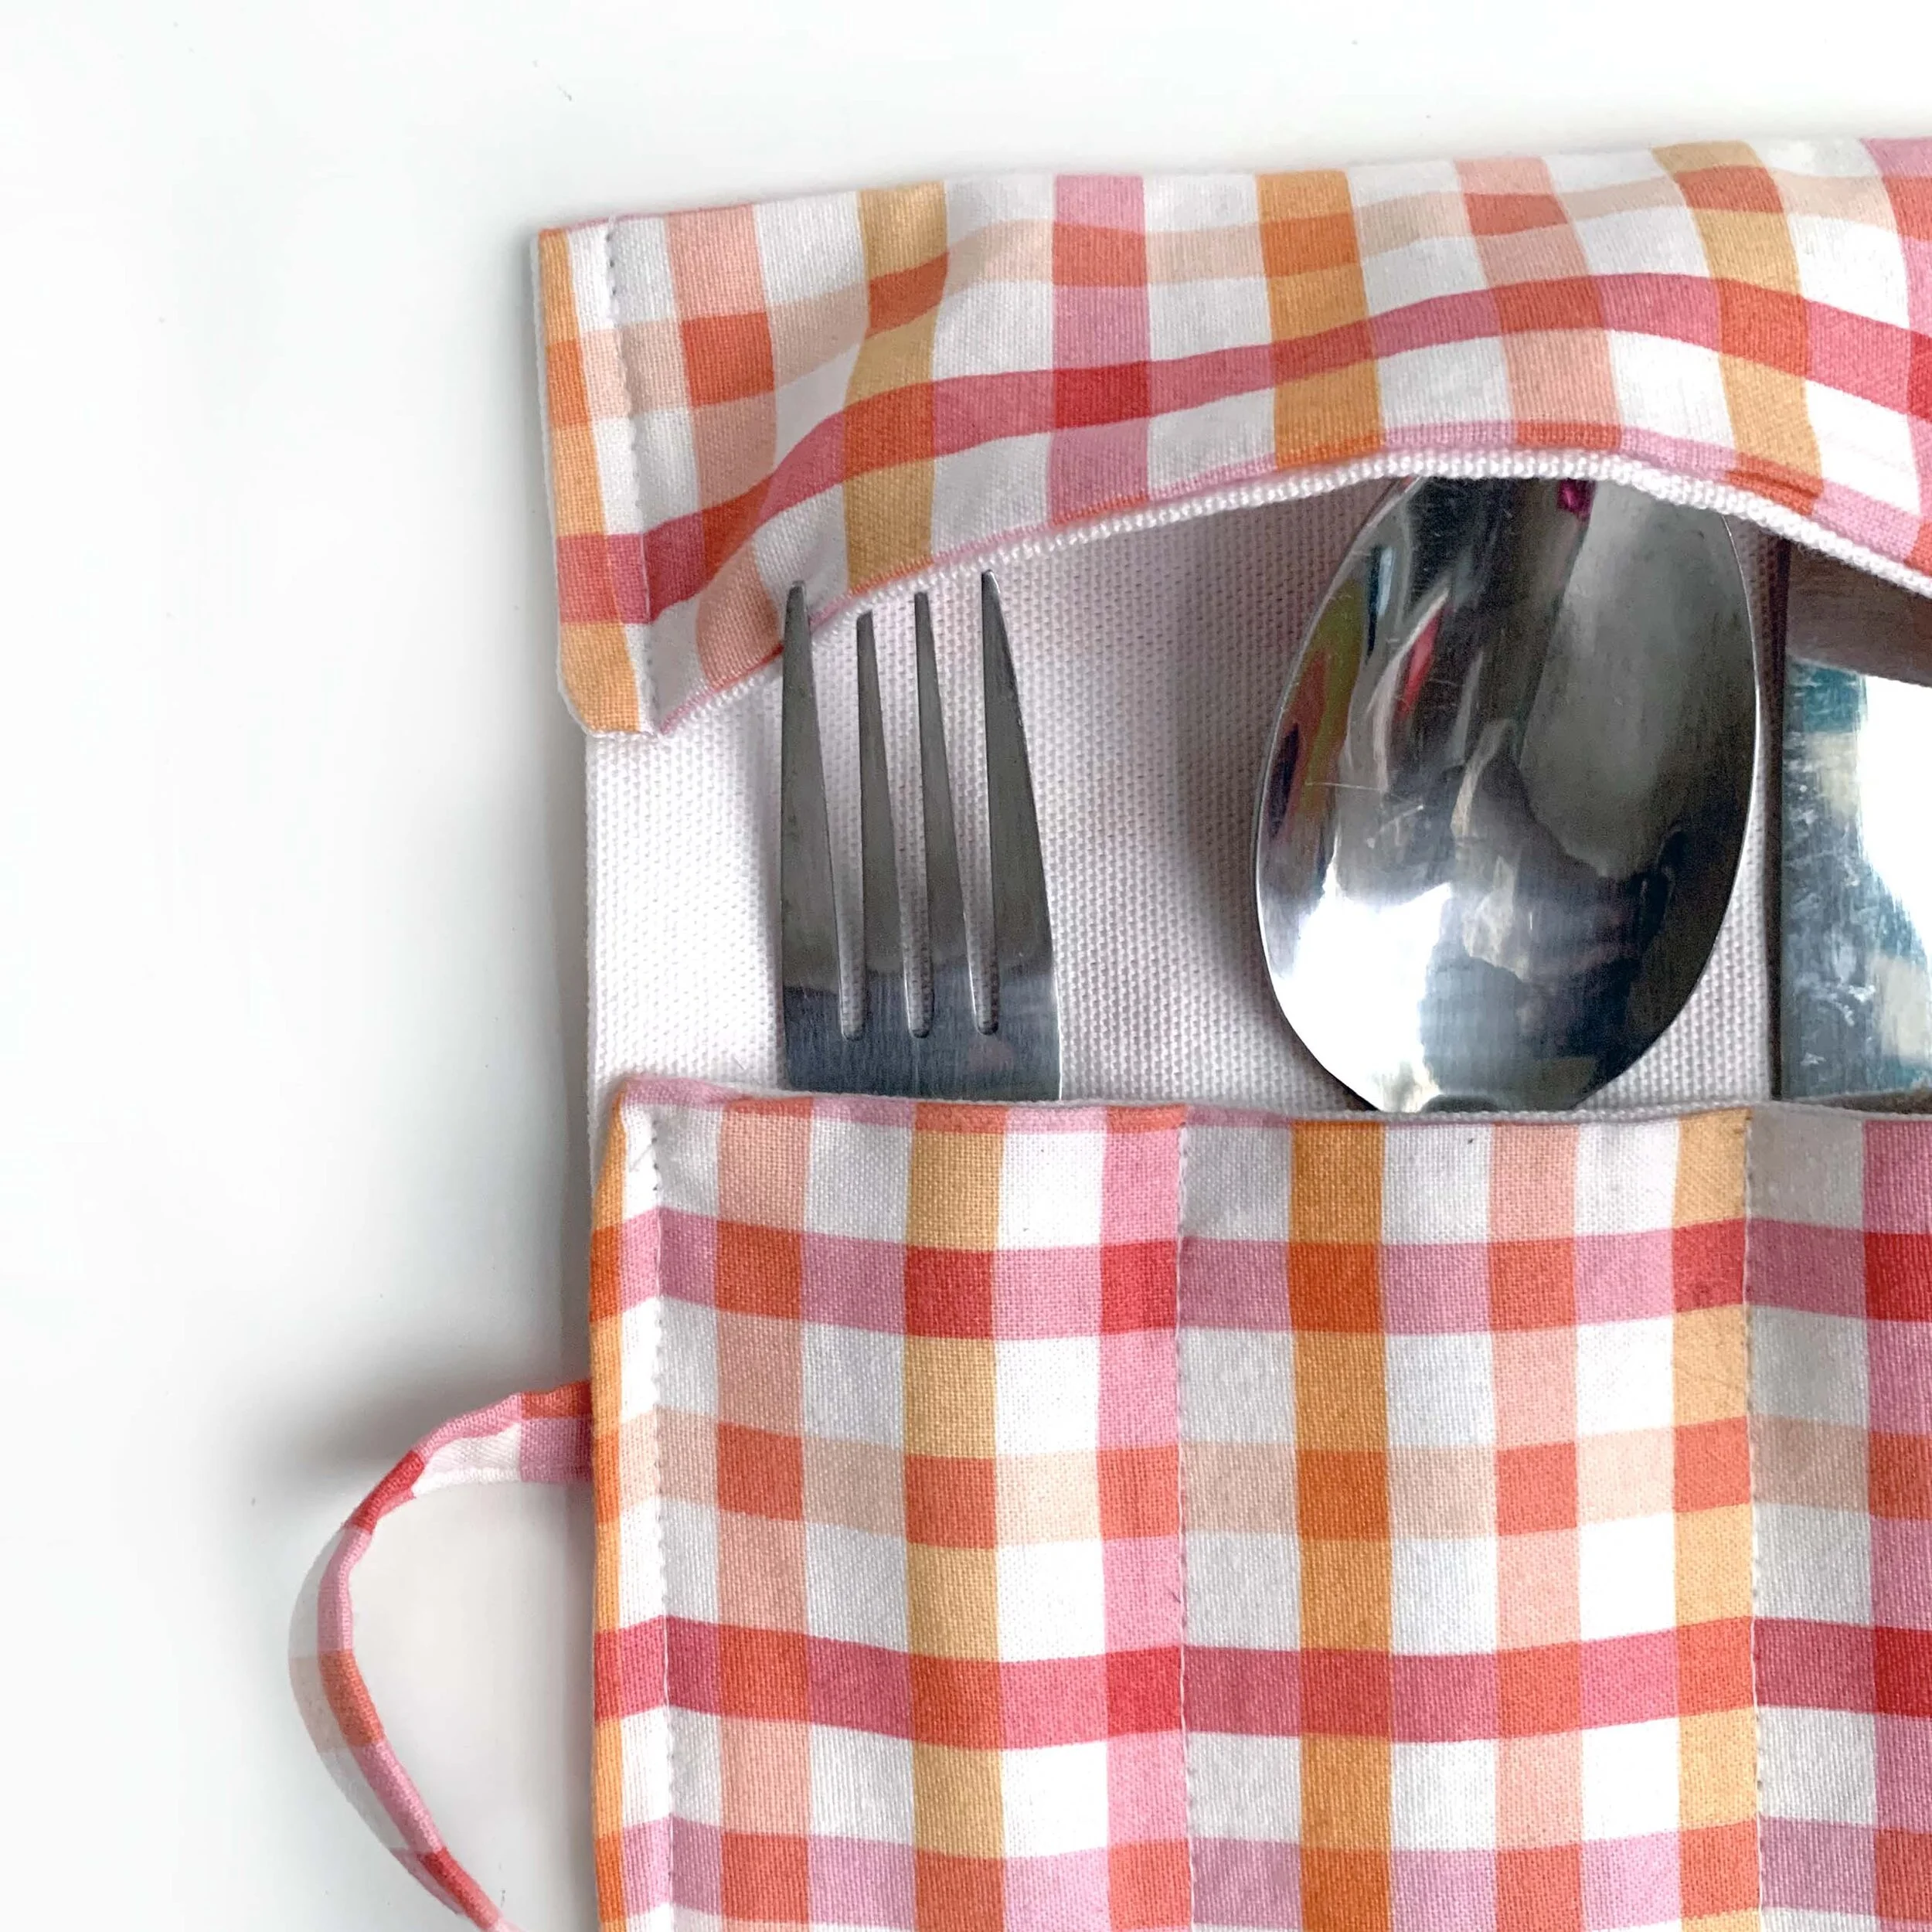
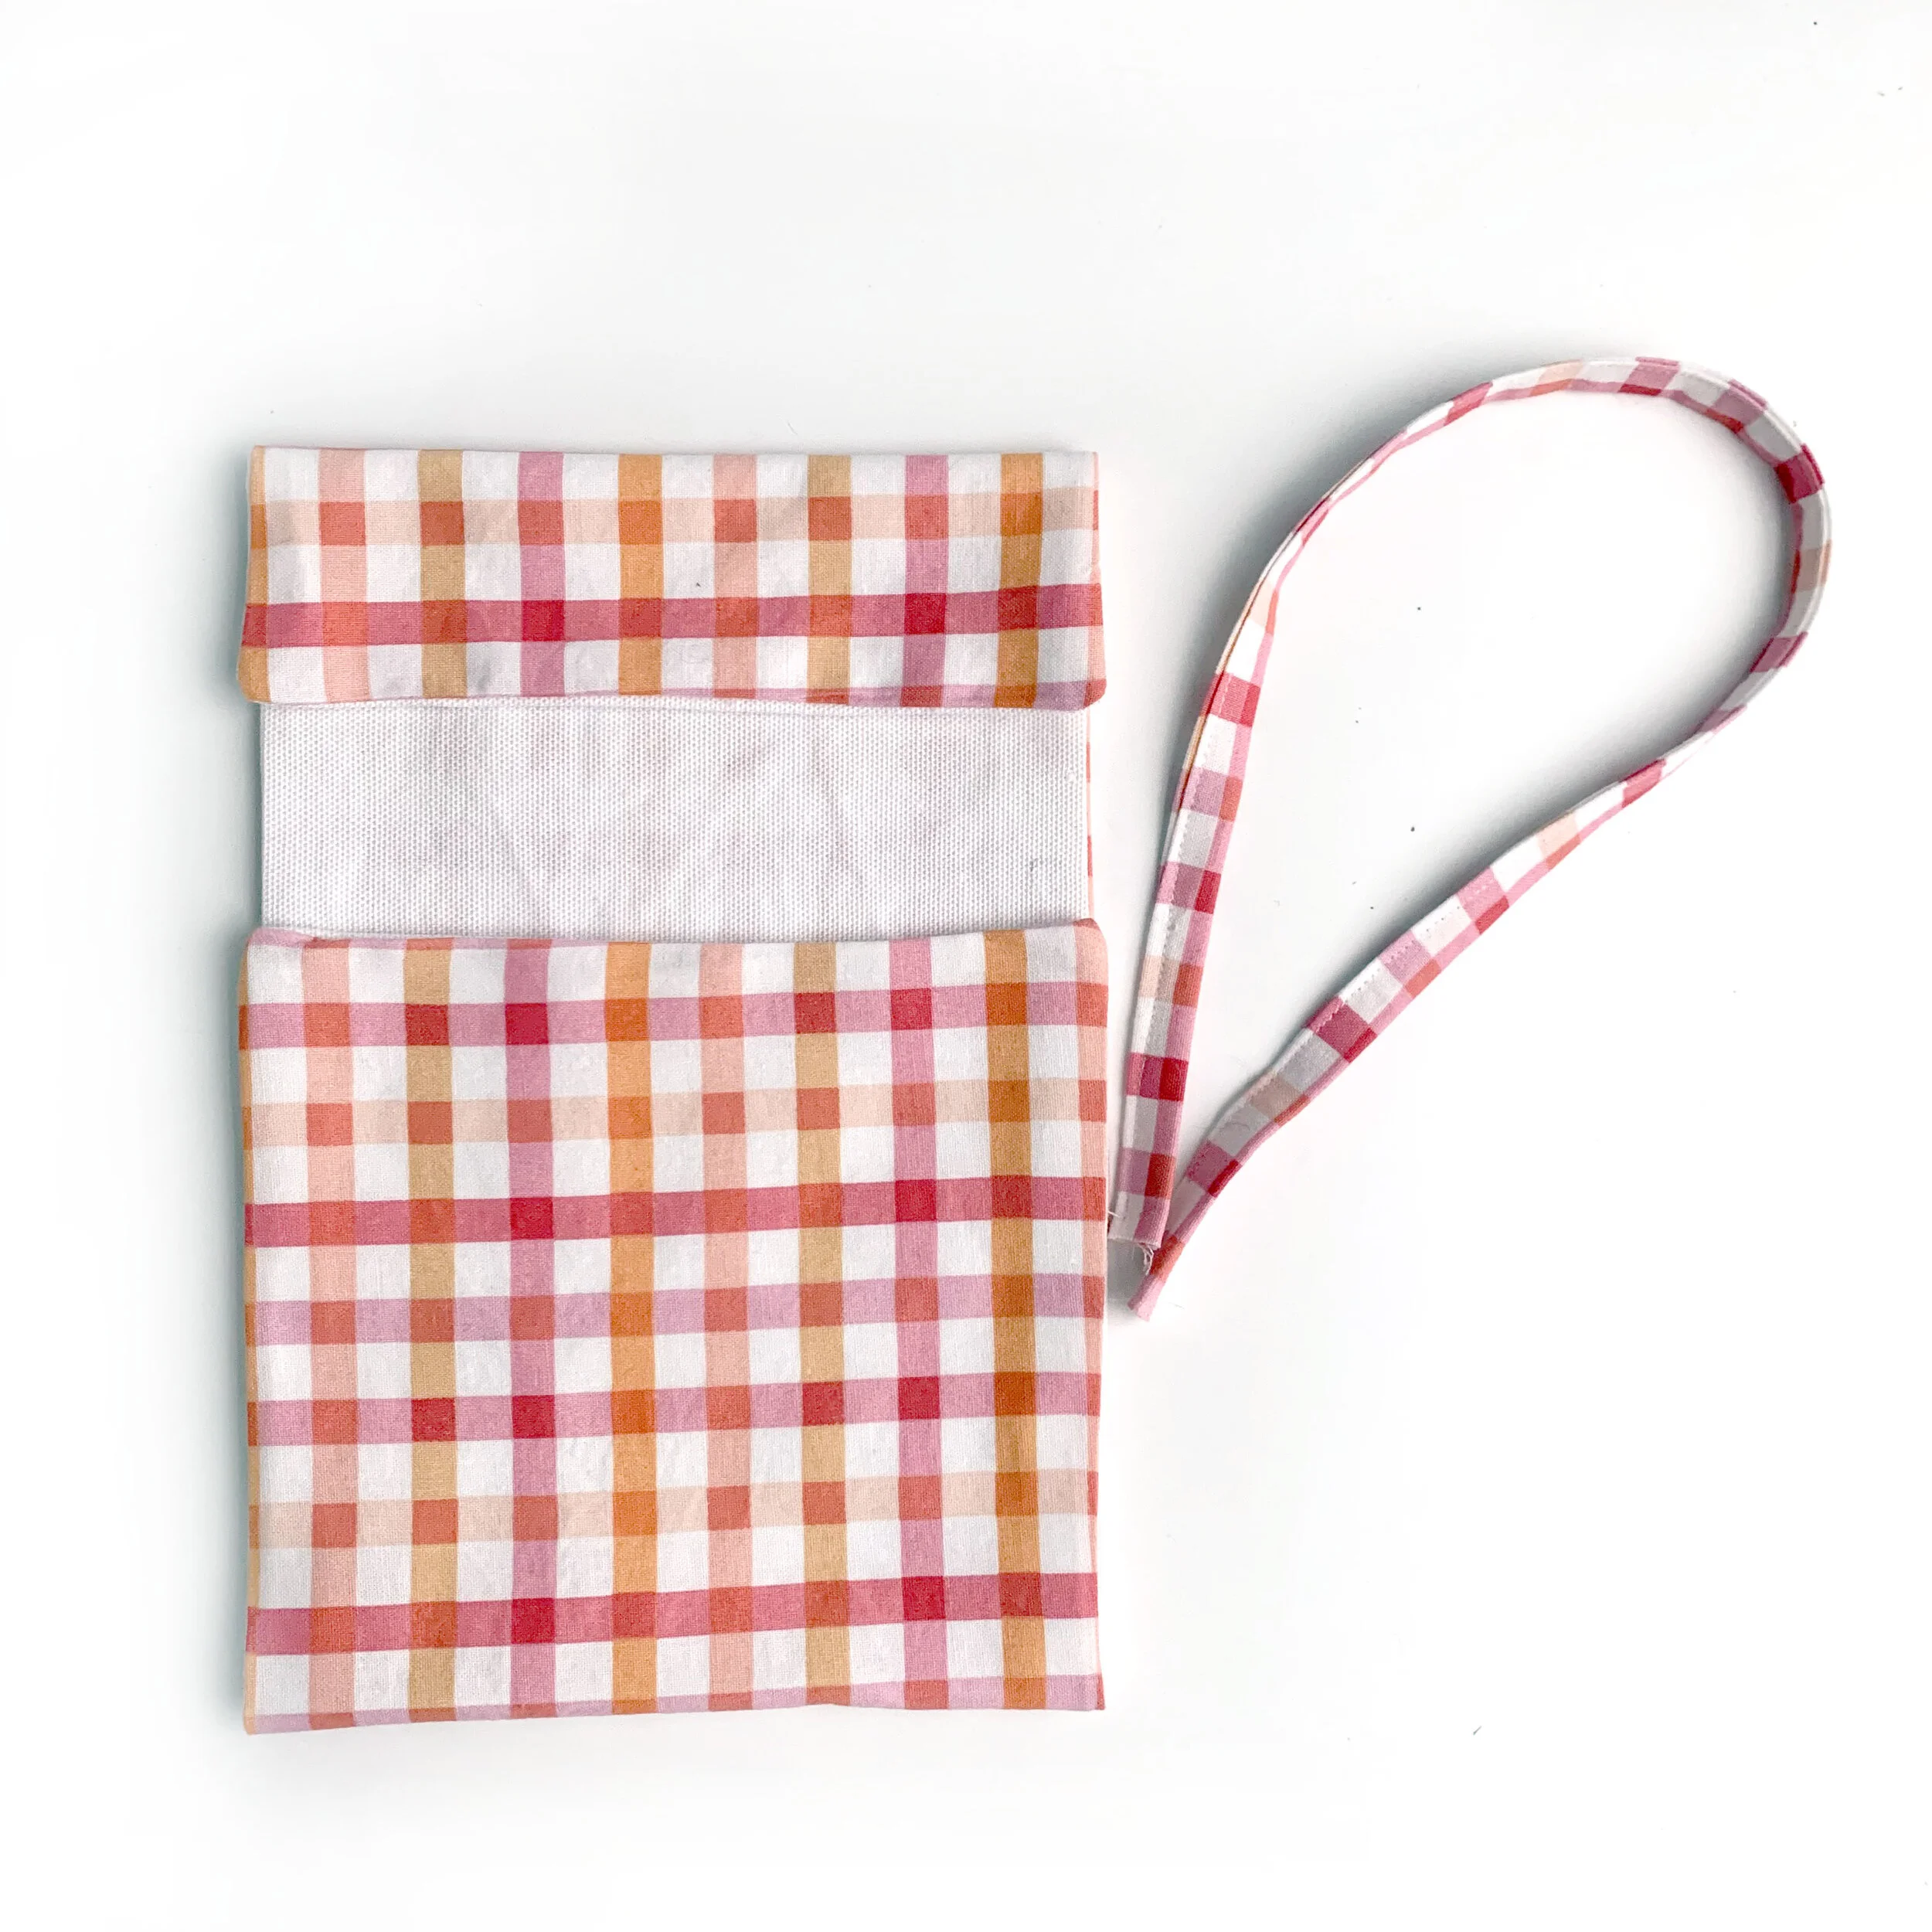
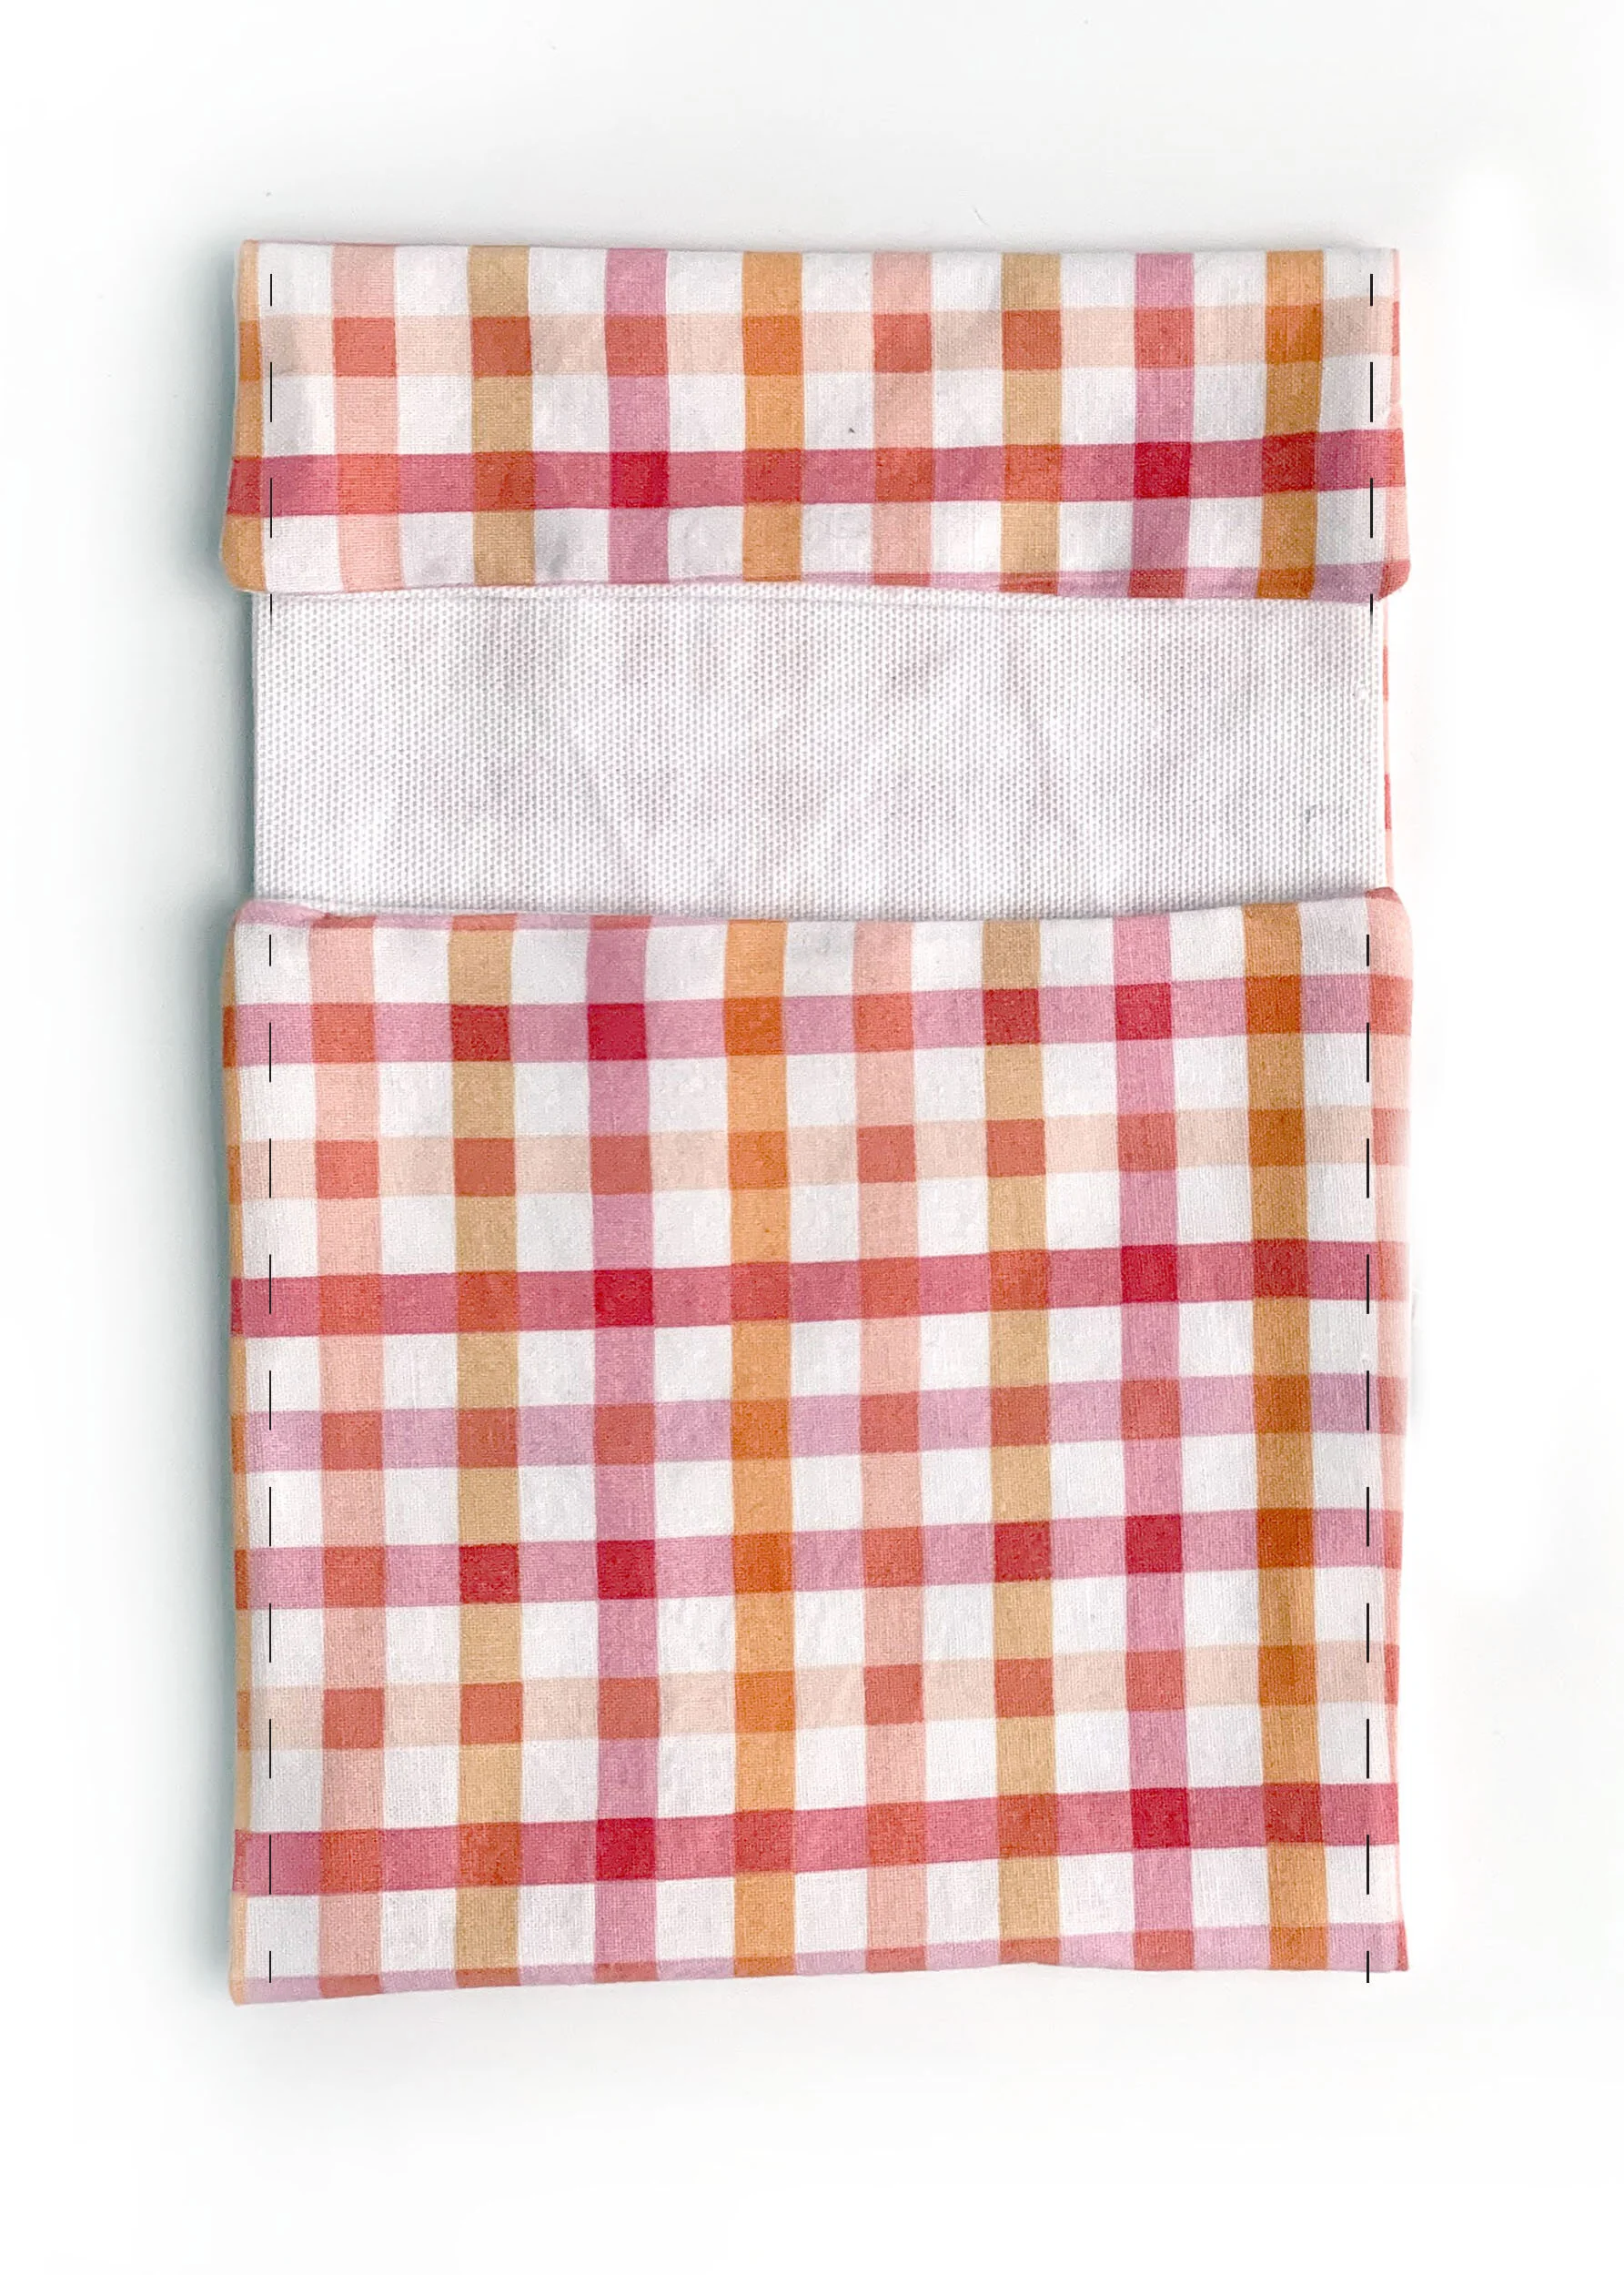
Fold top edge of wrap down 1.75”, and pin together along edge. Fold up lower edge 5.5”, and pin along edge. Sew along edges to secure each section to wrap. Stop your machine at the end of each section. TIP: Back stitch at the top and bottom to secure these in place.
Use a fabric pen or chalk pencil to draw two straight lines like my dotted lines below. You can eye ball the spacing.These will form your sections for silverware. Stitch down lines, making sure to back stitch at the top and bottom. Remove the utensils before you sew.
TIP: You can also pin the fabric down if you want to ensure it doesn’t move around. This is optional. Remove the pins as you sew.

You’re all done sewing! All that‘s left is to grab some silverware from your drawer, and your set is complete. Isn’t she lovely!?