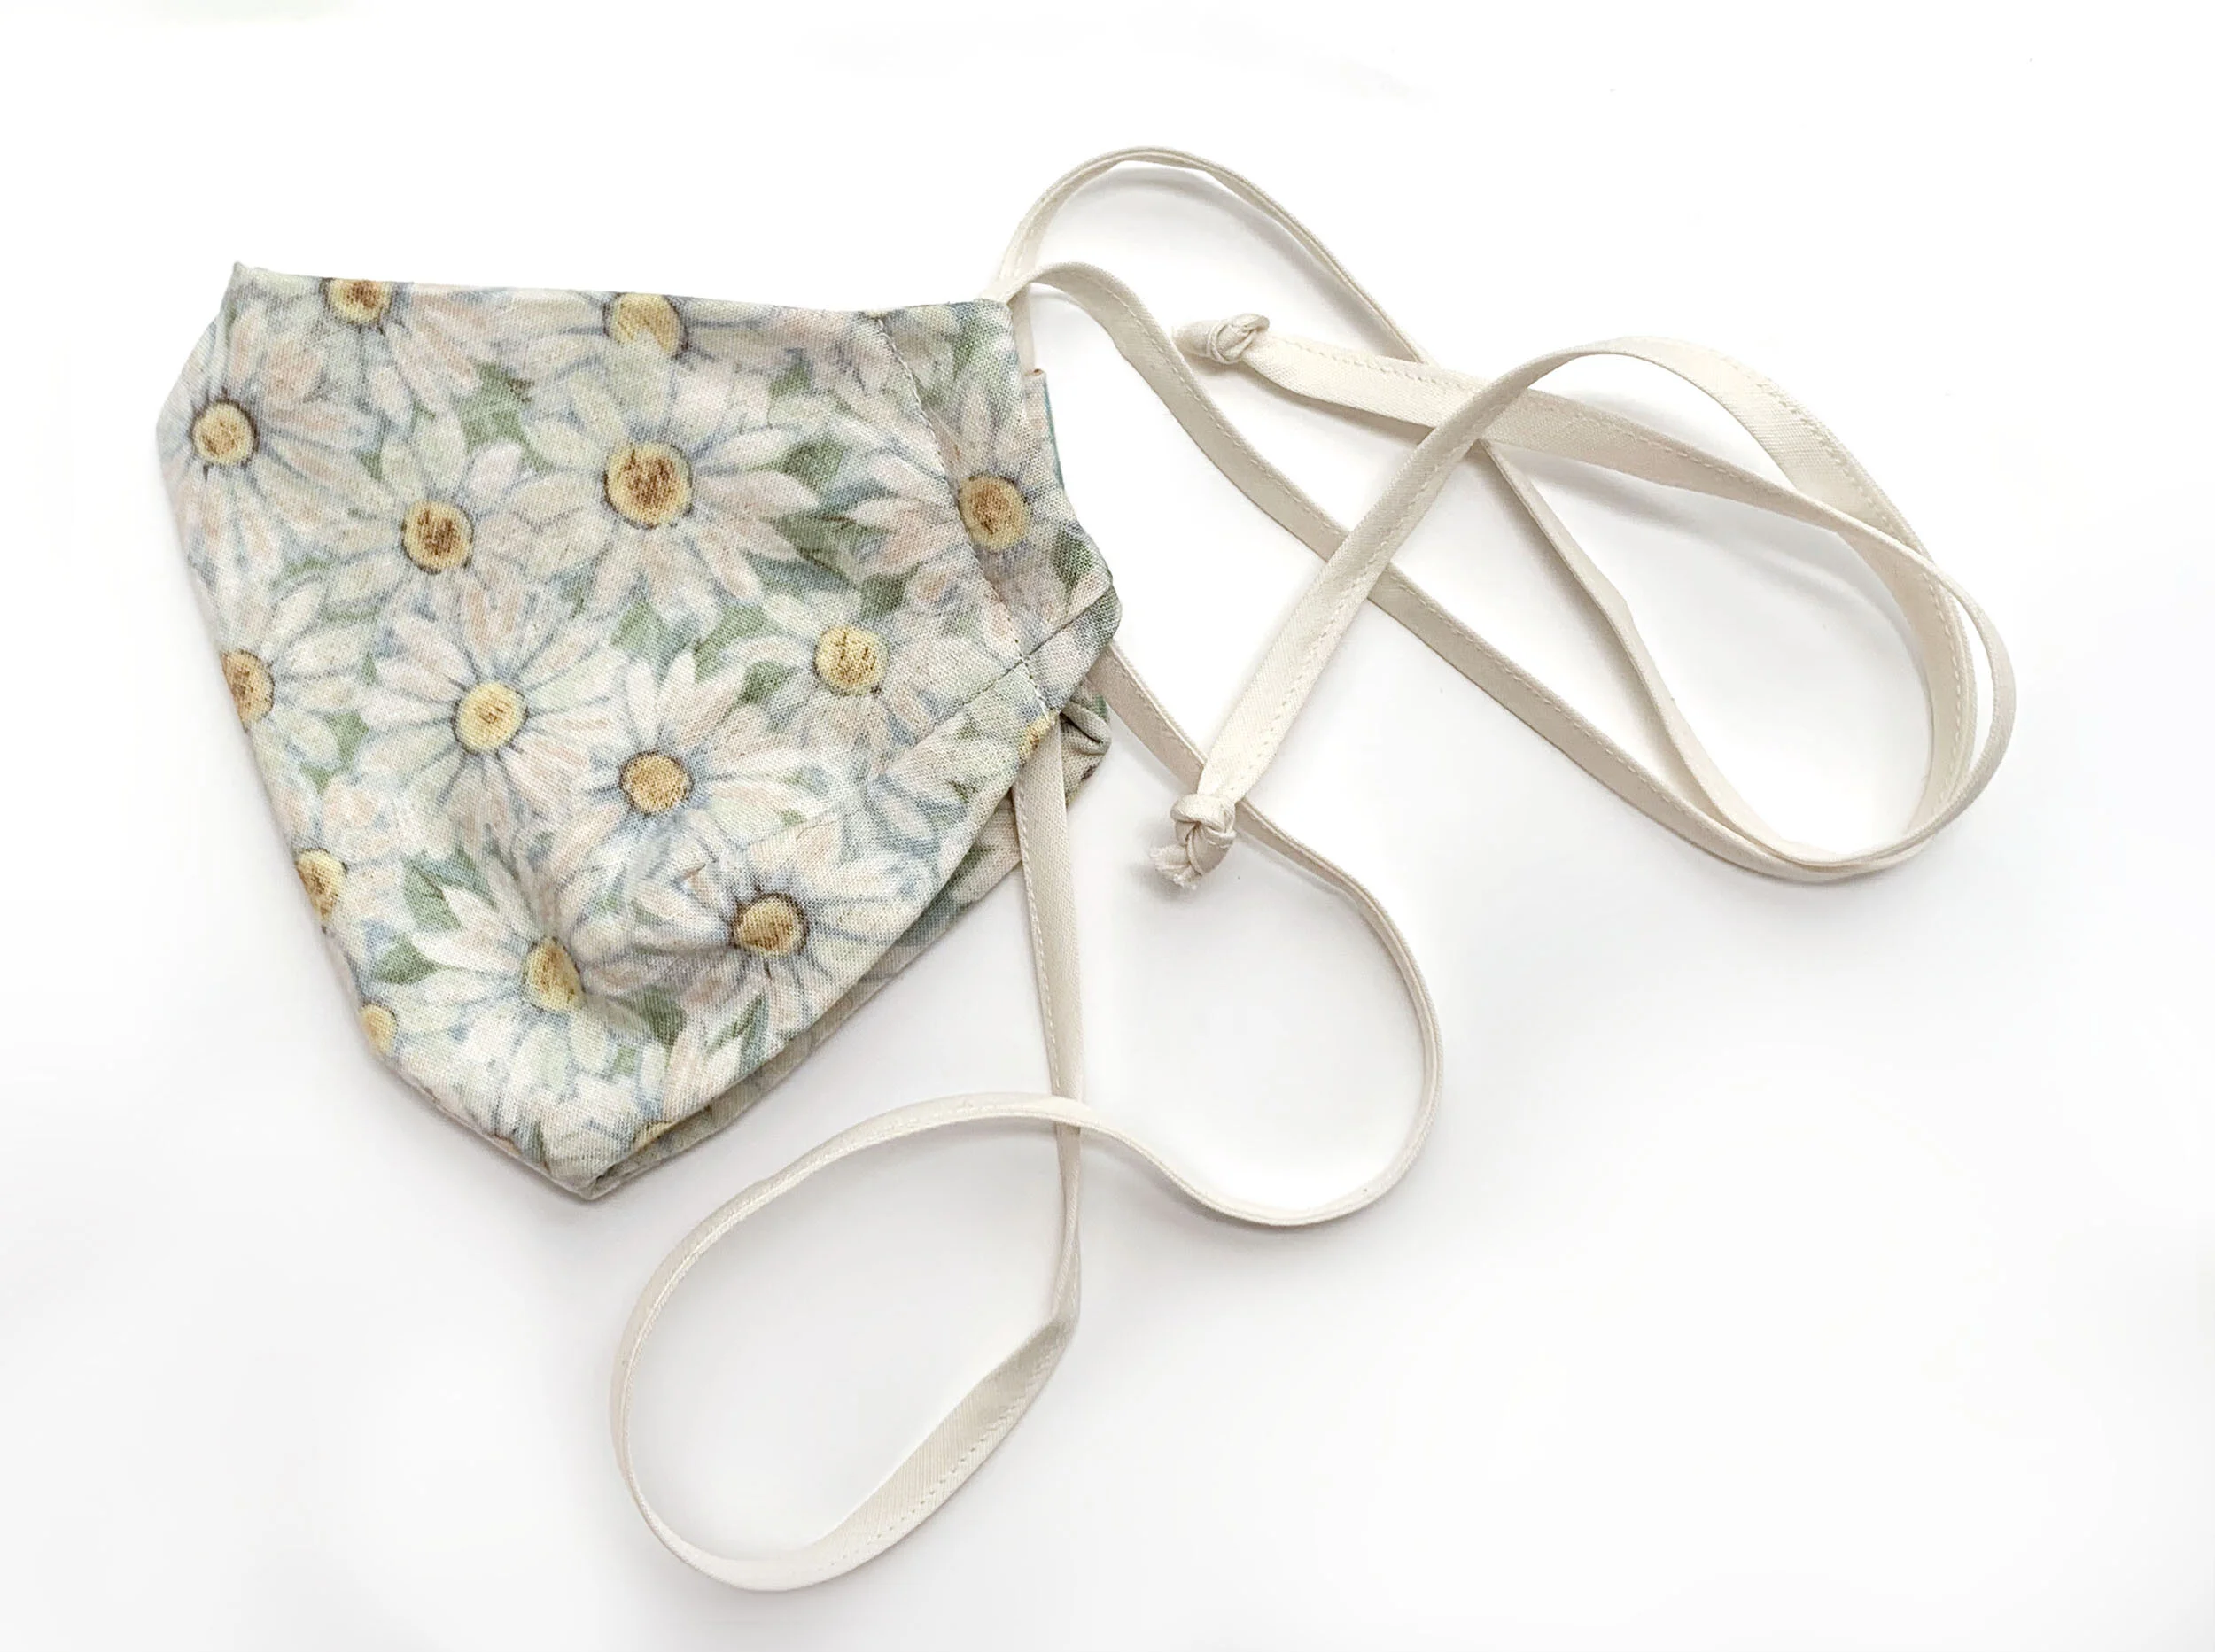
Adjustable Face Mask

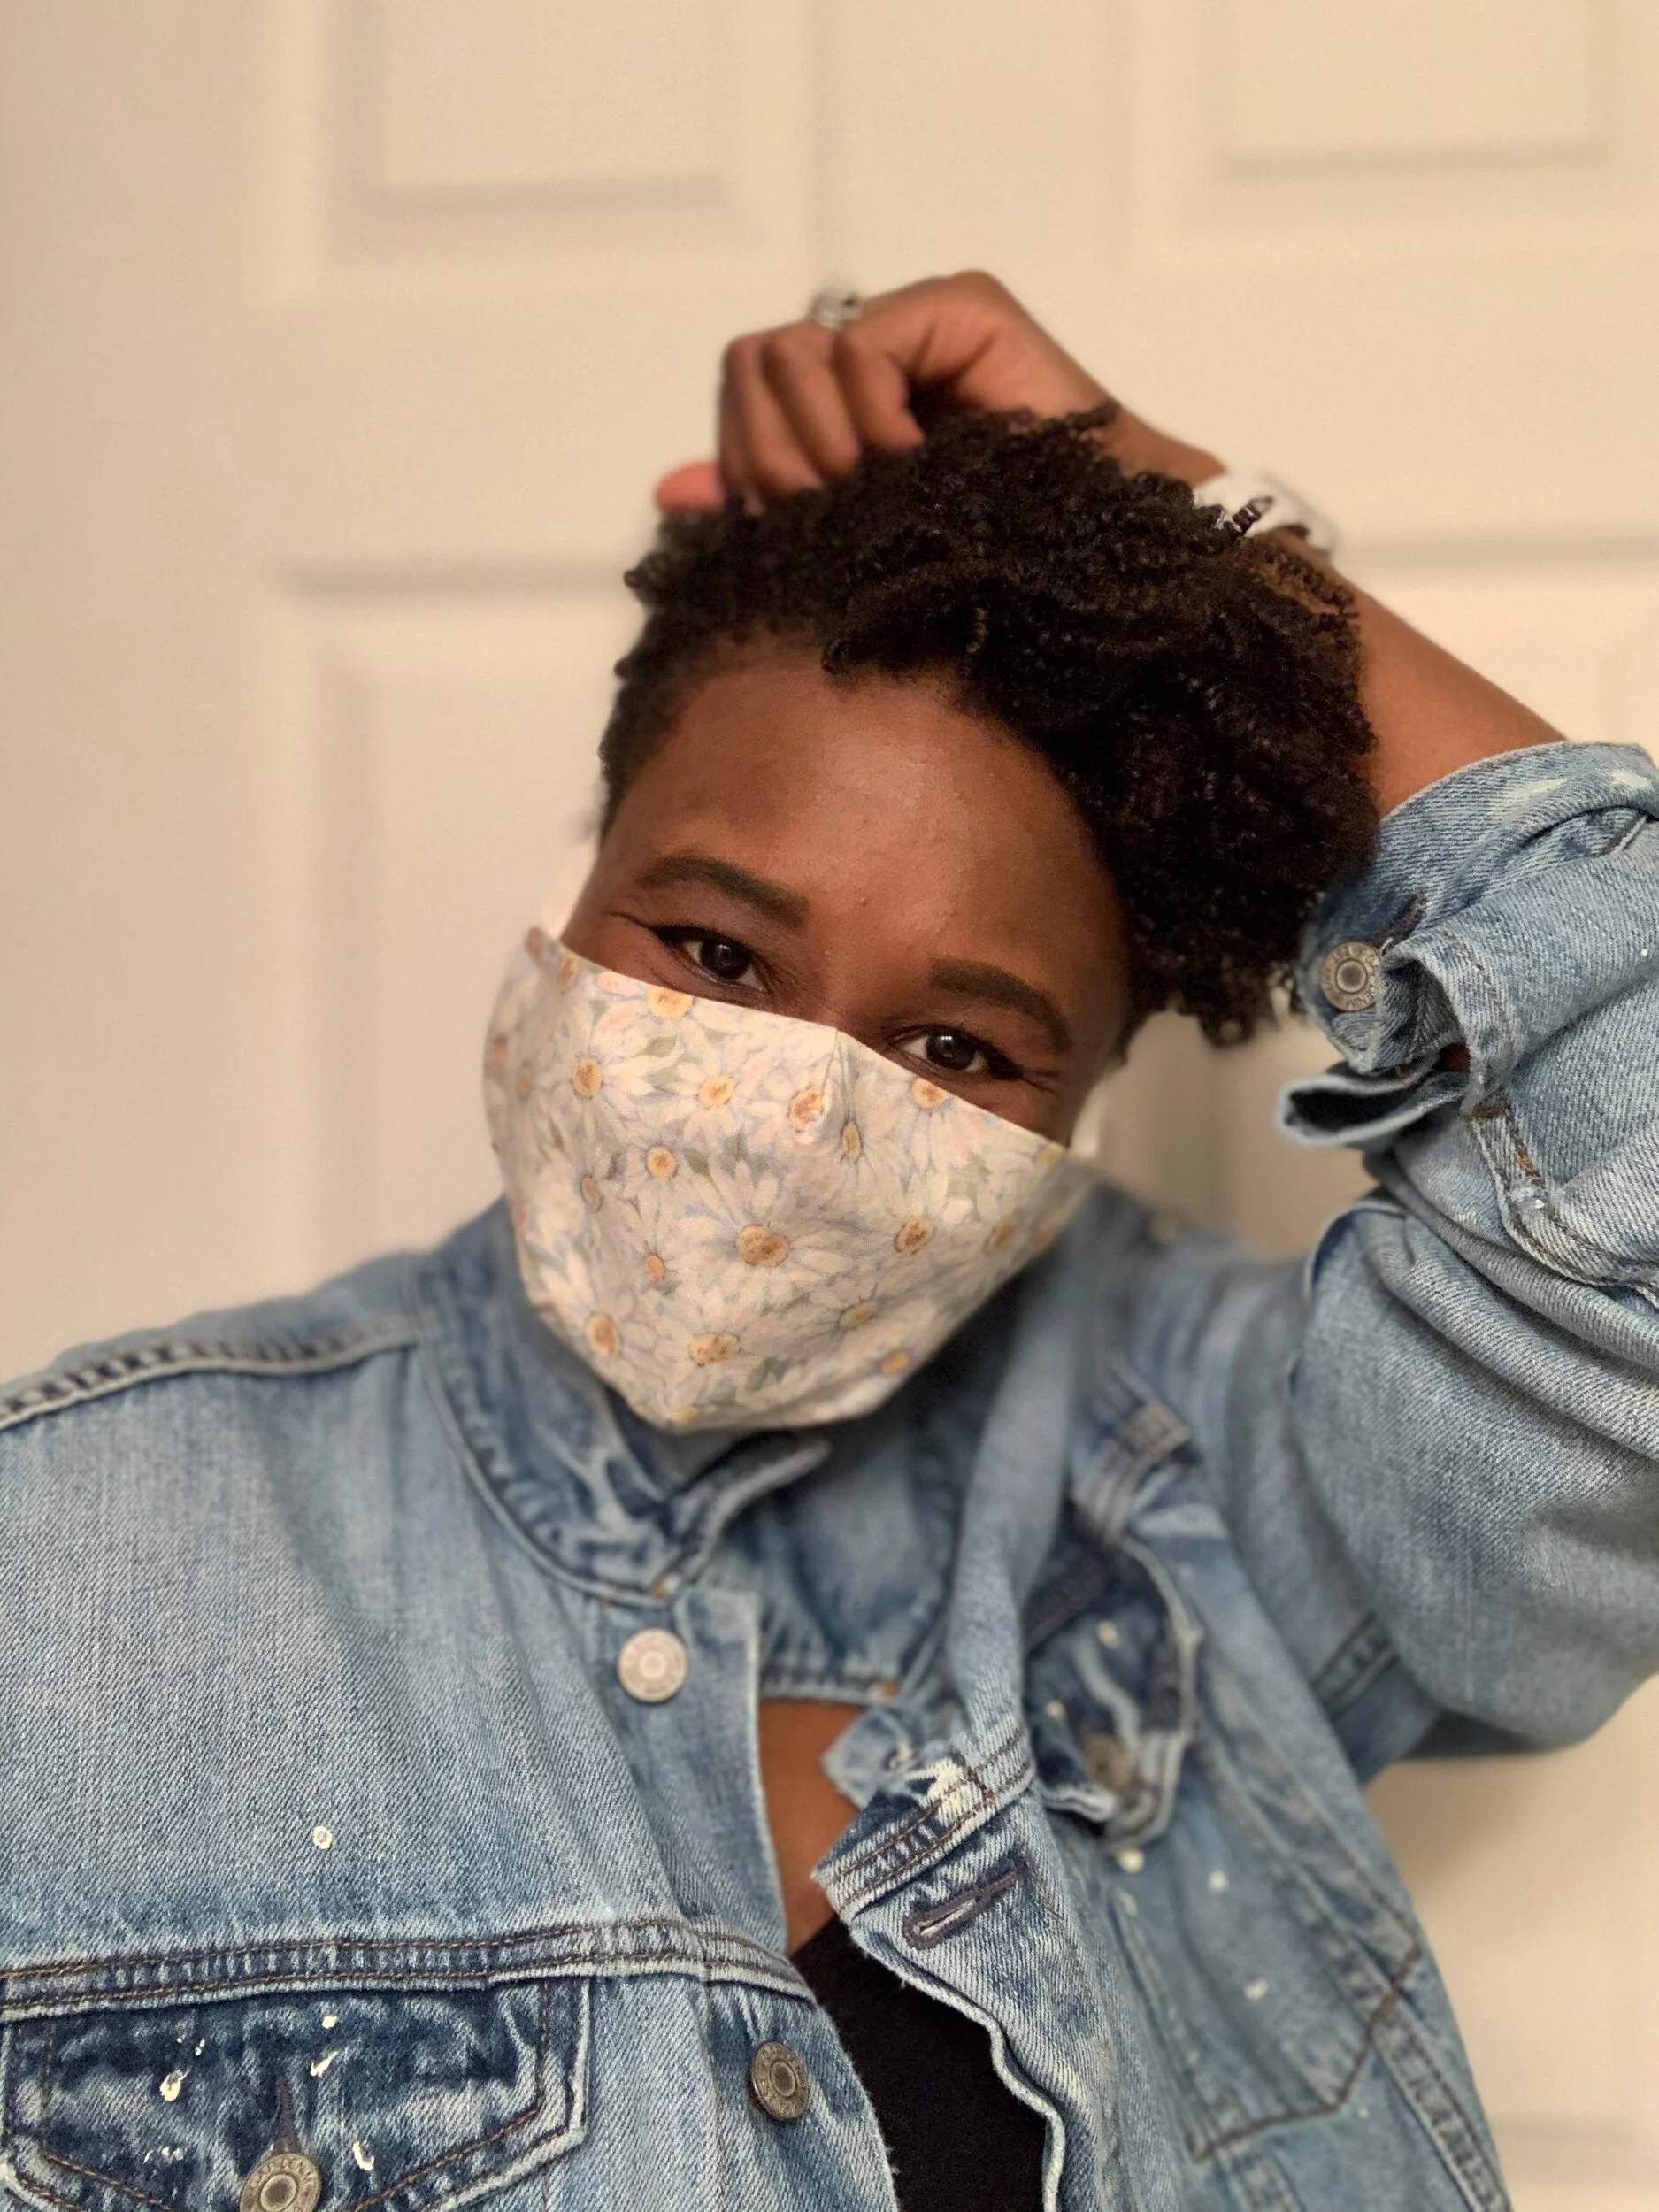
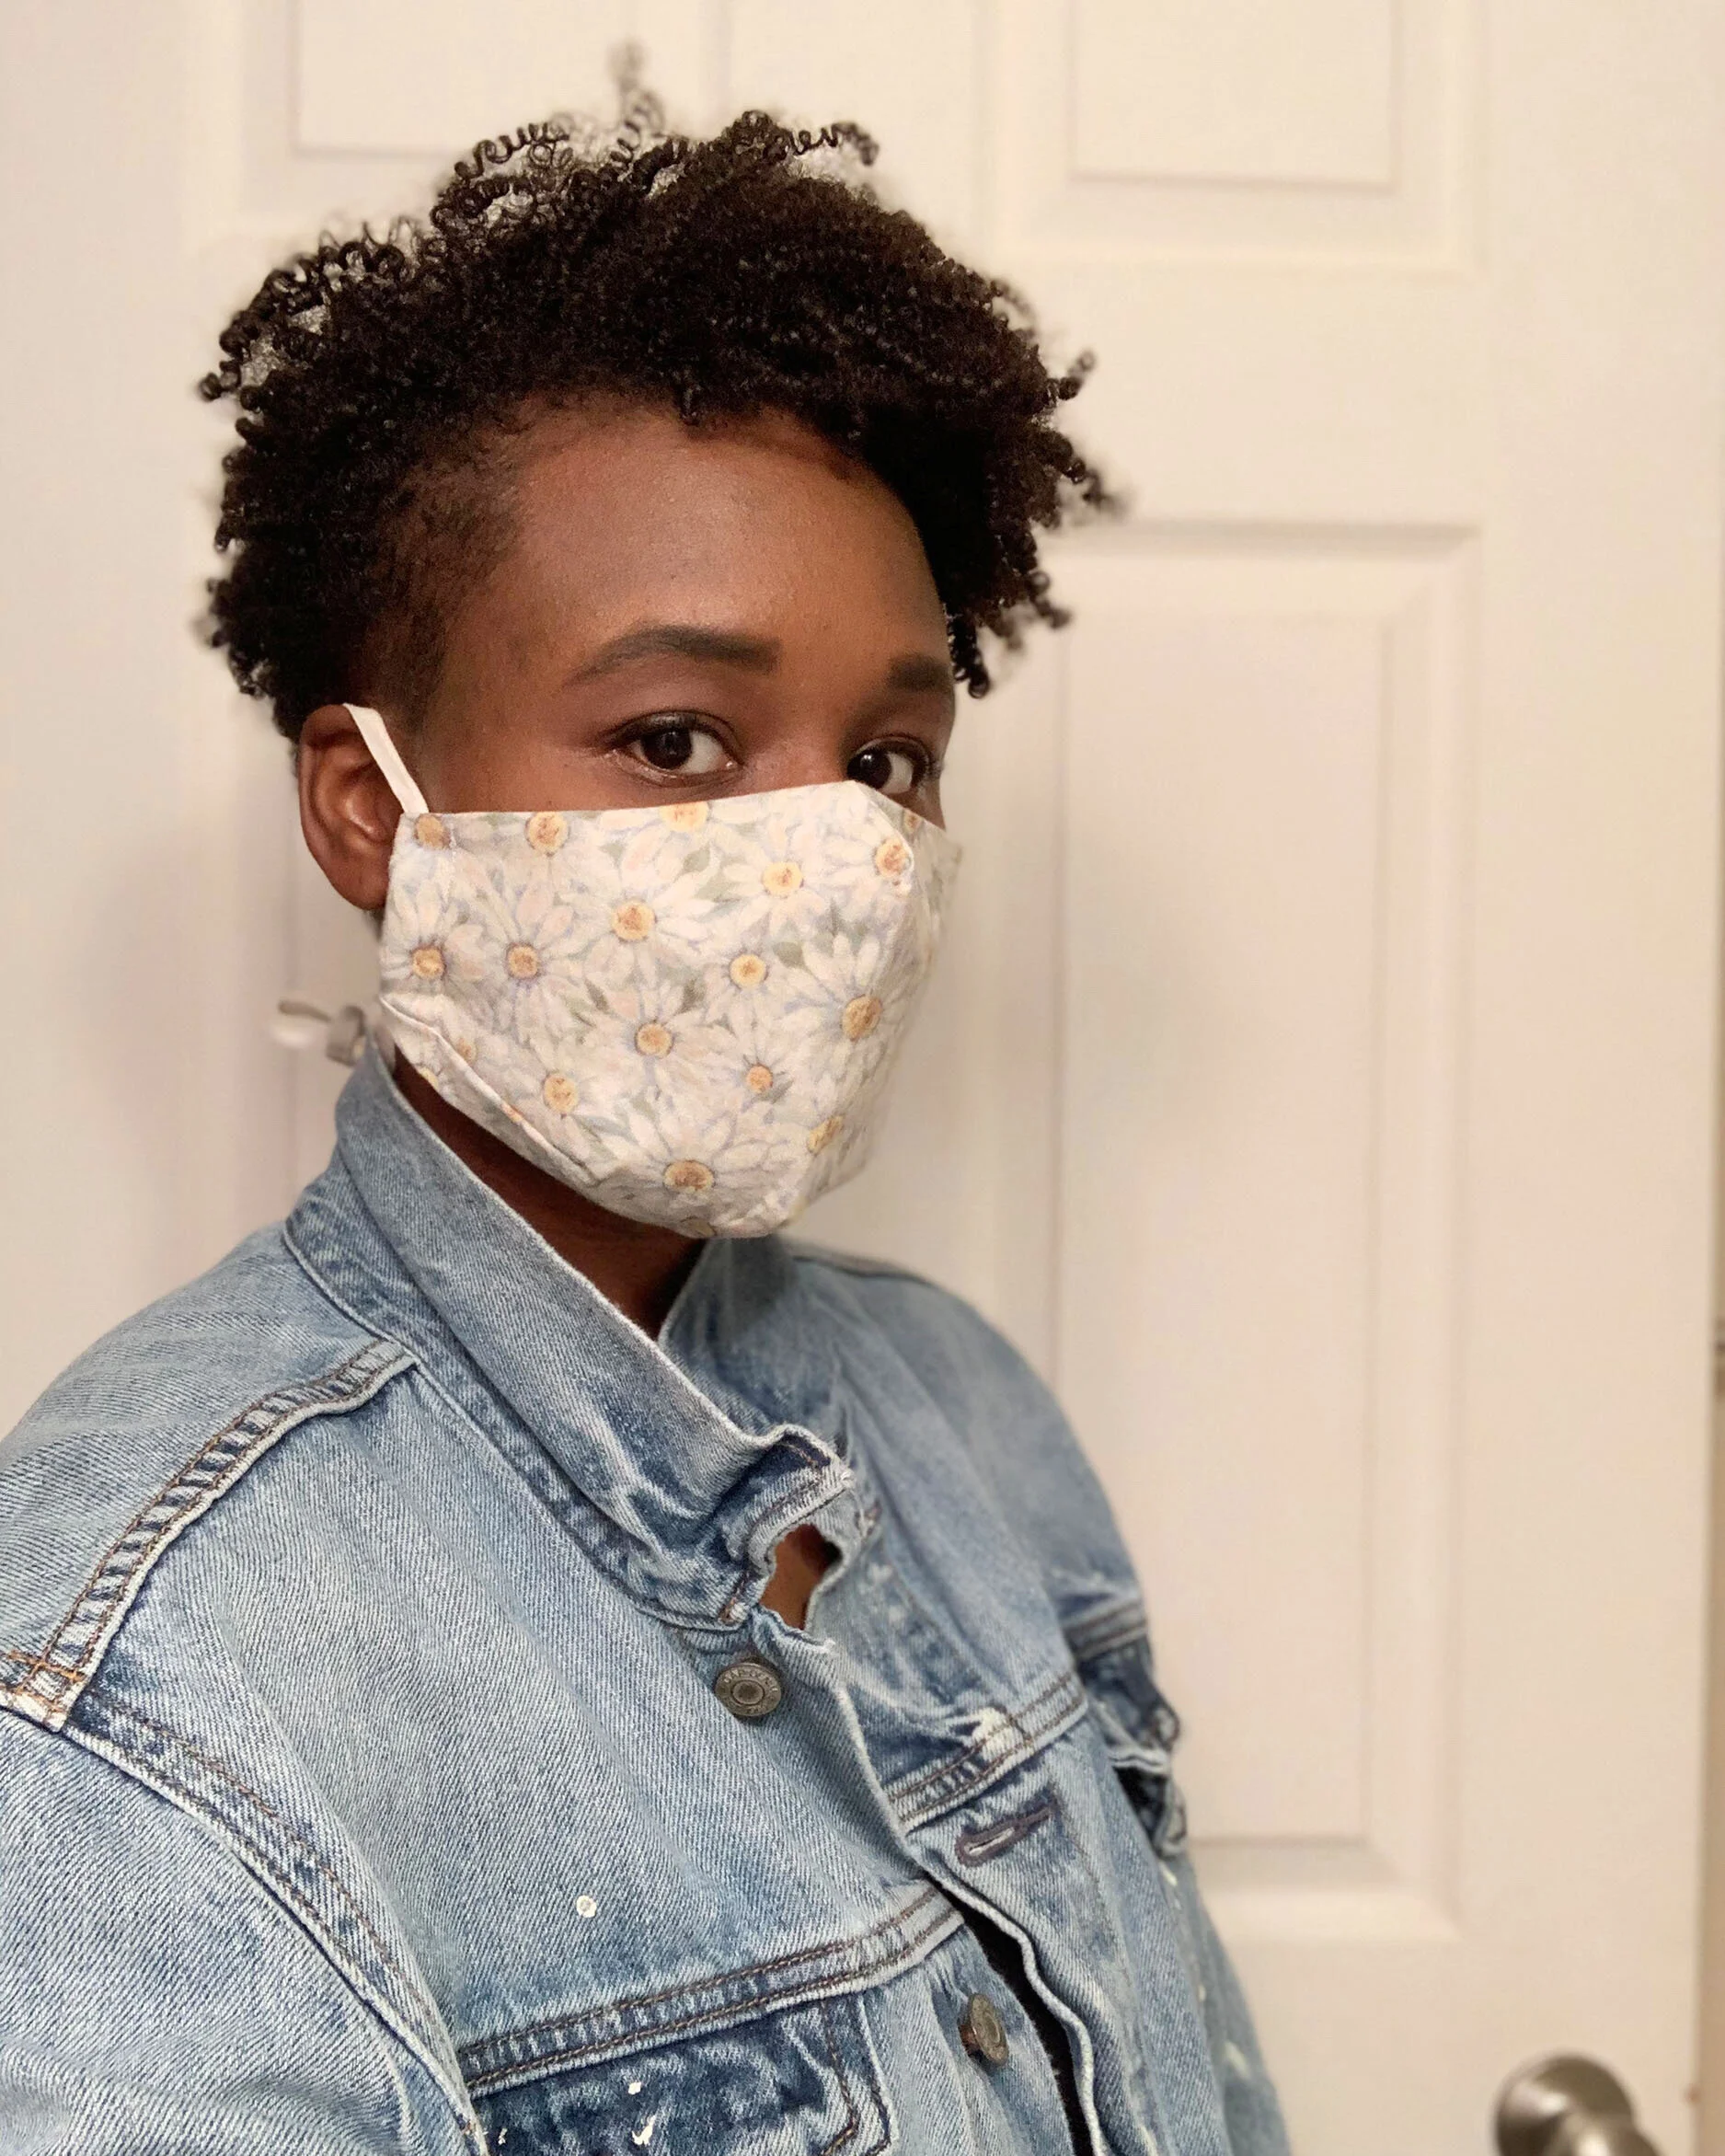
I’ve been blessed to be working from home since mid March. Due to the nature of my work, I’ve found that I am in the office at least a couple times a week either reviewing samples or meeting with my team. I quickly learned the masks with ear loops give me a headache when worn over a couple hours. This issue inspired me to develop a new hybrid style.
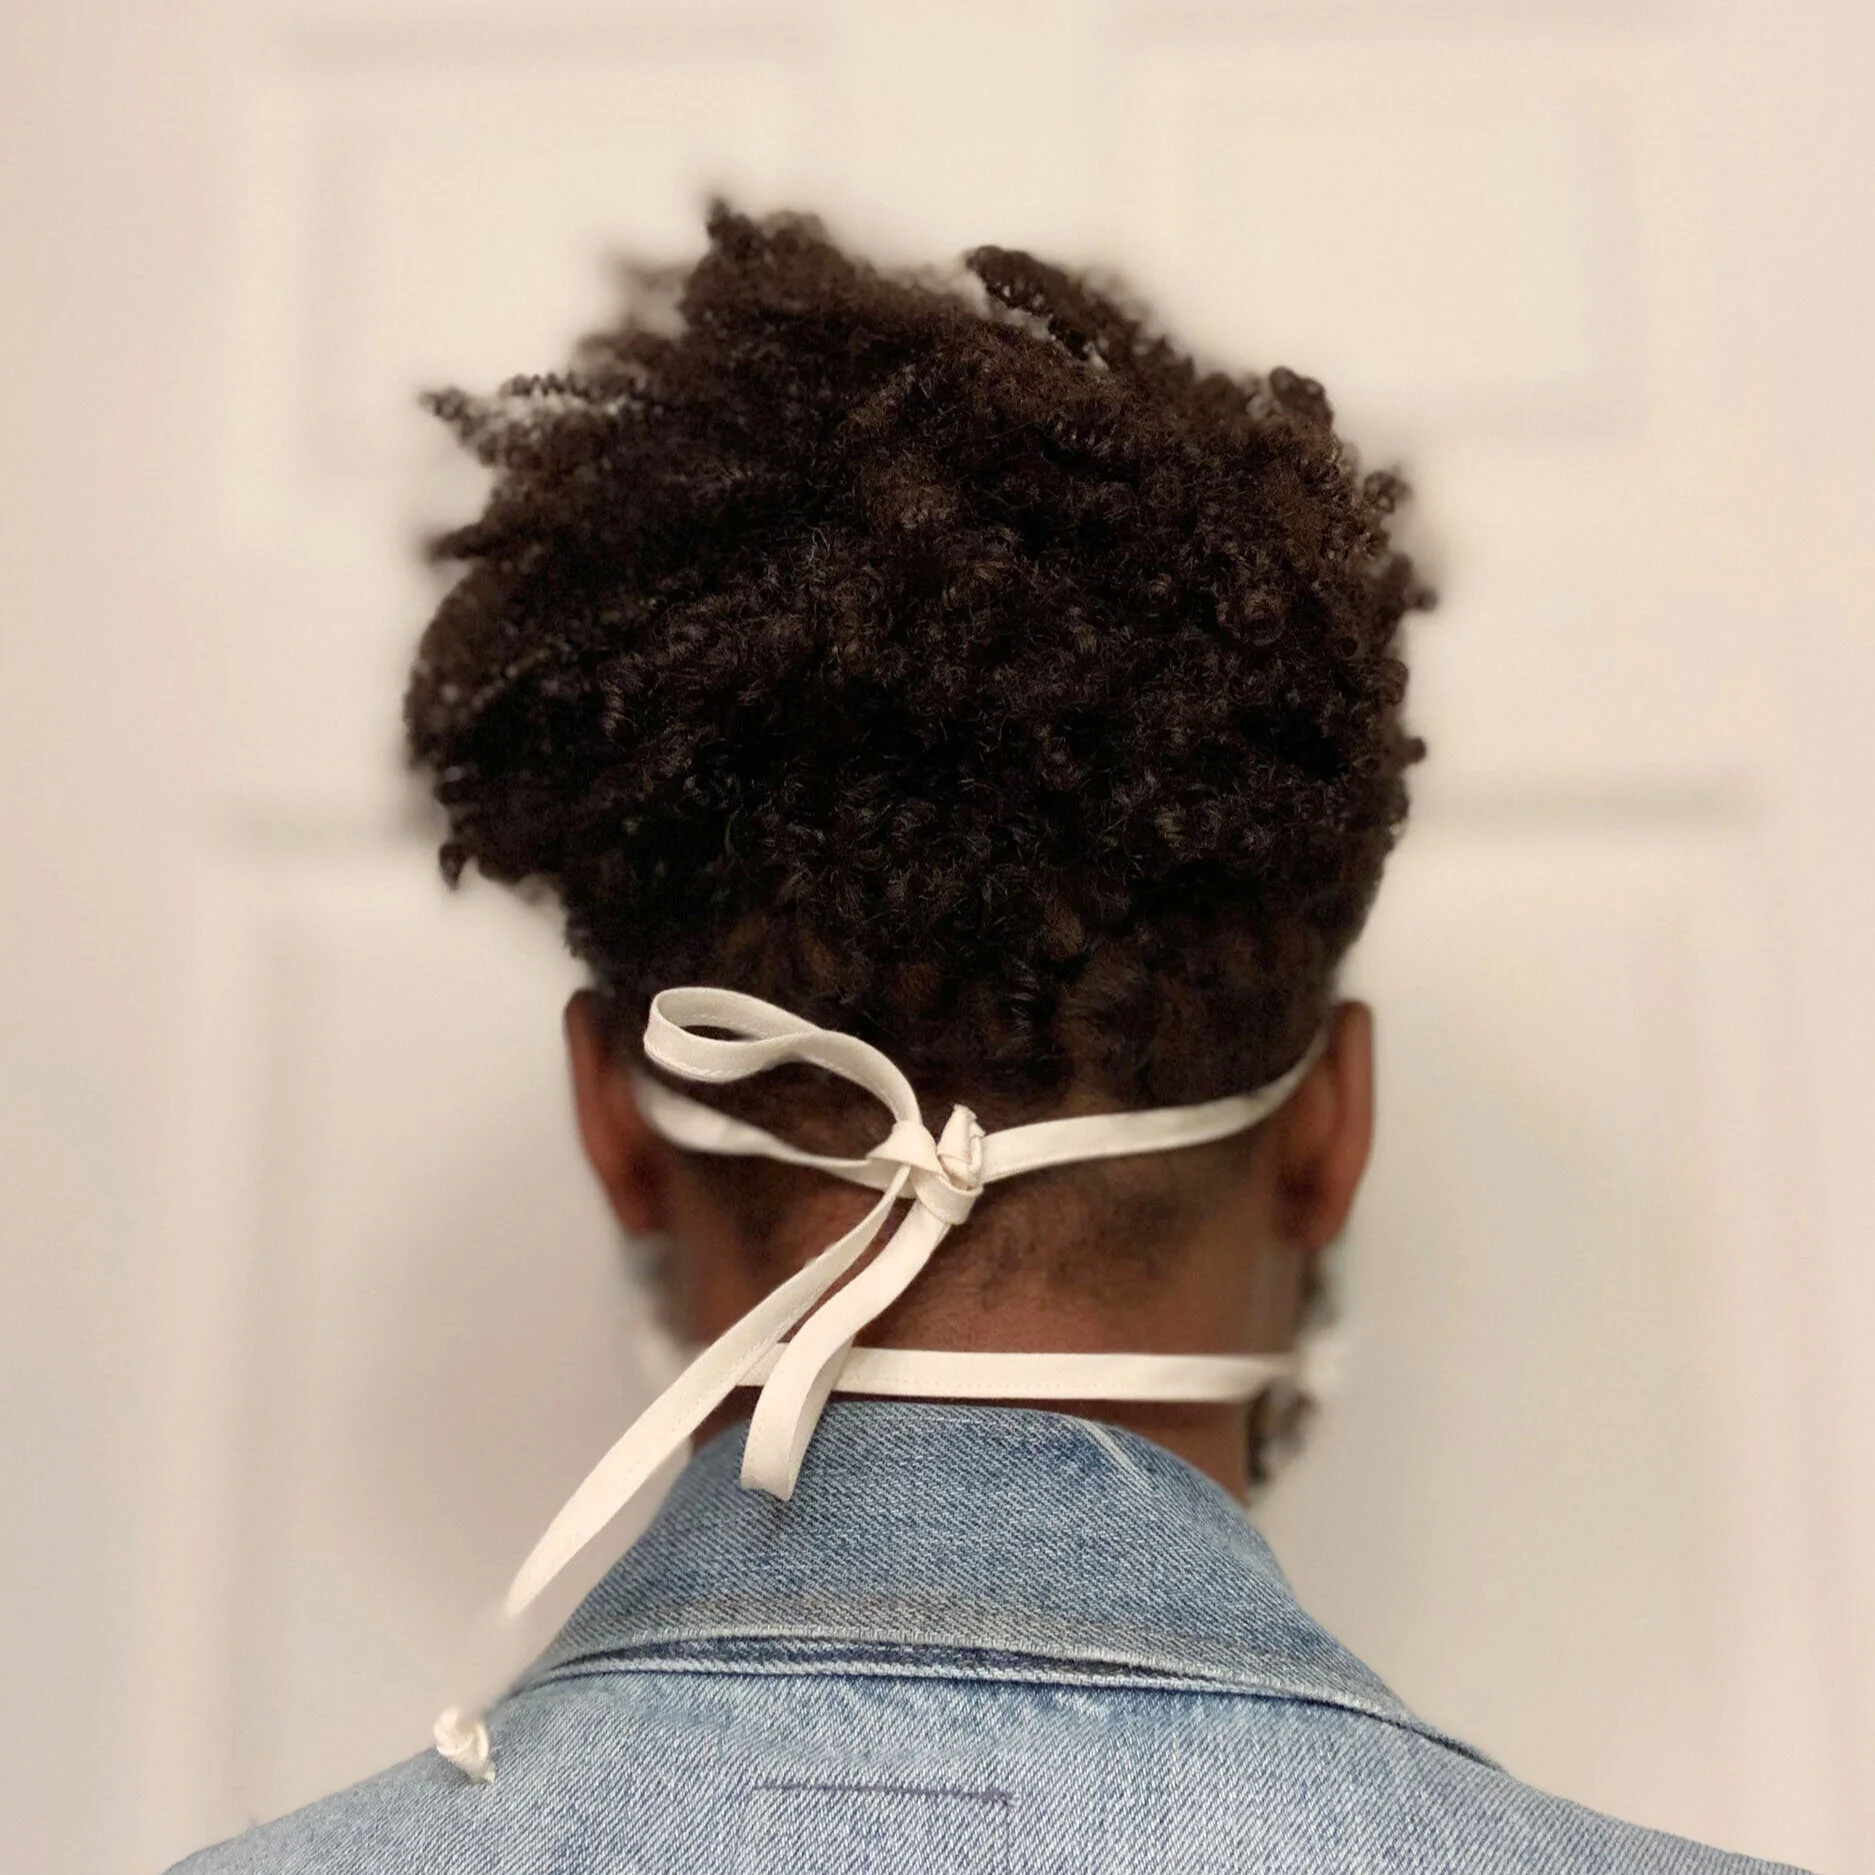
I started by testing out styles from online tutorials because there are so many out there. From there, I was able to figure out what I wanted to incorporate into my design. My design features an adjustable strap that went around my head and solved two issues –––no more headaches or dropping my mask on the in the parking lot. I also removed the middle seam down the middle of the mask so there will be no issue of the pattern not matching up after sewn.
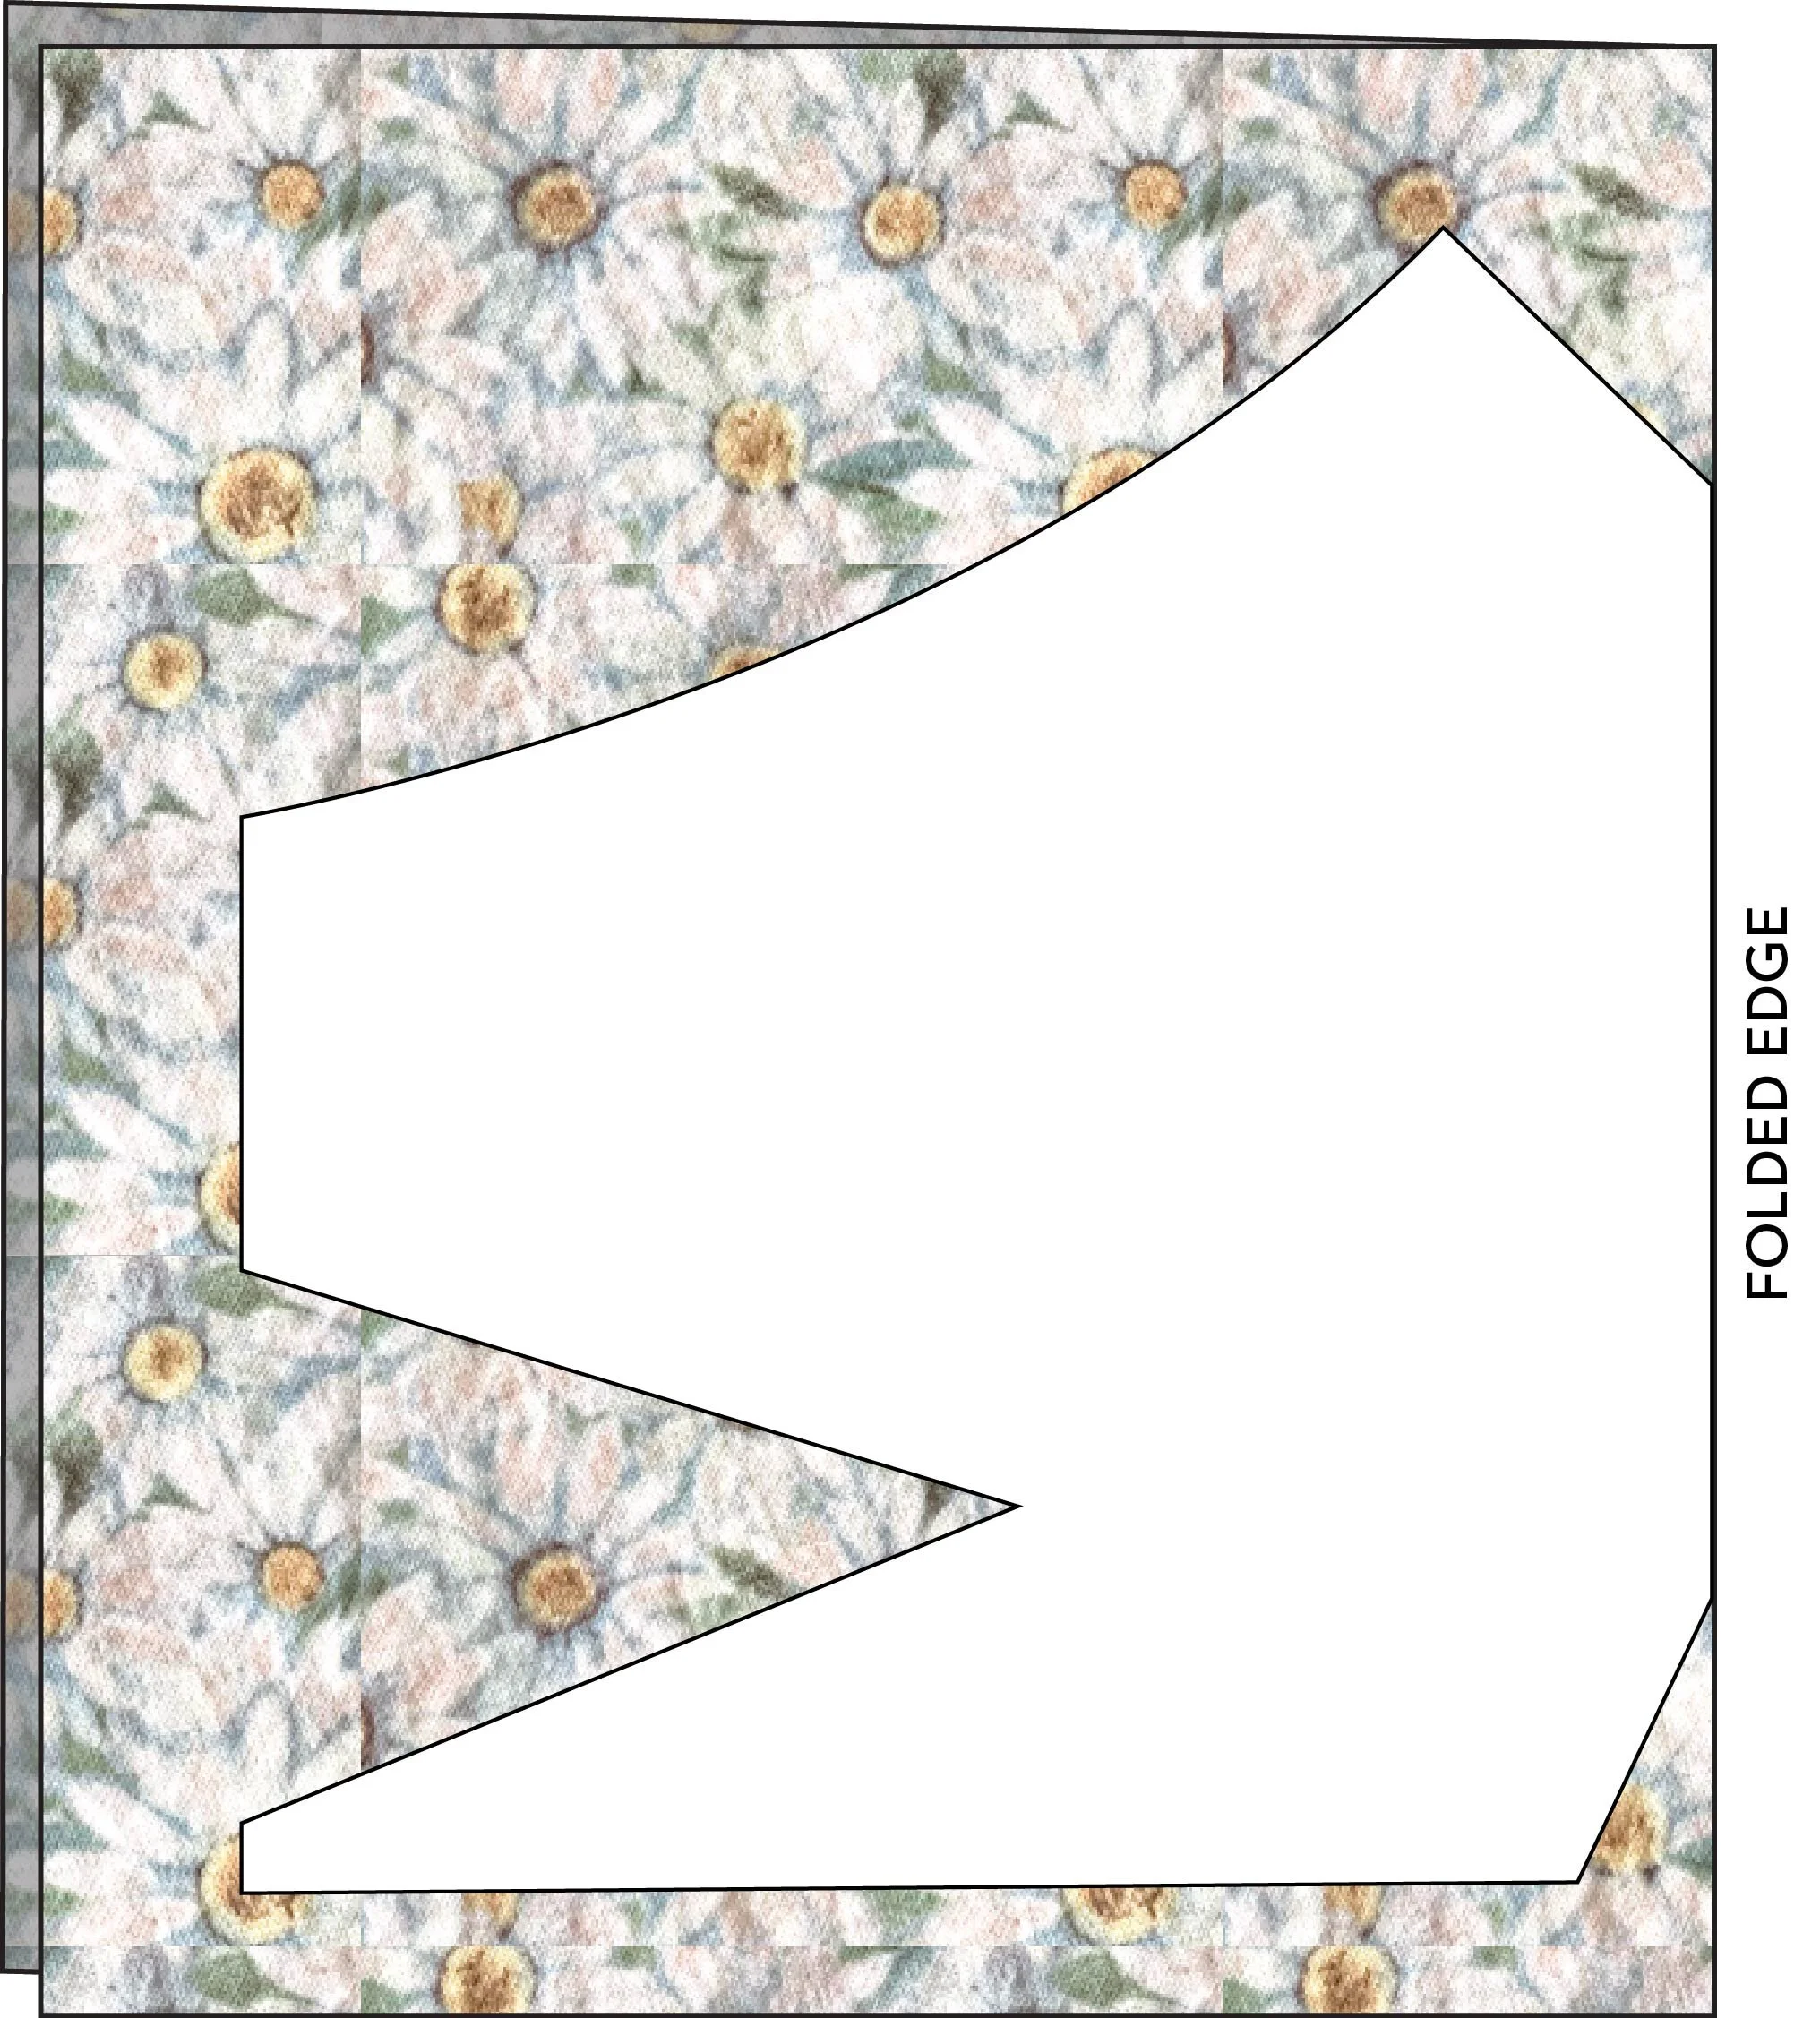
You can download my pattern at the end of this tutorial. It includes all the details listed in this tutorial (seam allowance, overall size, etc). Please use the pattern is for personal use only. Make some for your friends, family or coworkers, but please don’t use for profit.
Materials & Equipment:
1/4” Yard fabric (non stretchy cotton works best)
Double fold bias tape (1/4” or 1/2” )
Thread (match to bias tape color)
Sewing machine
Scissors
Pinking Shears (Optional)
Pins
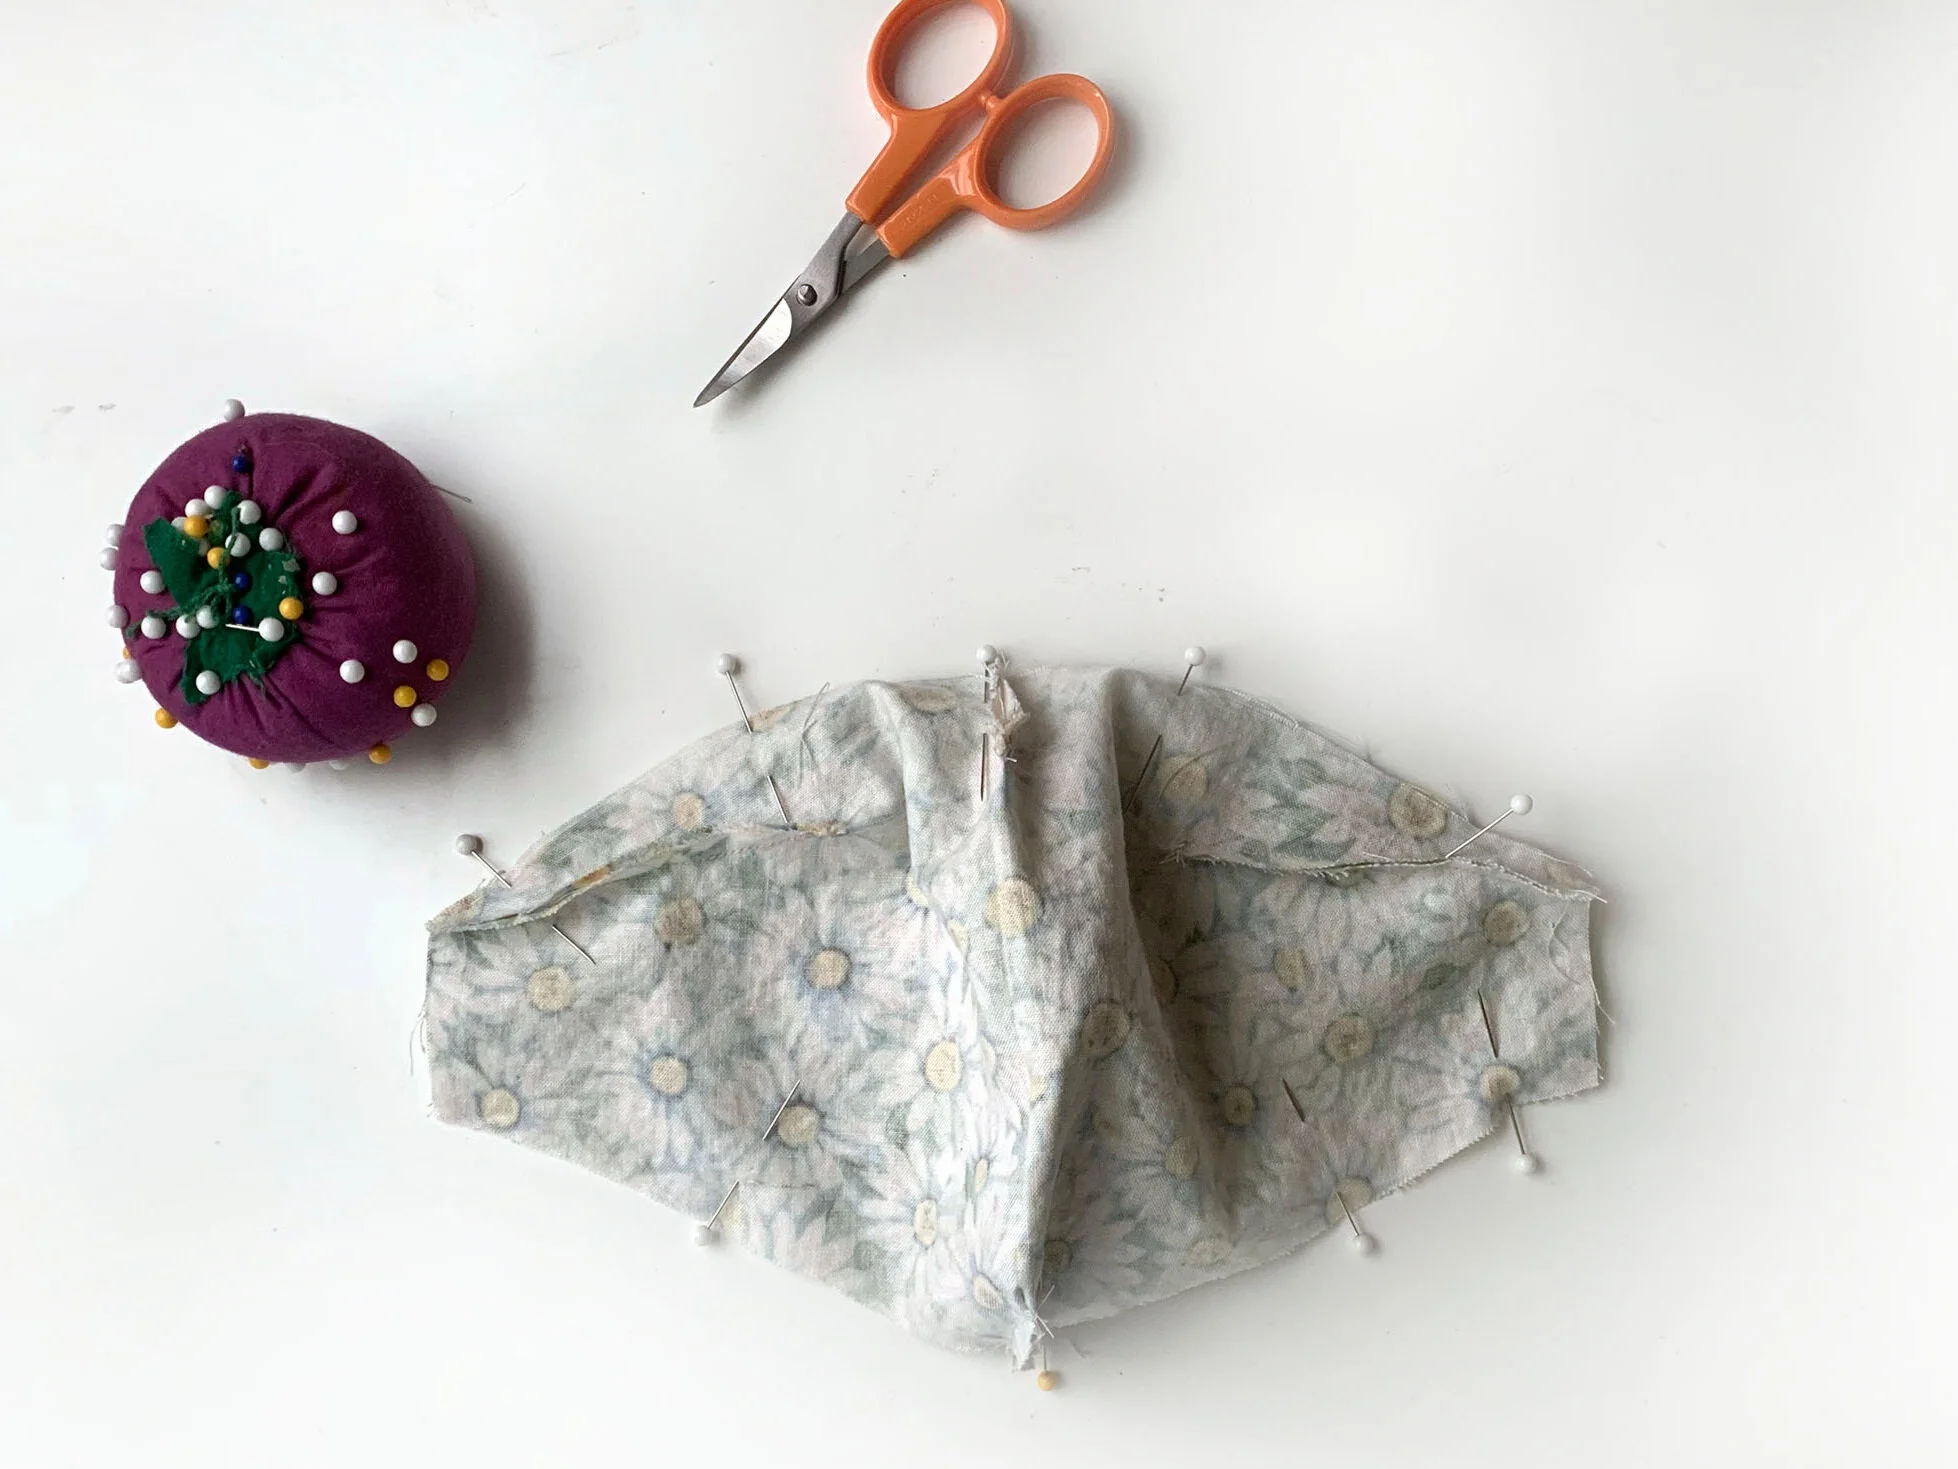
Let’s start by cutting out your mask pieces. Fold your fabric in half, and lay the straight edge of your pattern along the folded edge of your fabric. Pin the pattern to the fabric, and cut around pattern. Repeat these steps because you need two pieces to form the mask. I used the same fabric for the inside and outside of my mask.

Once your pieces are cut out, you can pin your darts (the triangular cut outs) together with wrong sides of the fabric touching. Use 1-3 pins to keep the darts together until it’s sewn together.
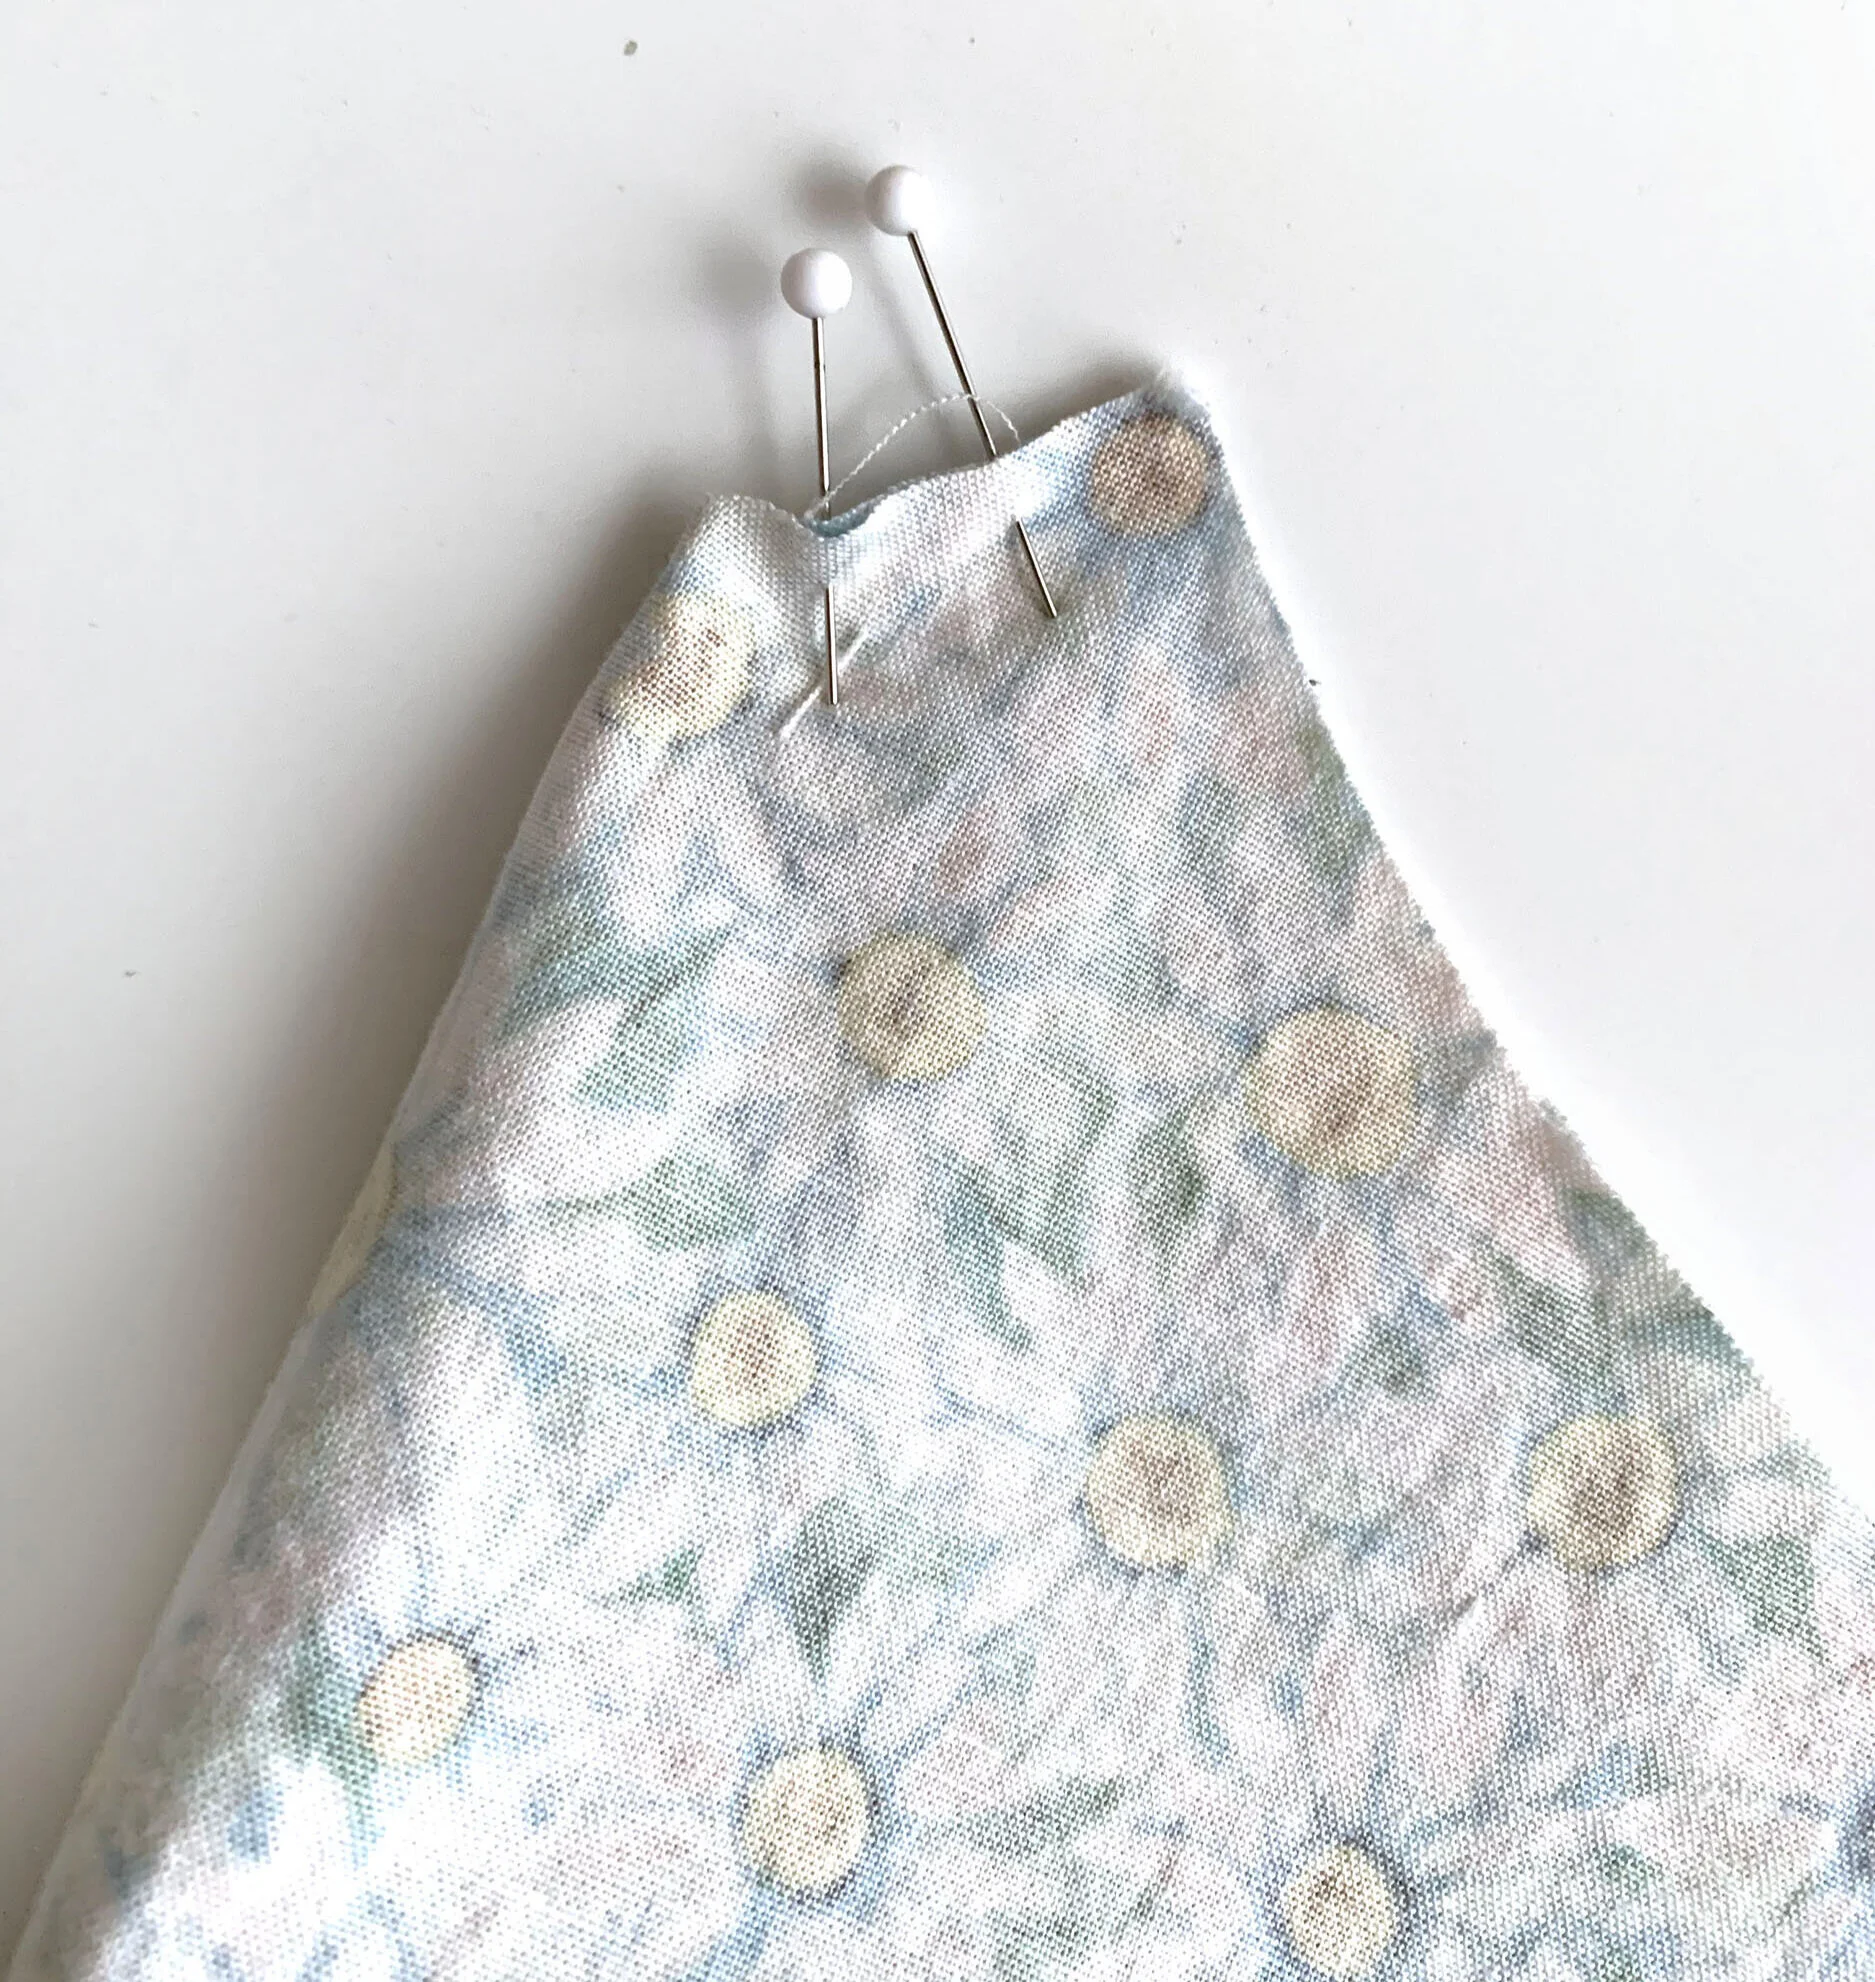
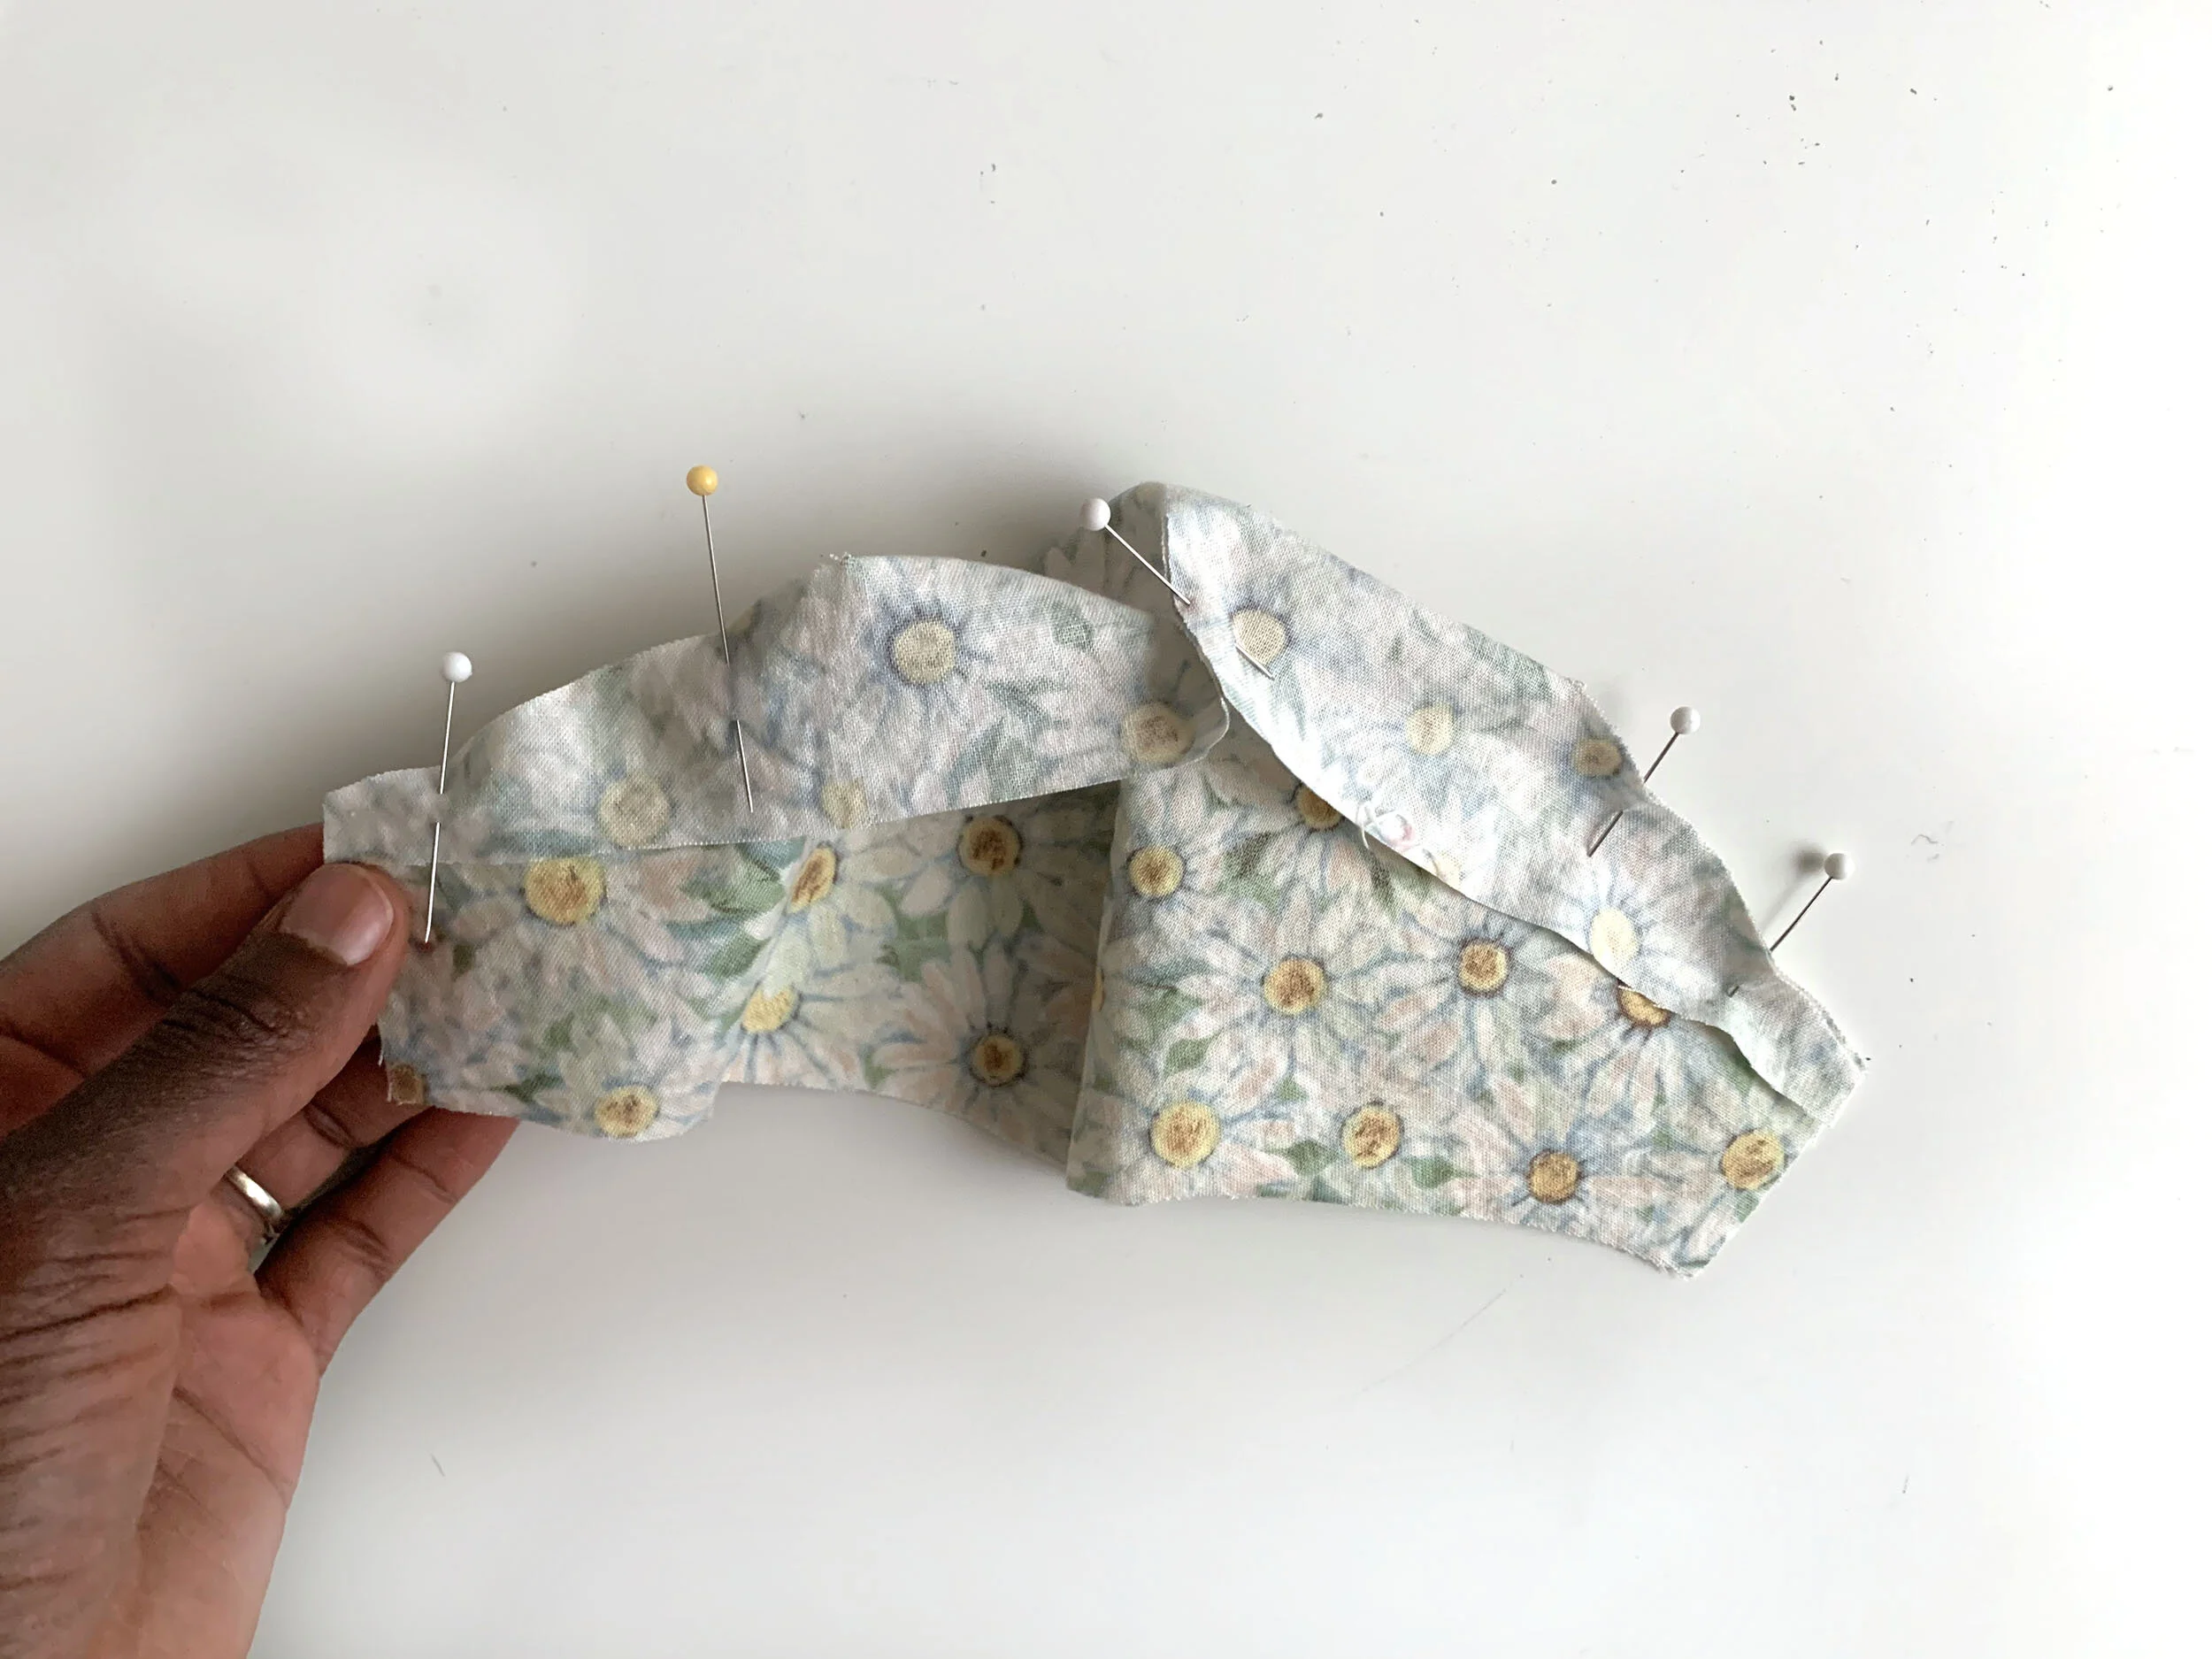
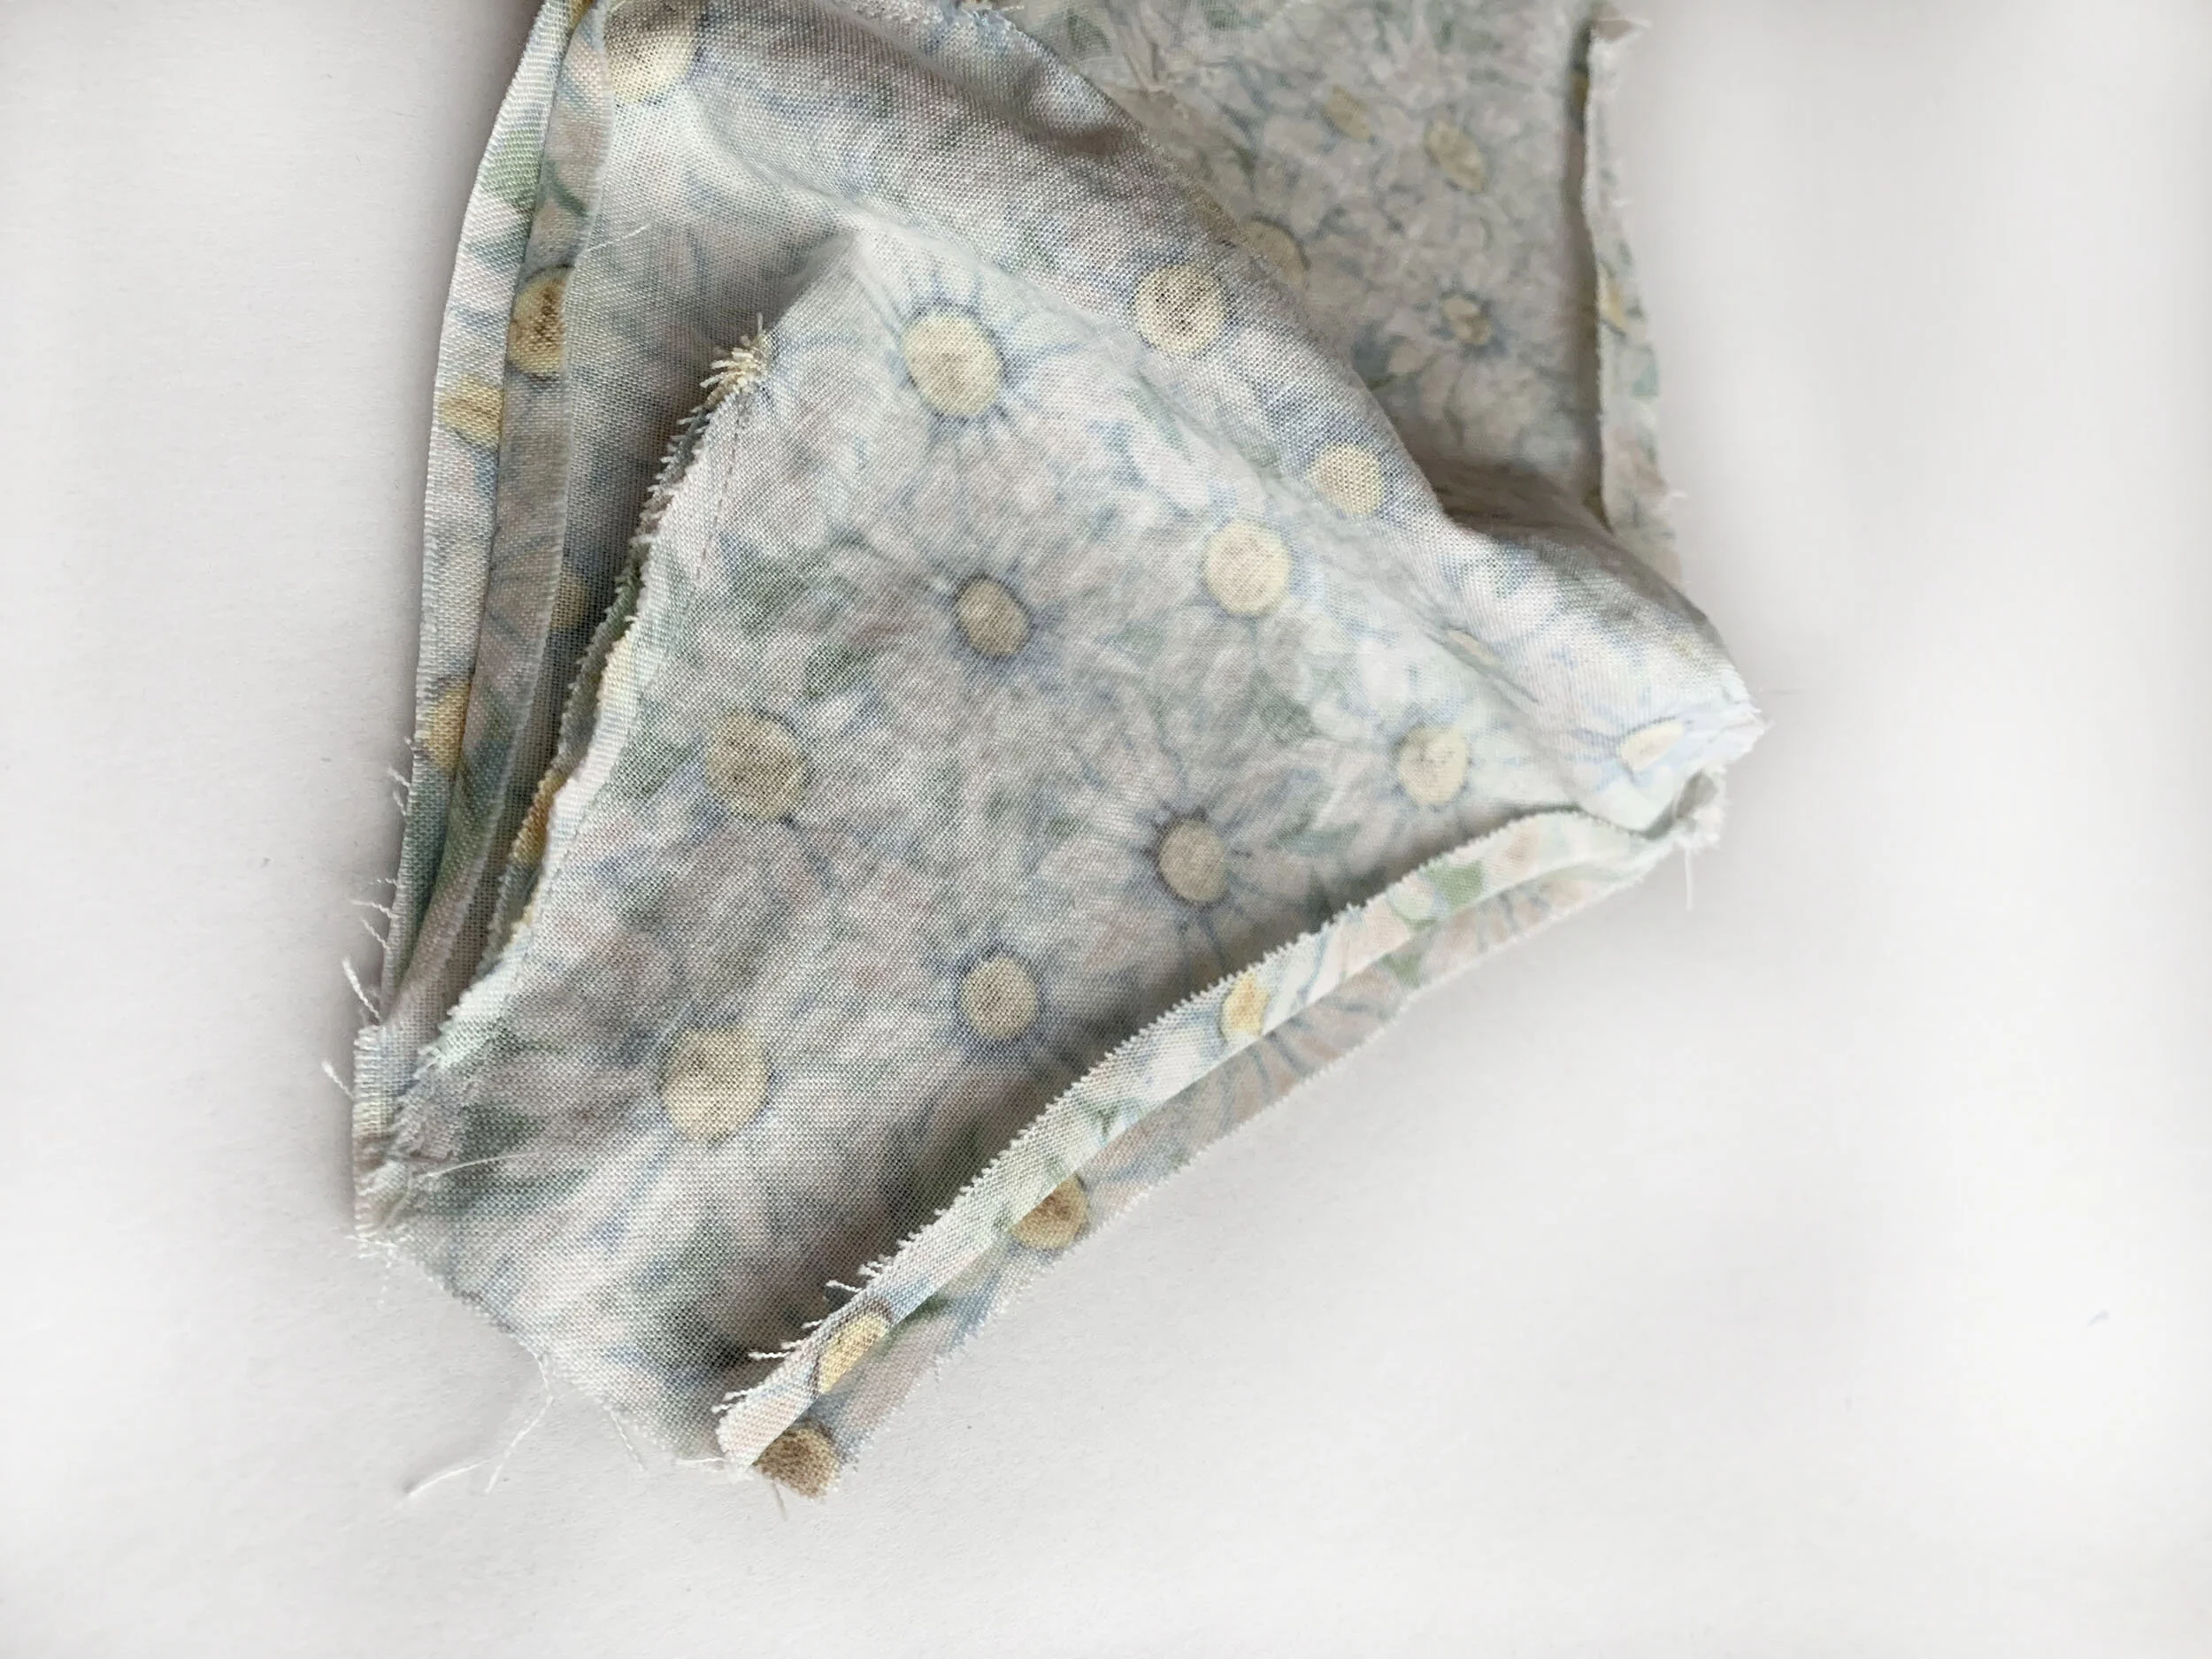
Machine stitch your darts, starting at the mask edge, and working your way toward the point. As you get closer to the point, taper the stitching so your sewing line is closer to the edge. Darts are used for shaping. Sewing the darts in this method will prevent your mask from having gaps on the sides.
Because I went to school for fashion design, I’m compulsive about pressing all seams. So I’m passing that along to you. Give each side of the mask a nice pressing by running the iron over your beautiful darts (on the right side).
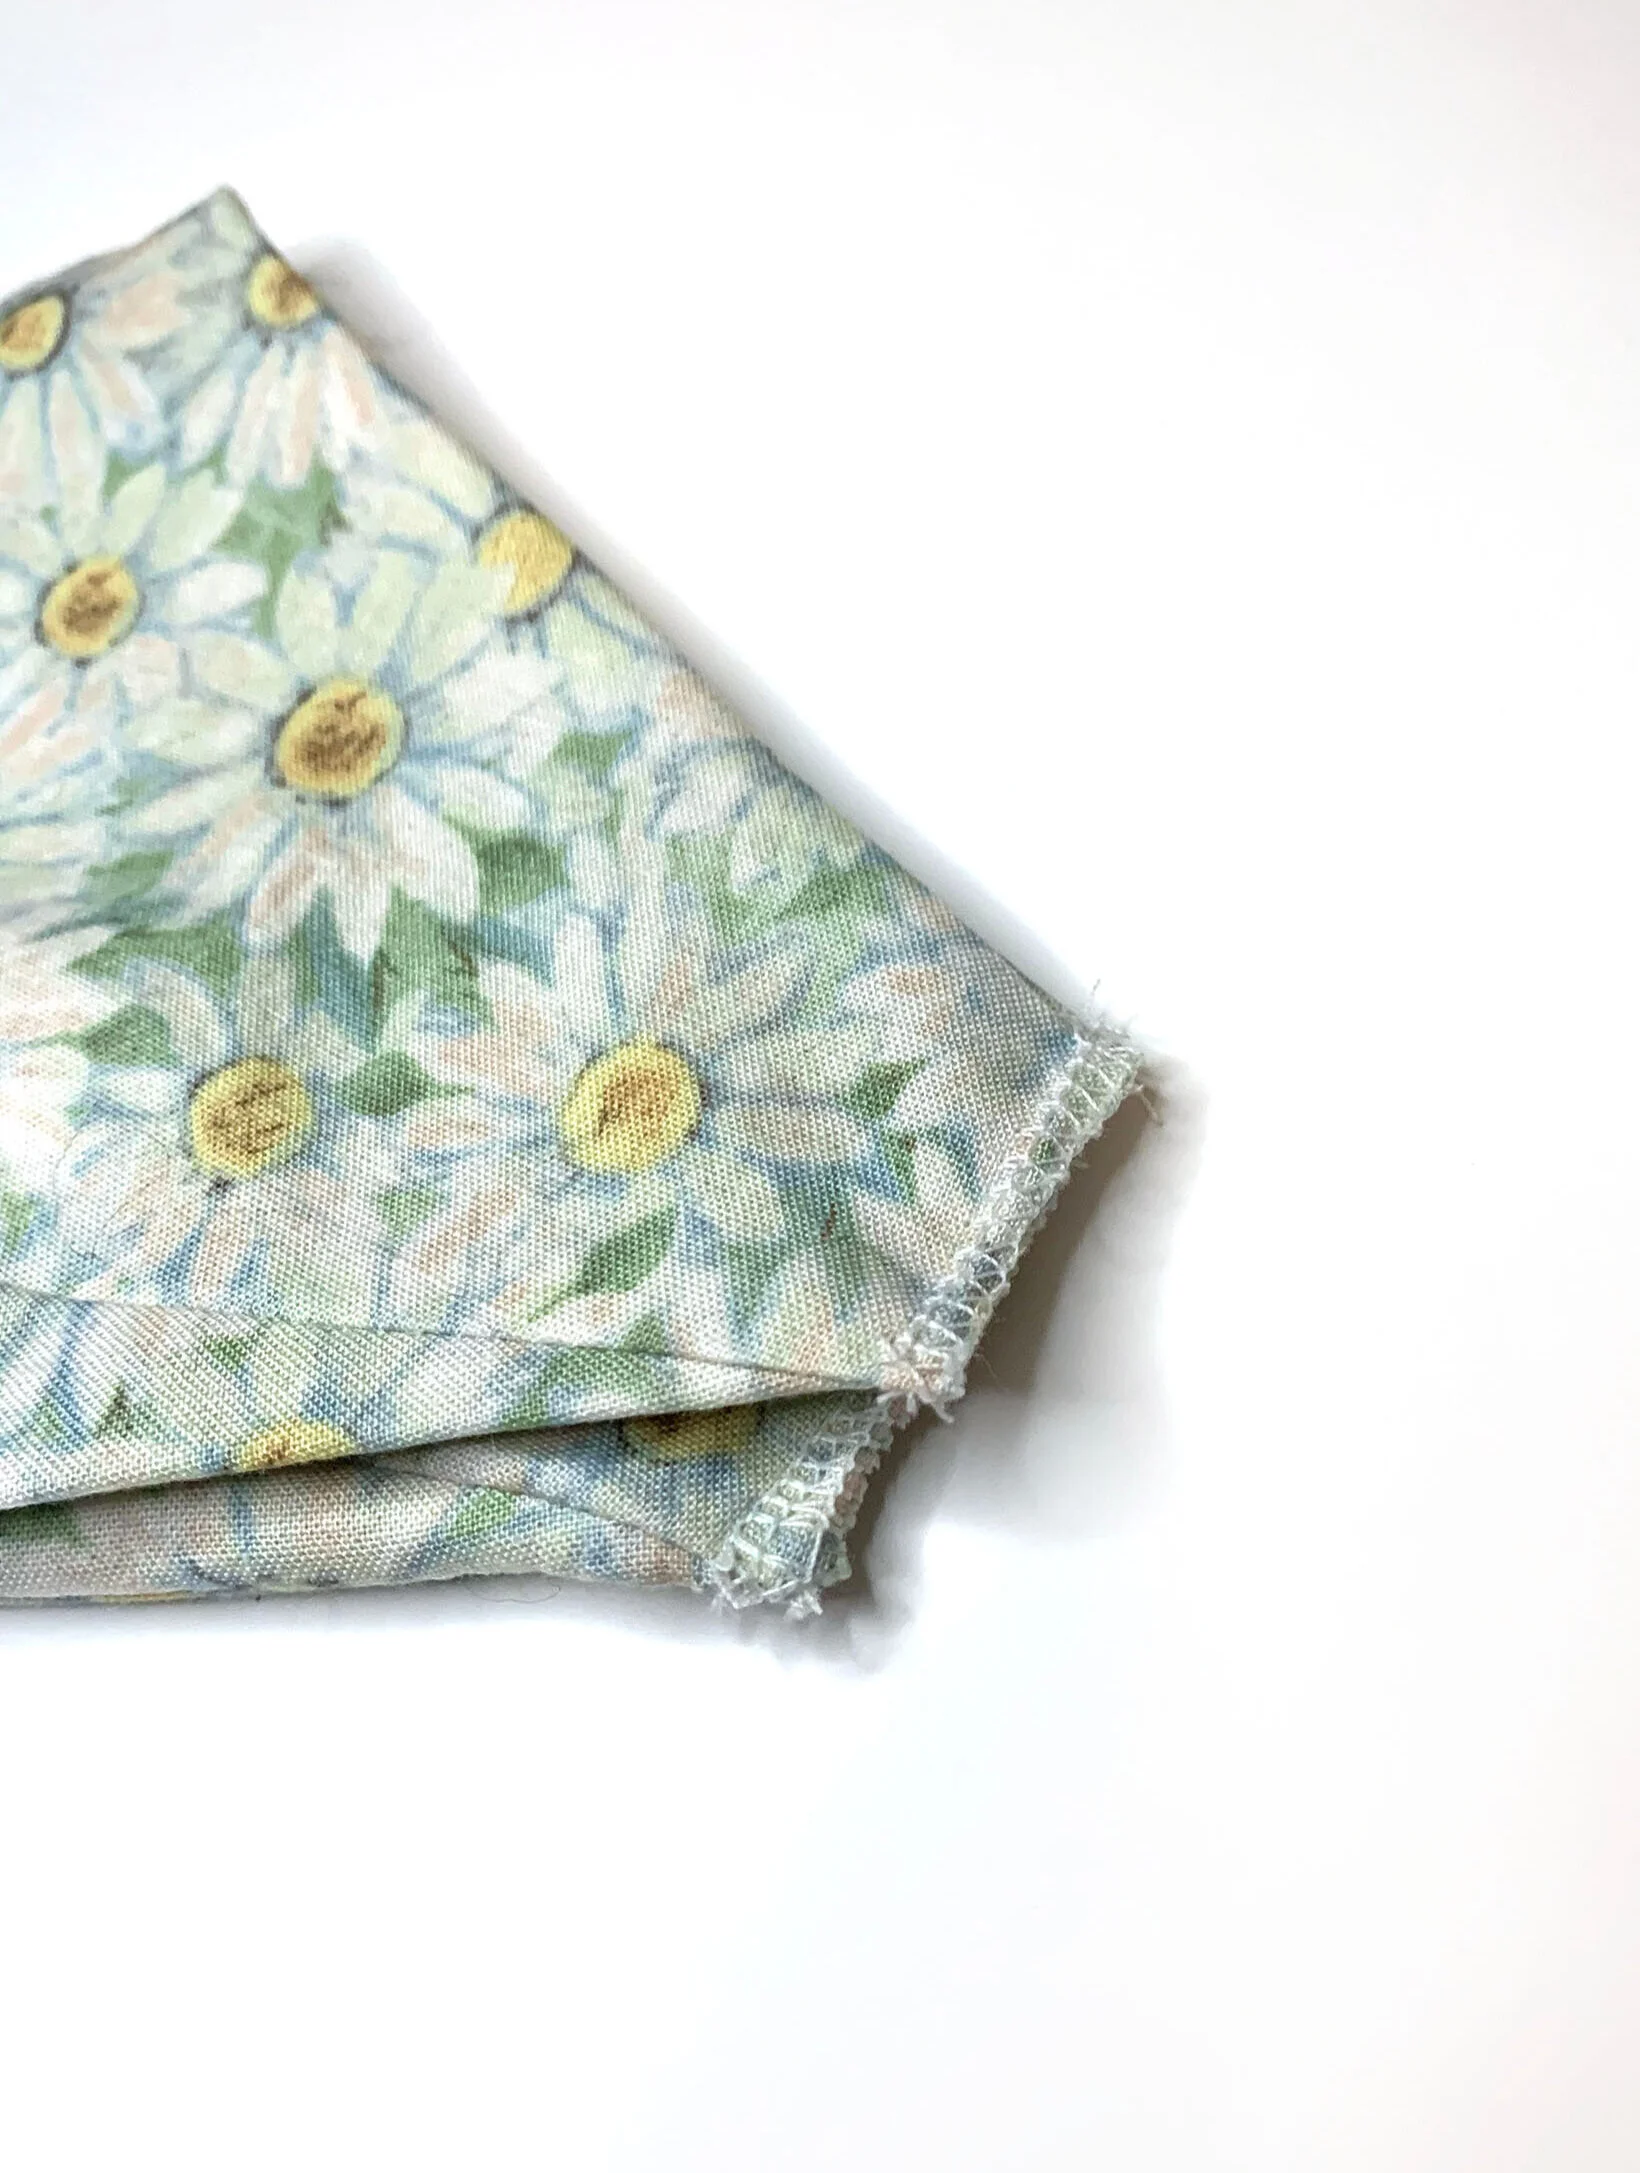
Lay the two pieces of mask together with right sides facing, and pin around top and bottom edge. Stitch along the edge using 1/4” seam allowance. Don’t sew along the short sides.
More pressing, along the seams you just sewed One day you’ll come to love pressing too!
Turn the mask right side out. Fold the mask in half and press until smooth. This helps the fabric lay together nicely. Otherwise it will look bubbly on your face.
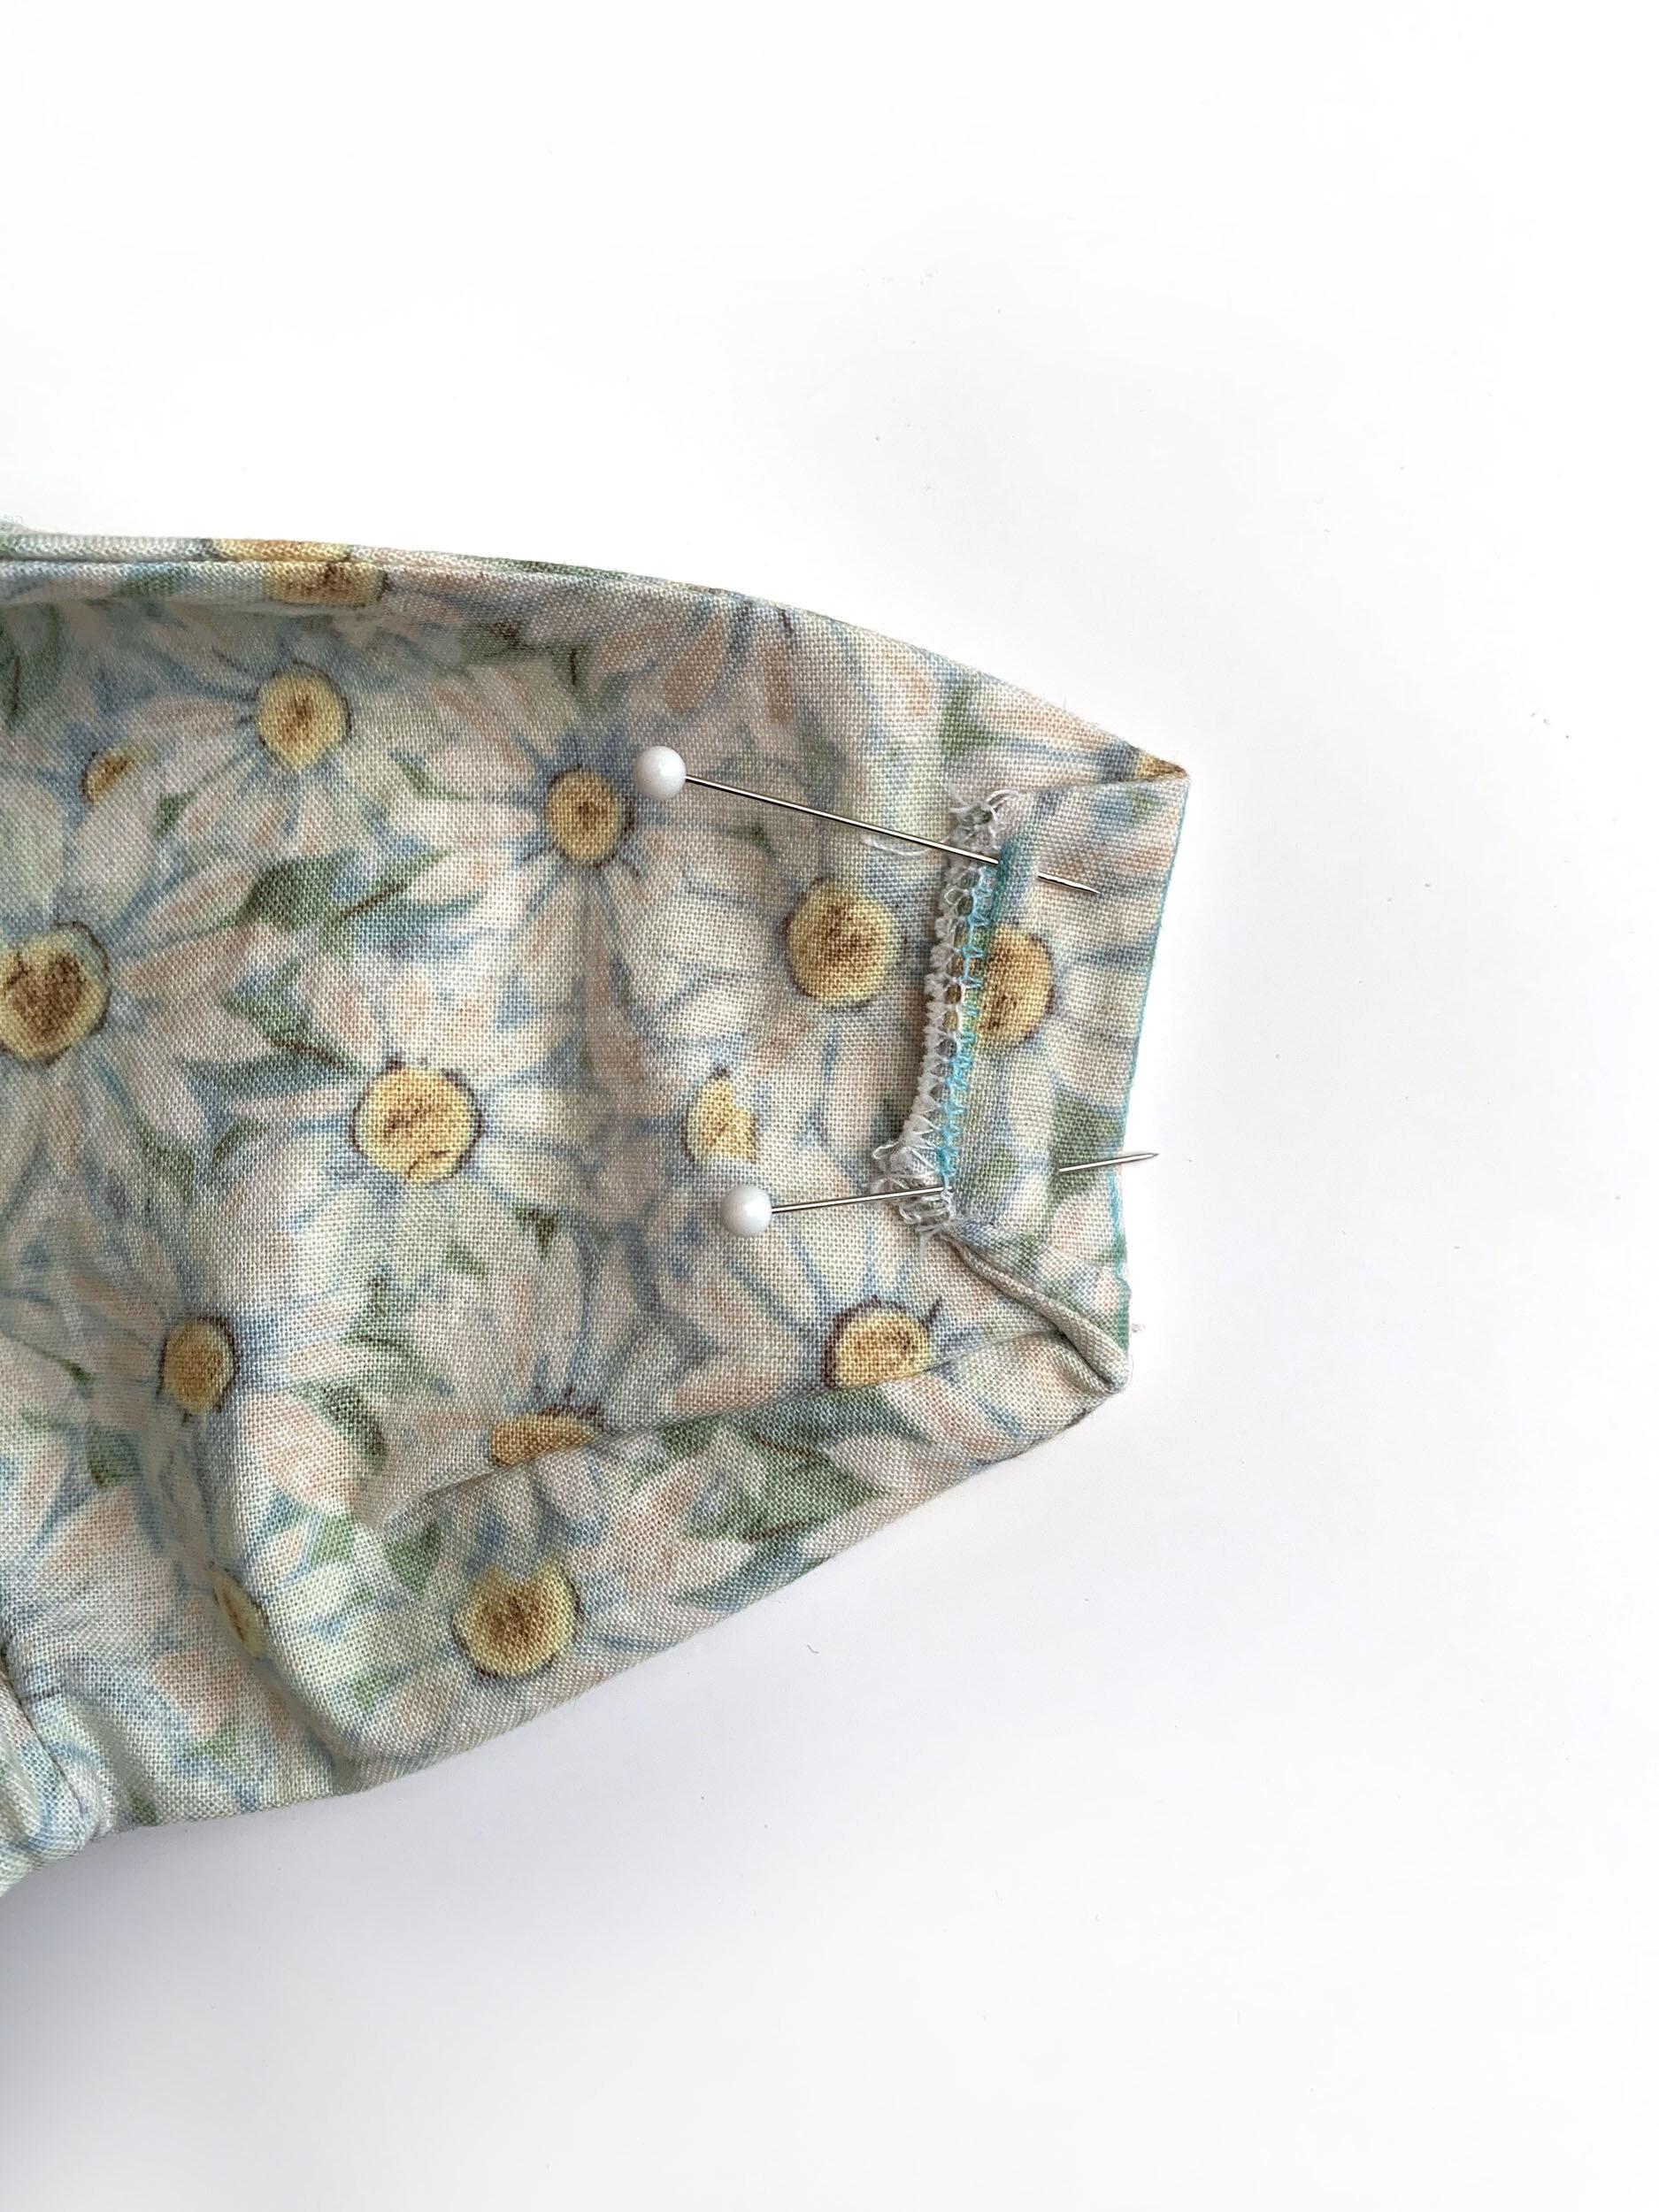
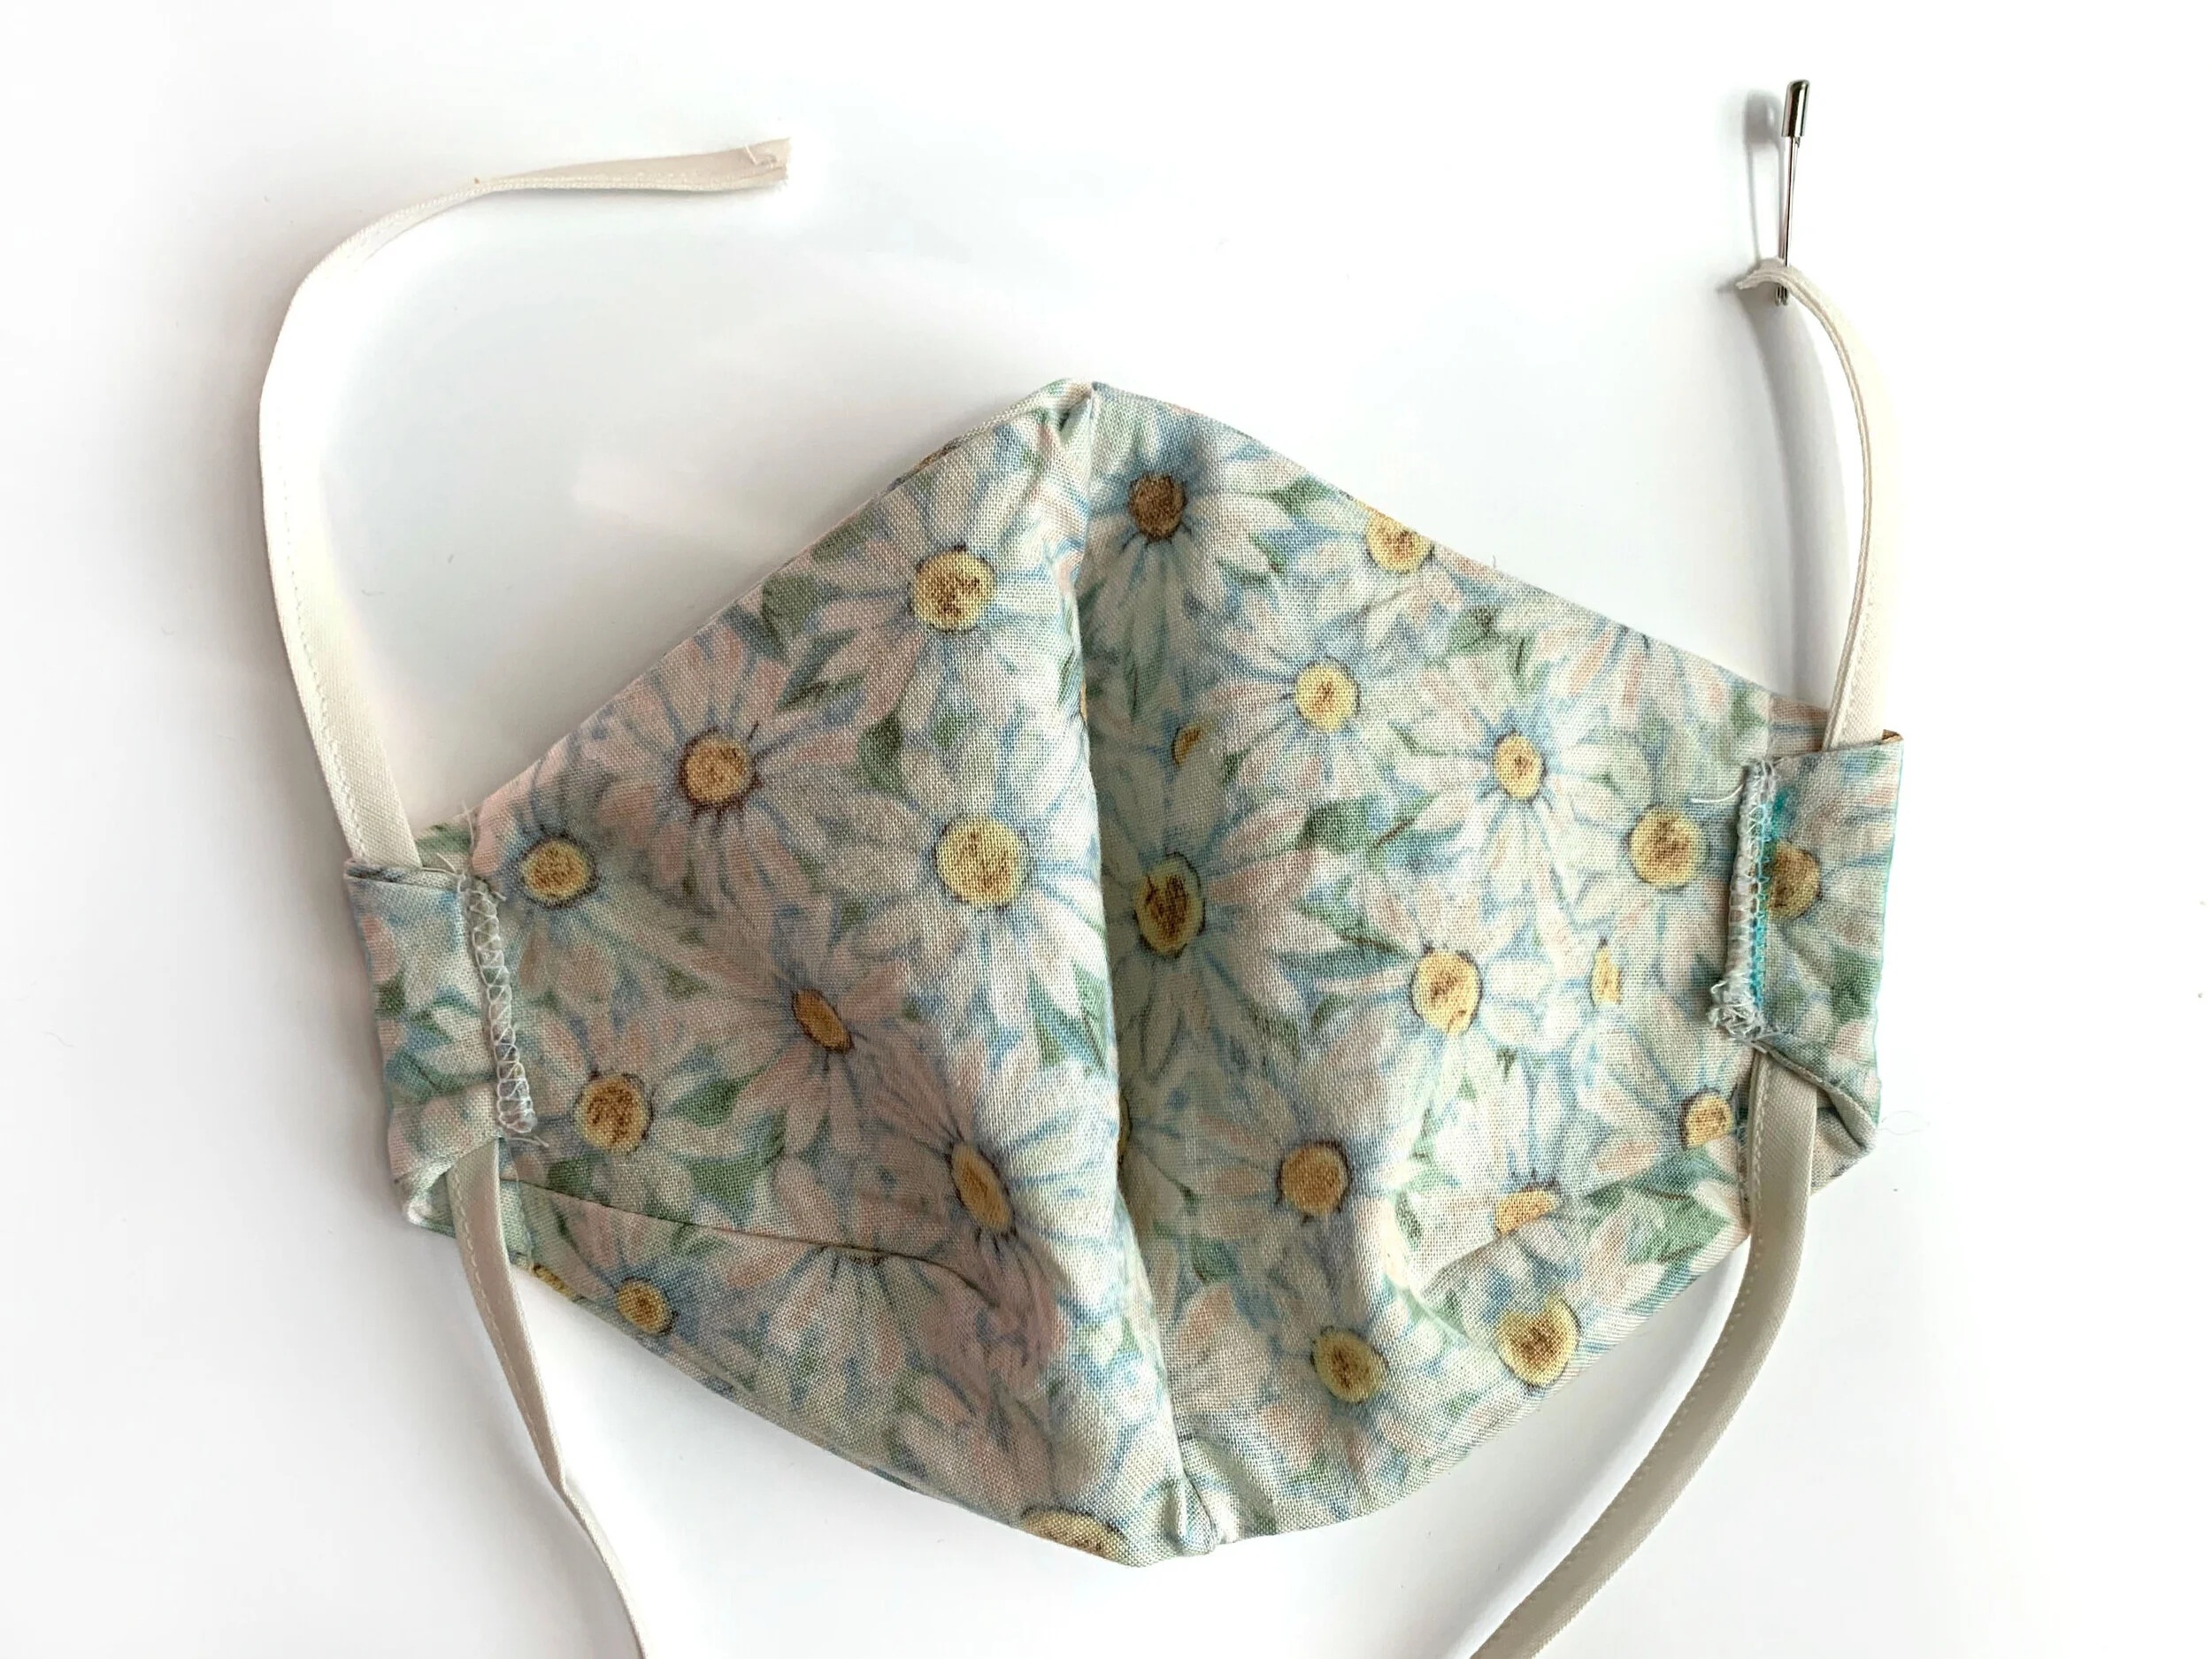
Next we’re going to finish the raw edges on the right and left of the mask. If we don’t finish them, they will unravel once washed. There are a few options finishing the edge. You can cut right along the edge with pinking shears, stitch right along the edge, or using a serger like me. Regardless the method, make sure you aren’t cutting off any fabric because that will affect the fit.
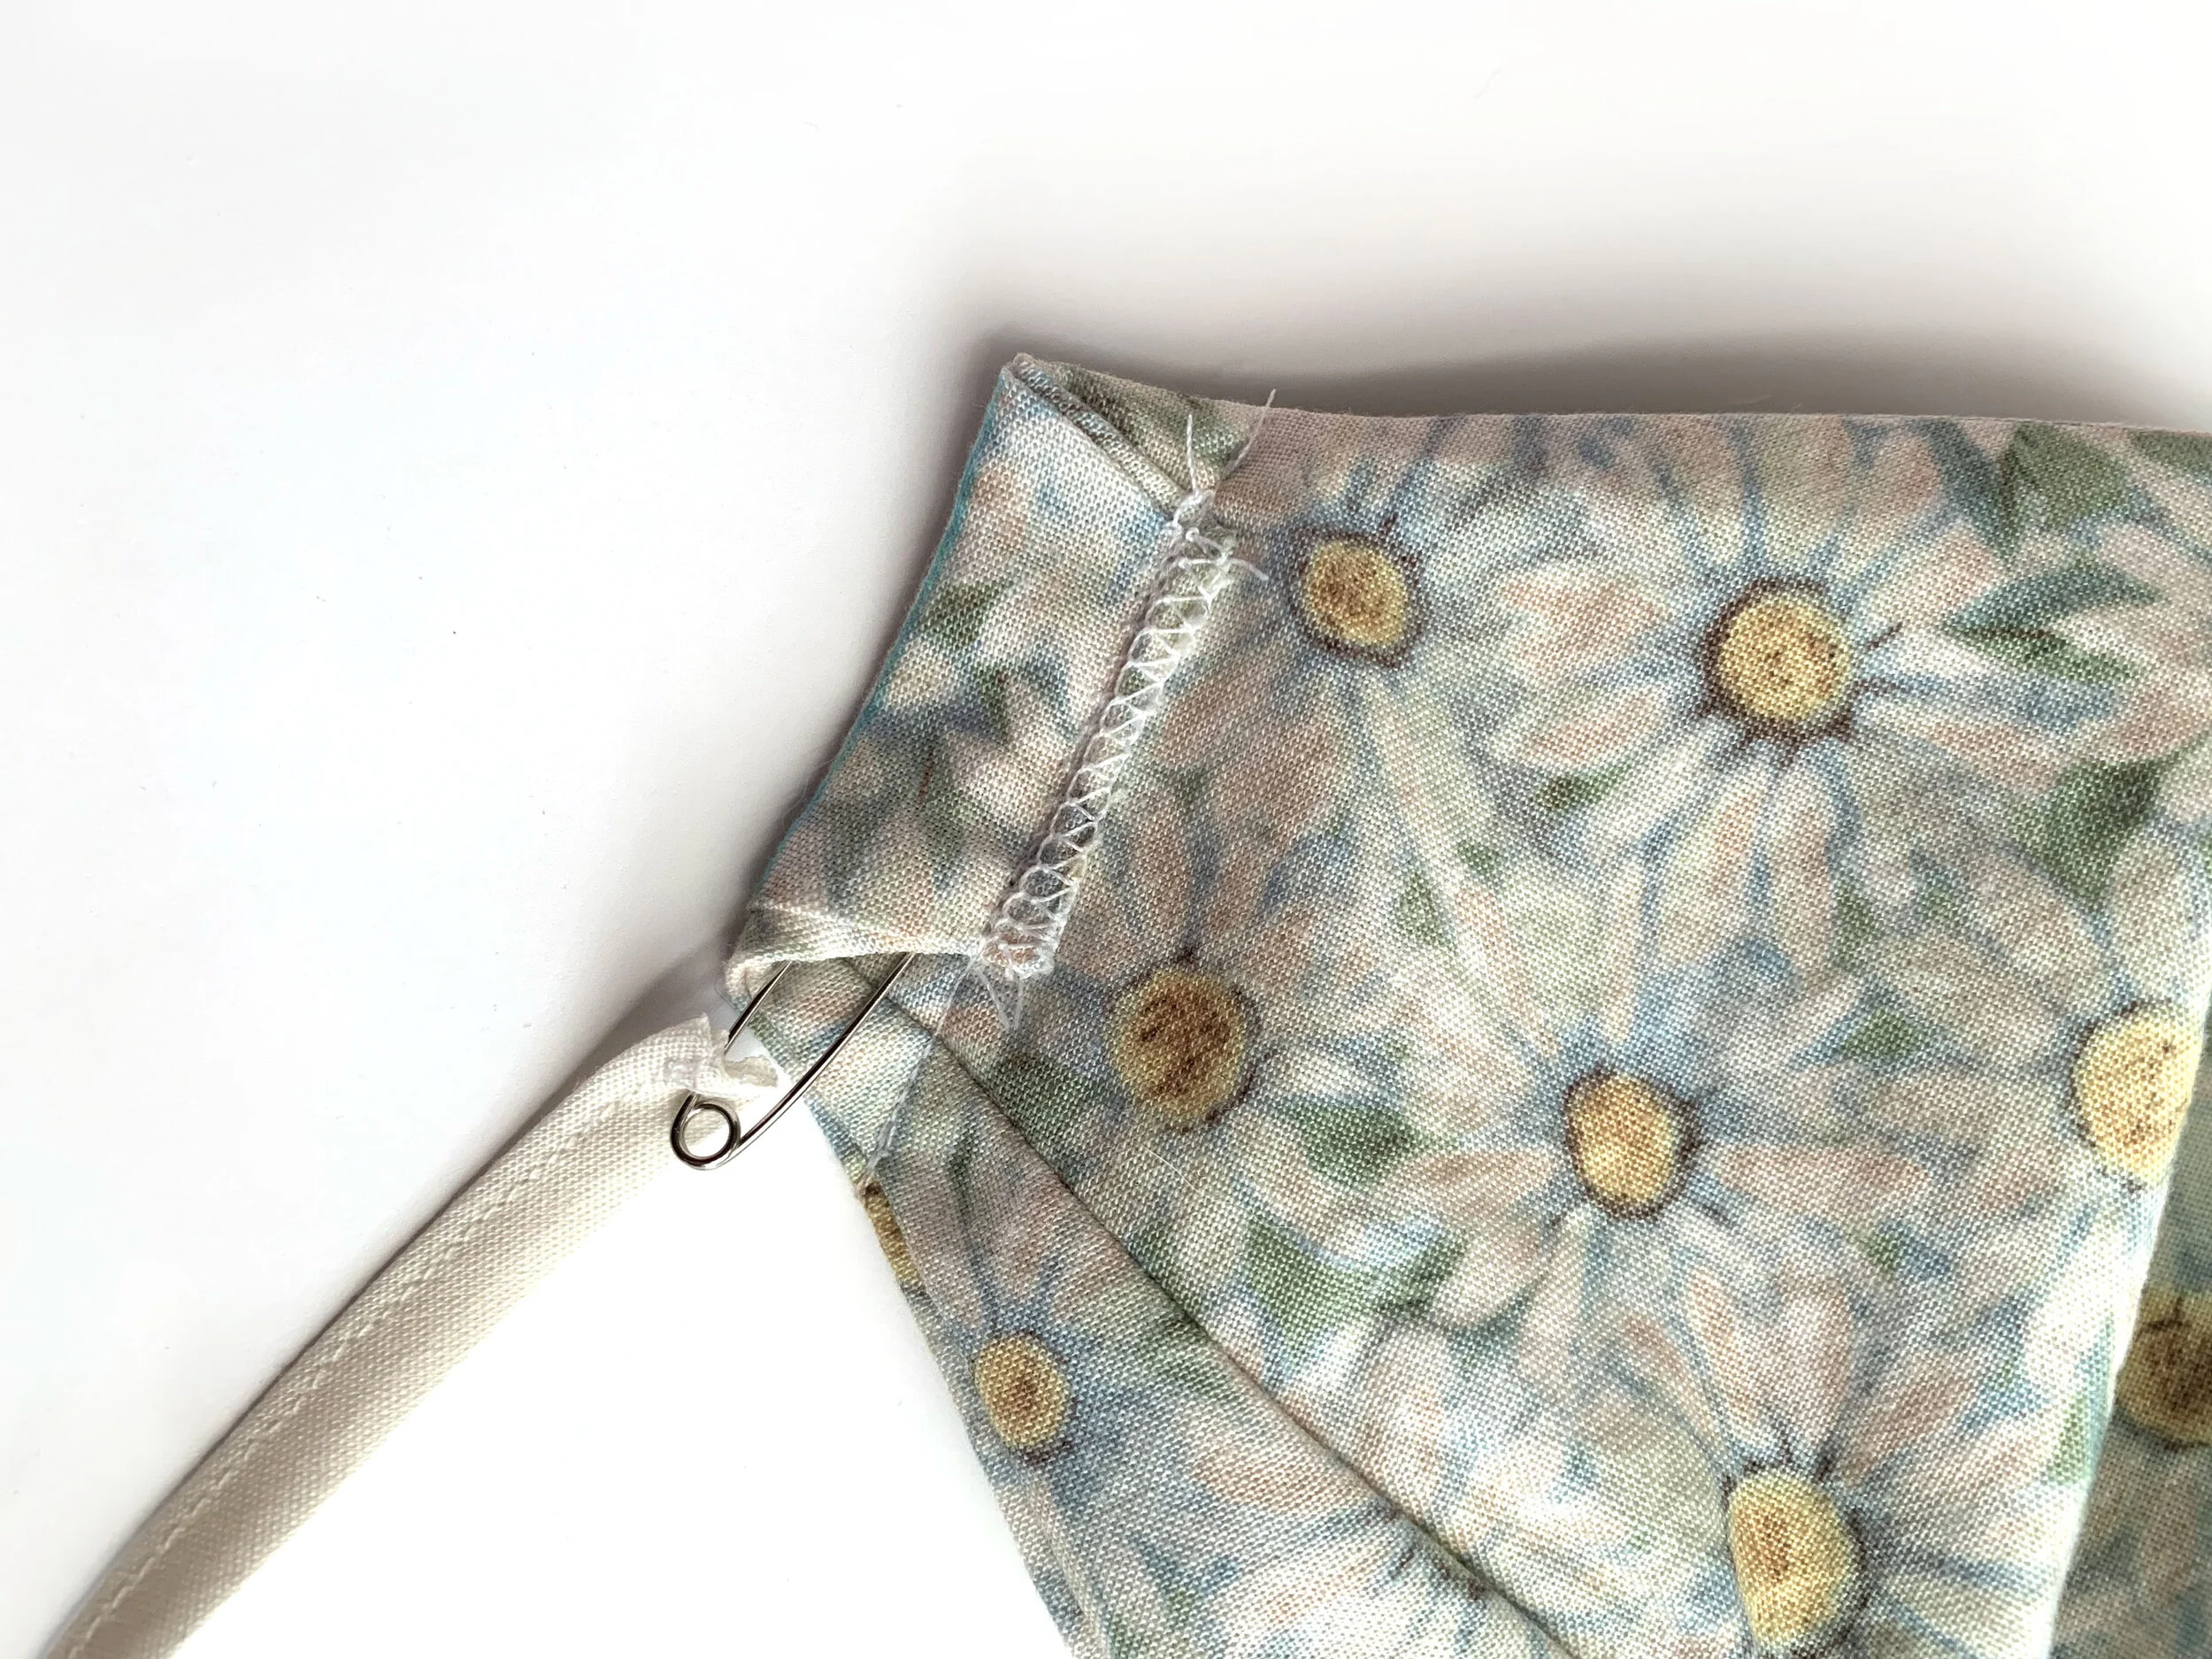
Using a ruler and an erasable pen, mark 5/8” from each end of mask.
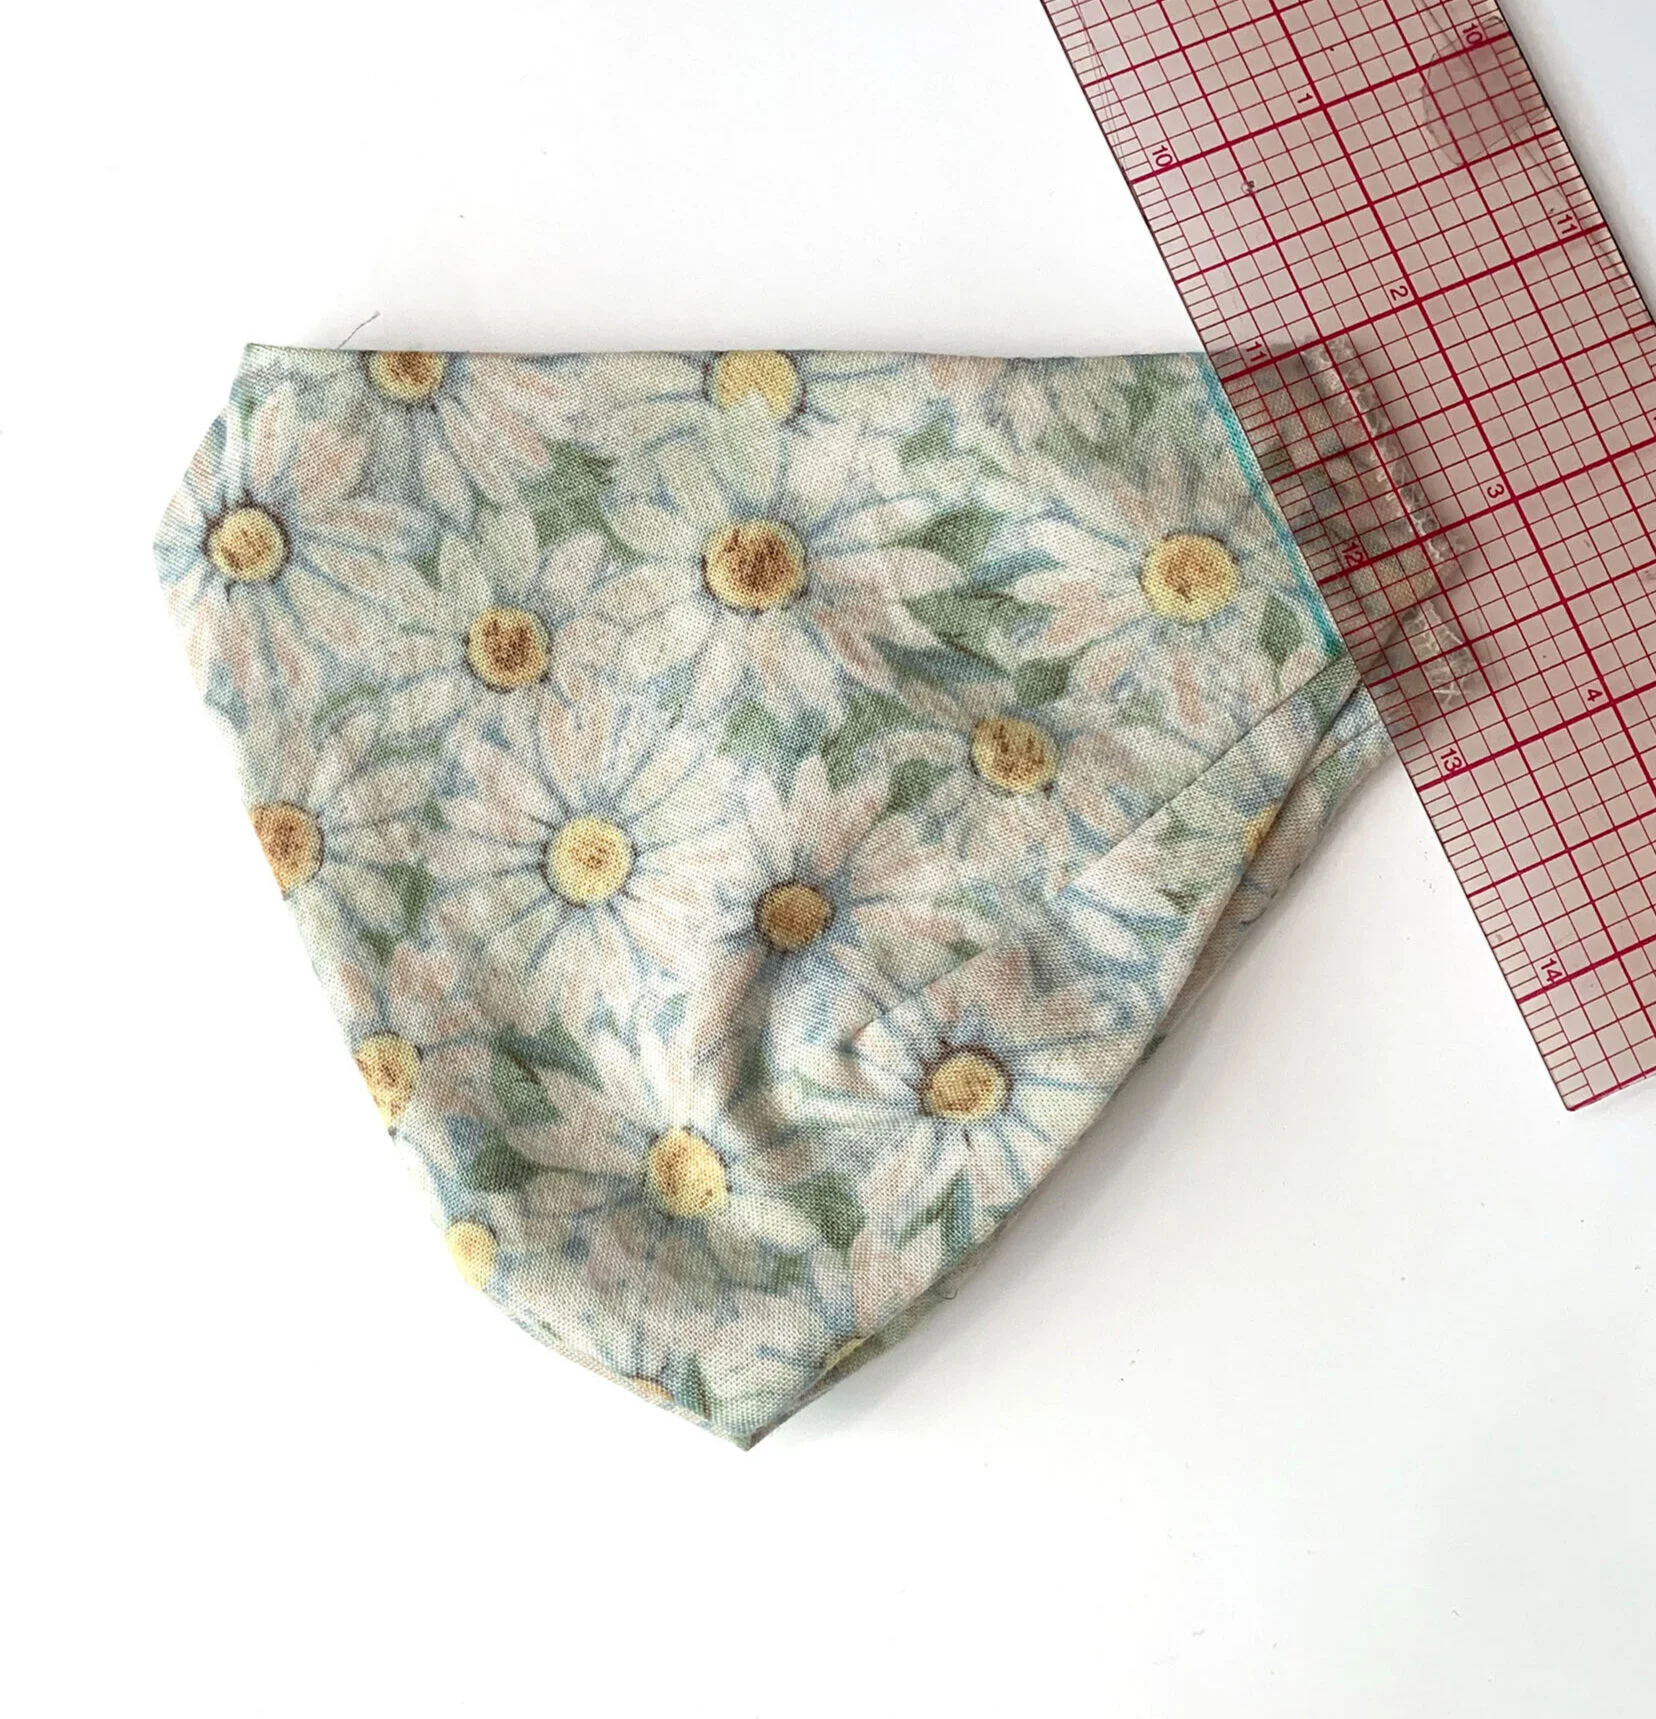
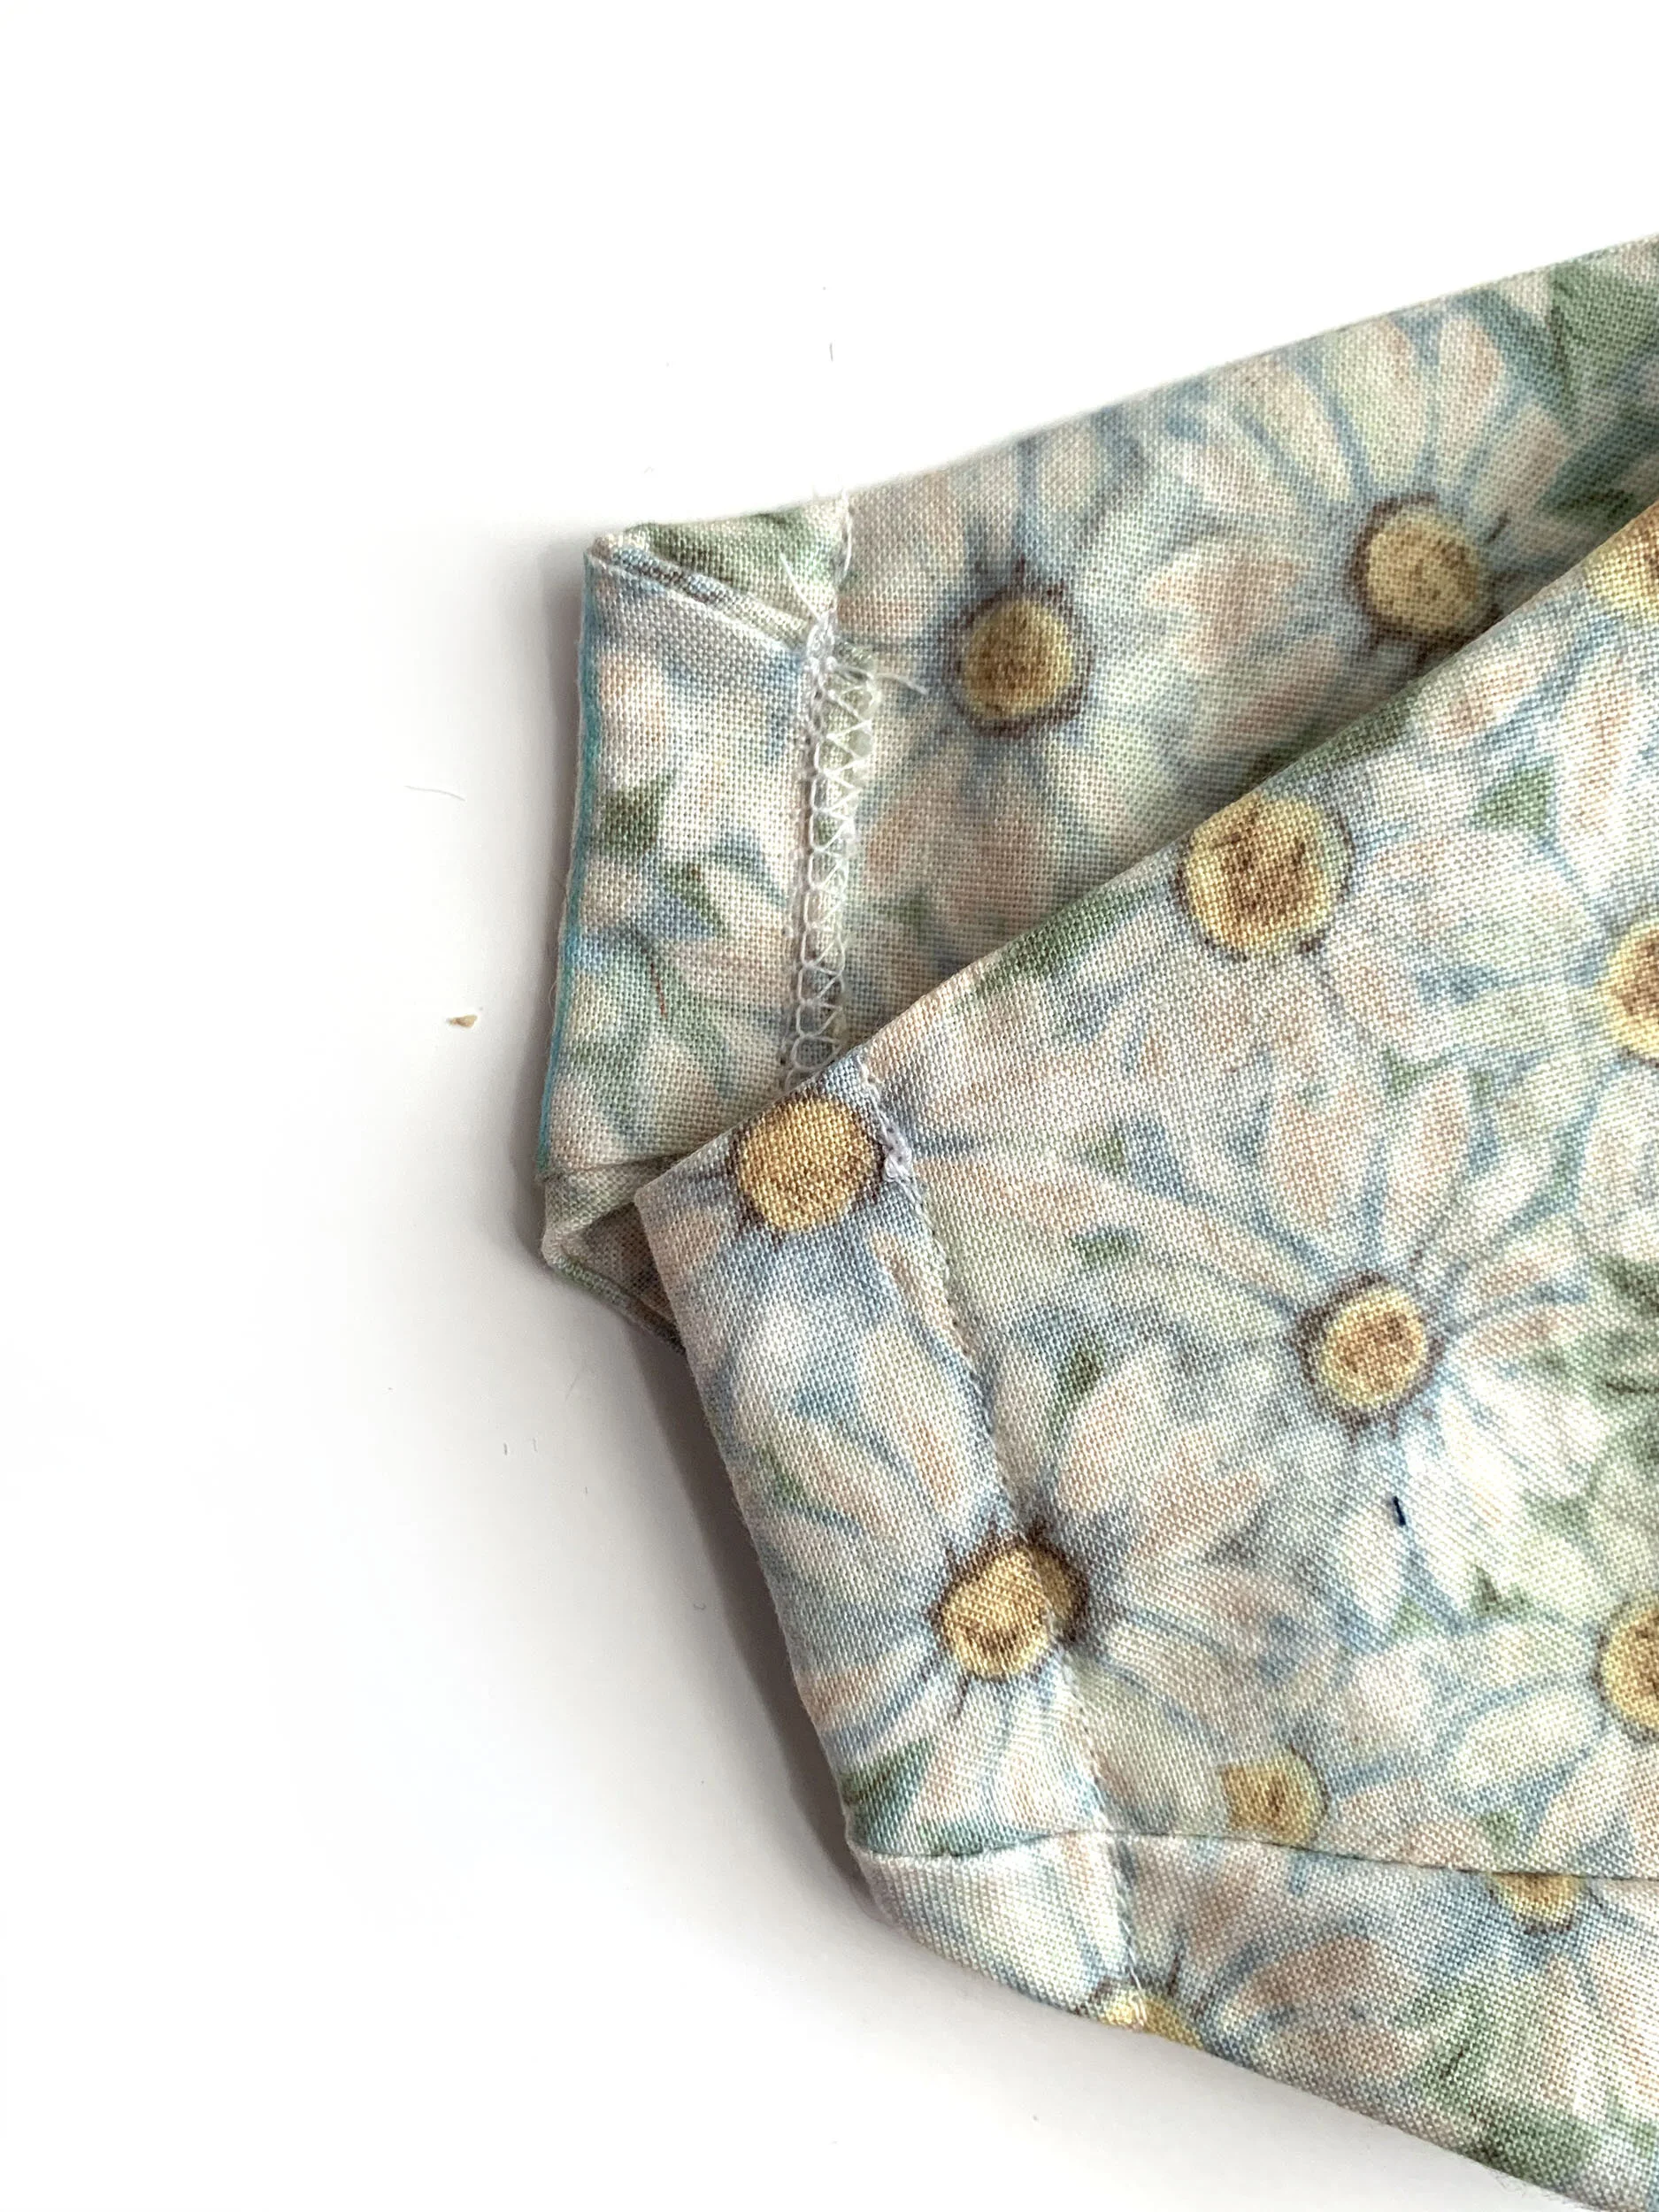
Fold the edge in toward the inside of mask. Use iron to press this down, and then pin. This is the channel for our bias tape strap.
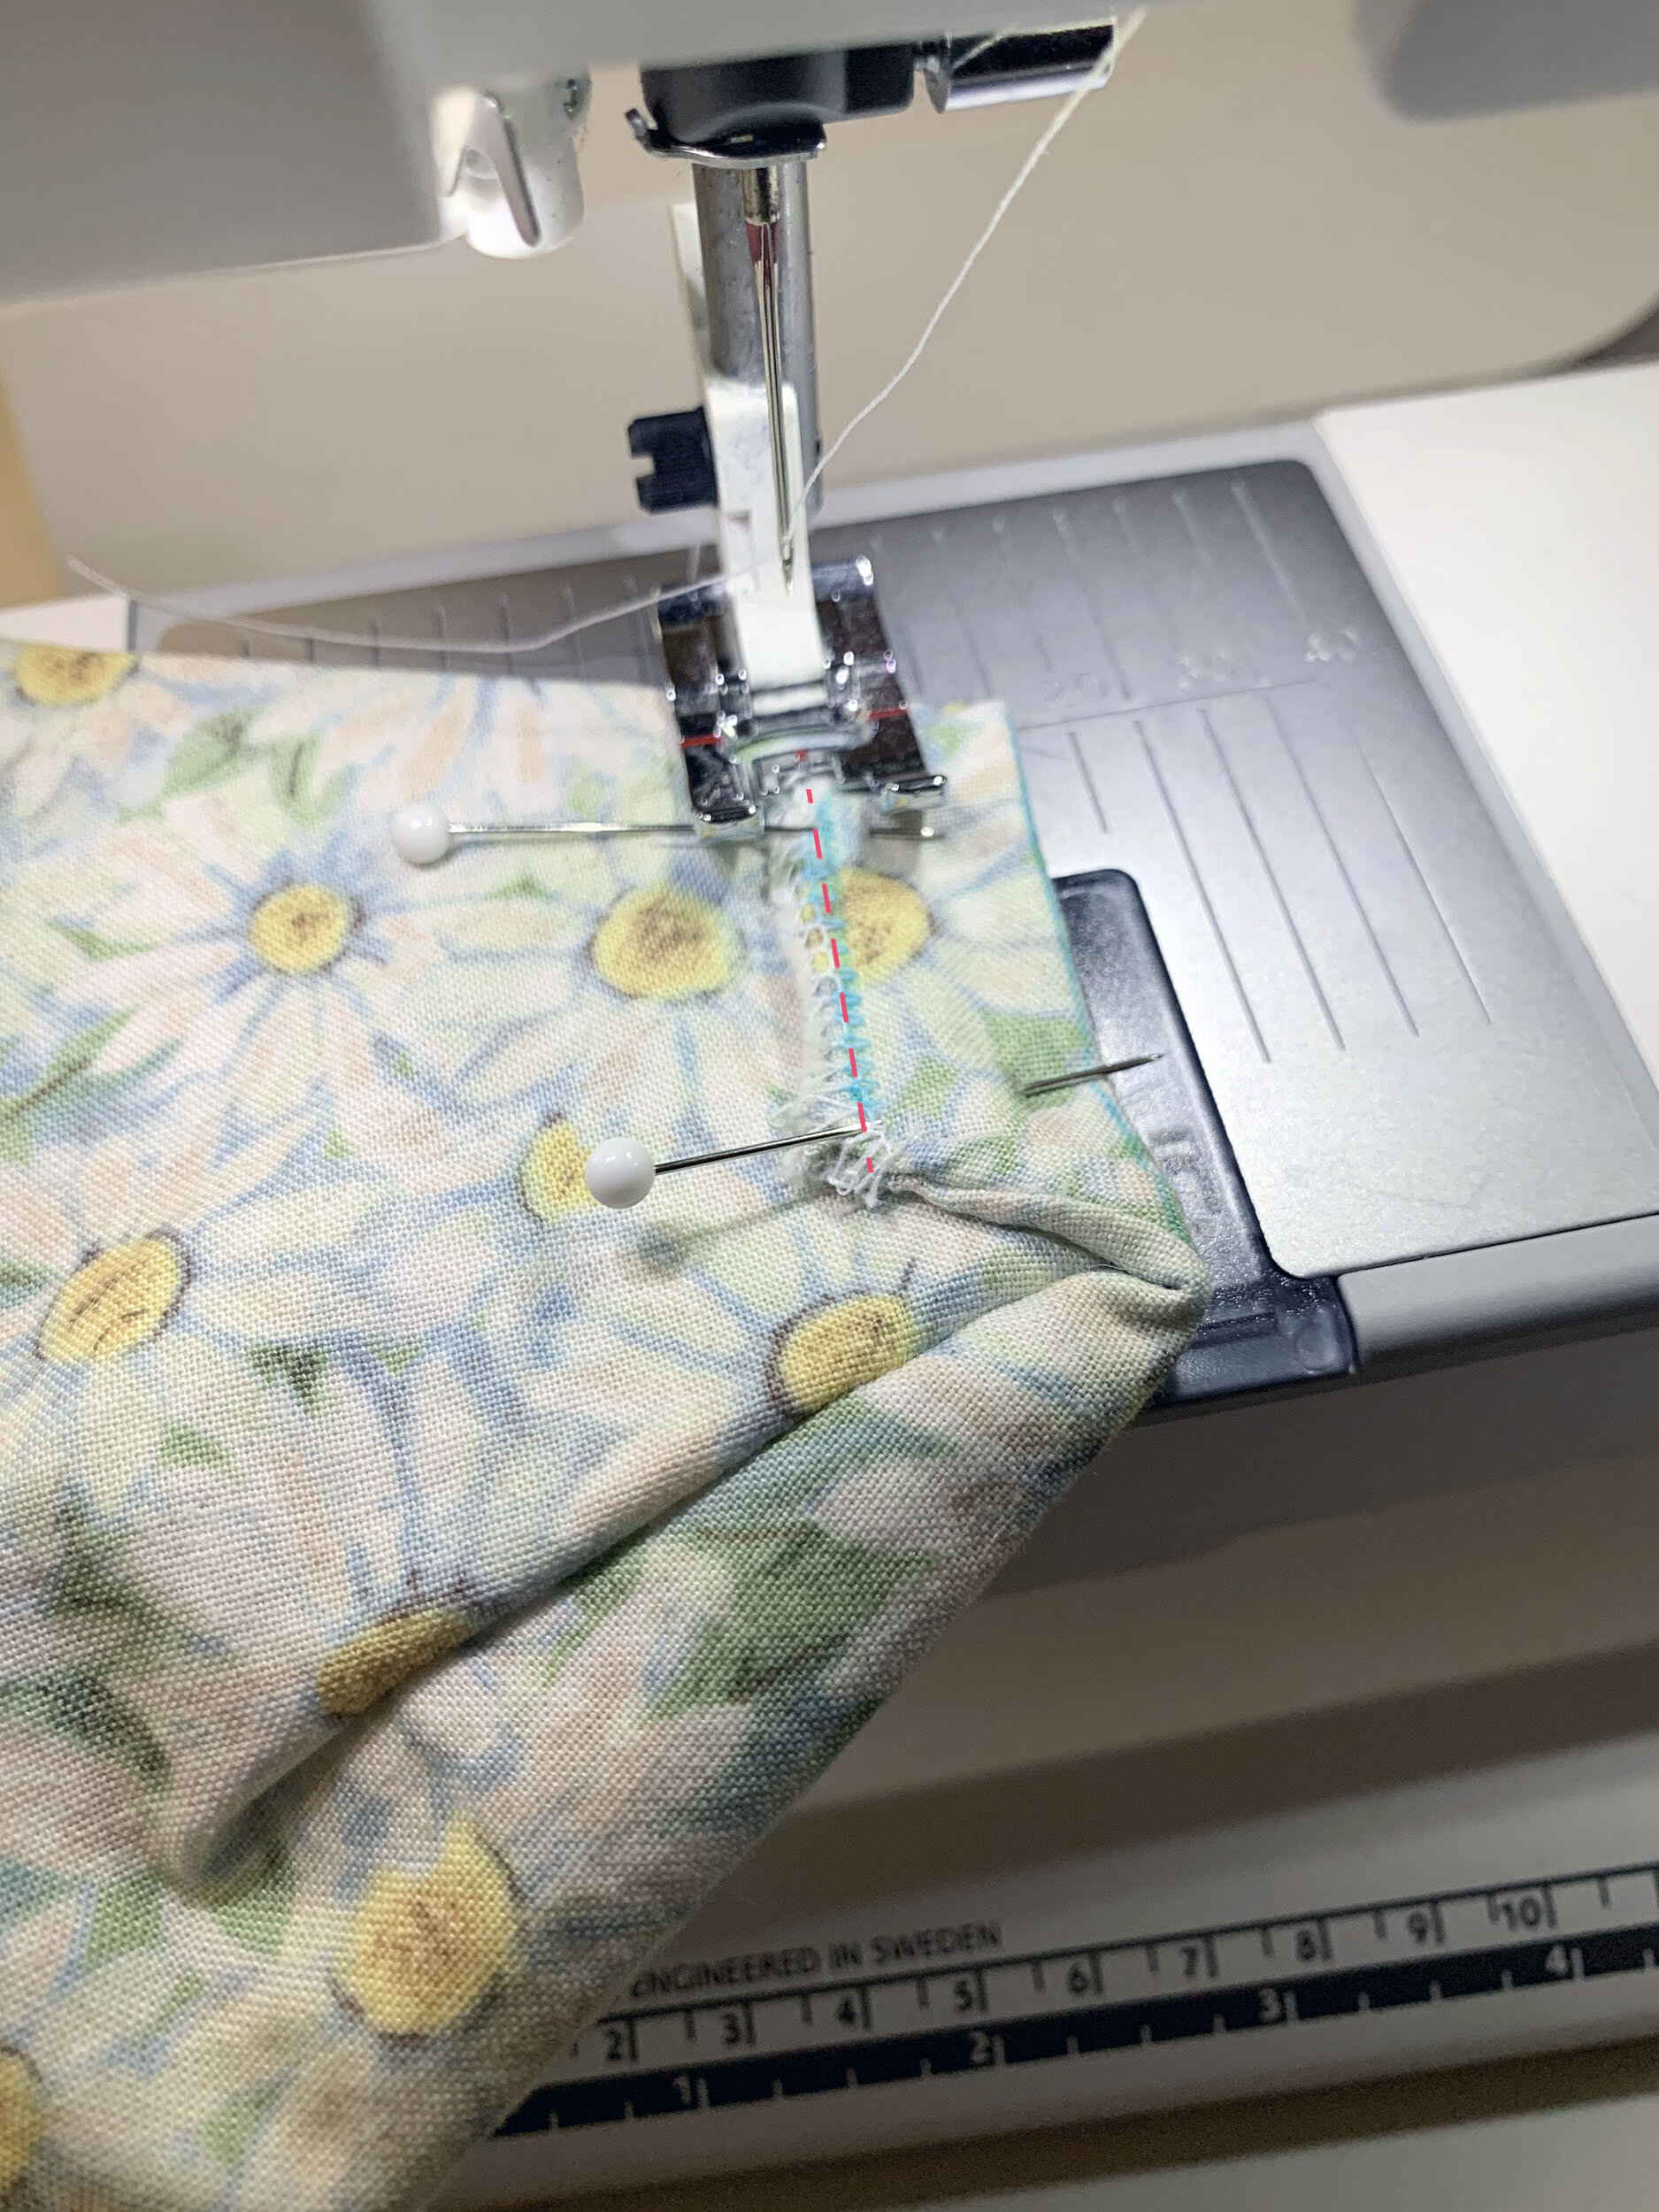
Stitch along the face mask edge. See above where I have the red dotted line. Friendly reminder to remove the pins as you go instead of sewing over them.
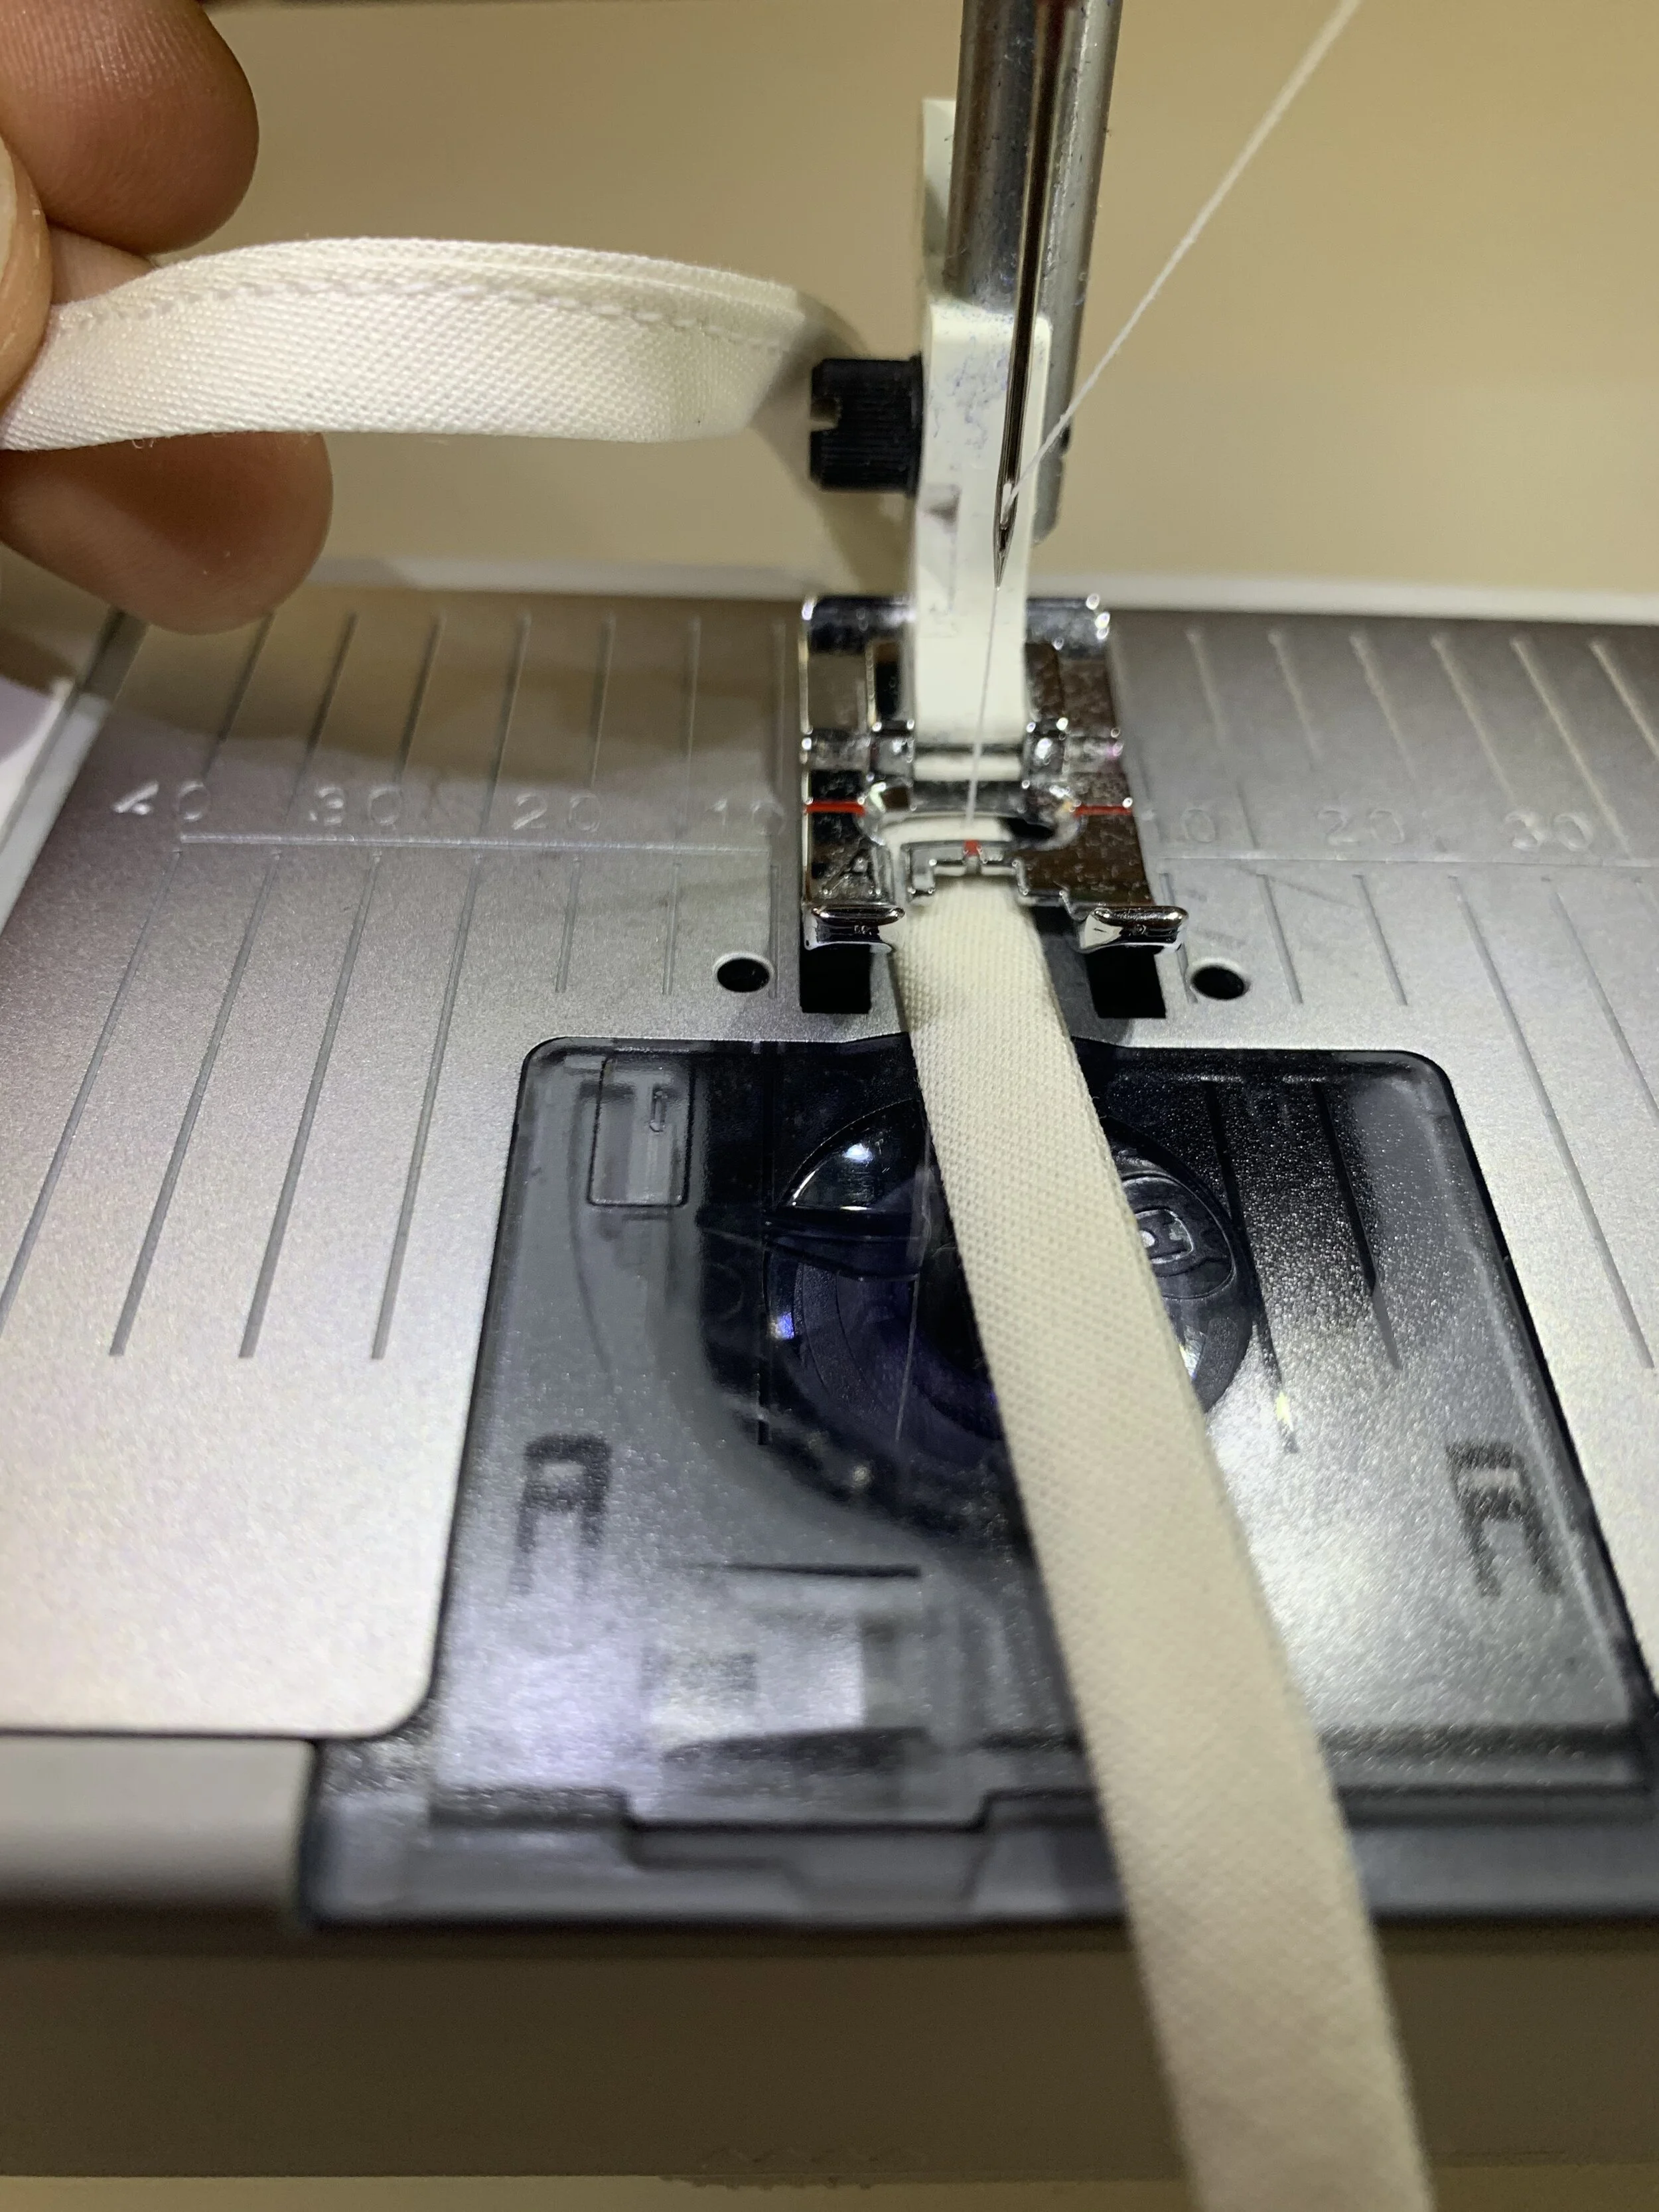
For the strap, you’ll need to cut a piece of bias tape that is 40”-50” long. This length depends on how much extra you want for the “tails” when you tie the mask on.

Stitch along the edge of the bias tape. Make sure you capture the edge on front and back so that it doesn’t fray when washed.
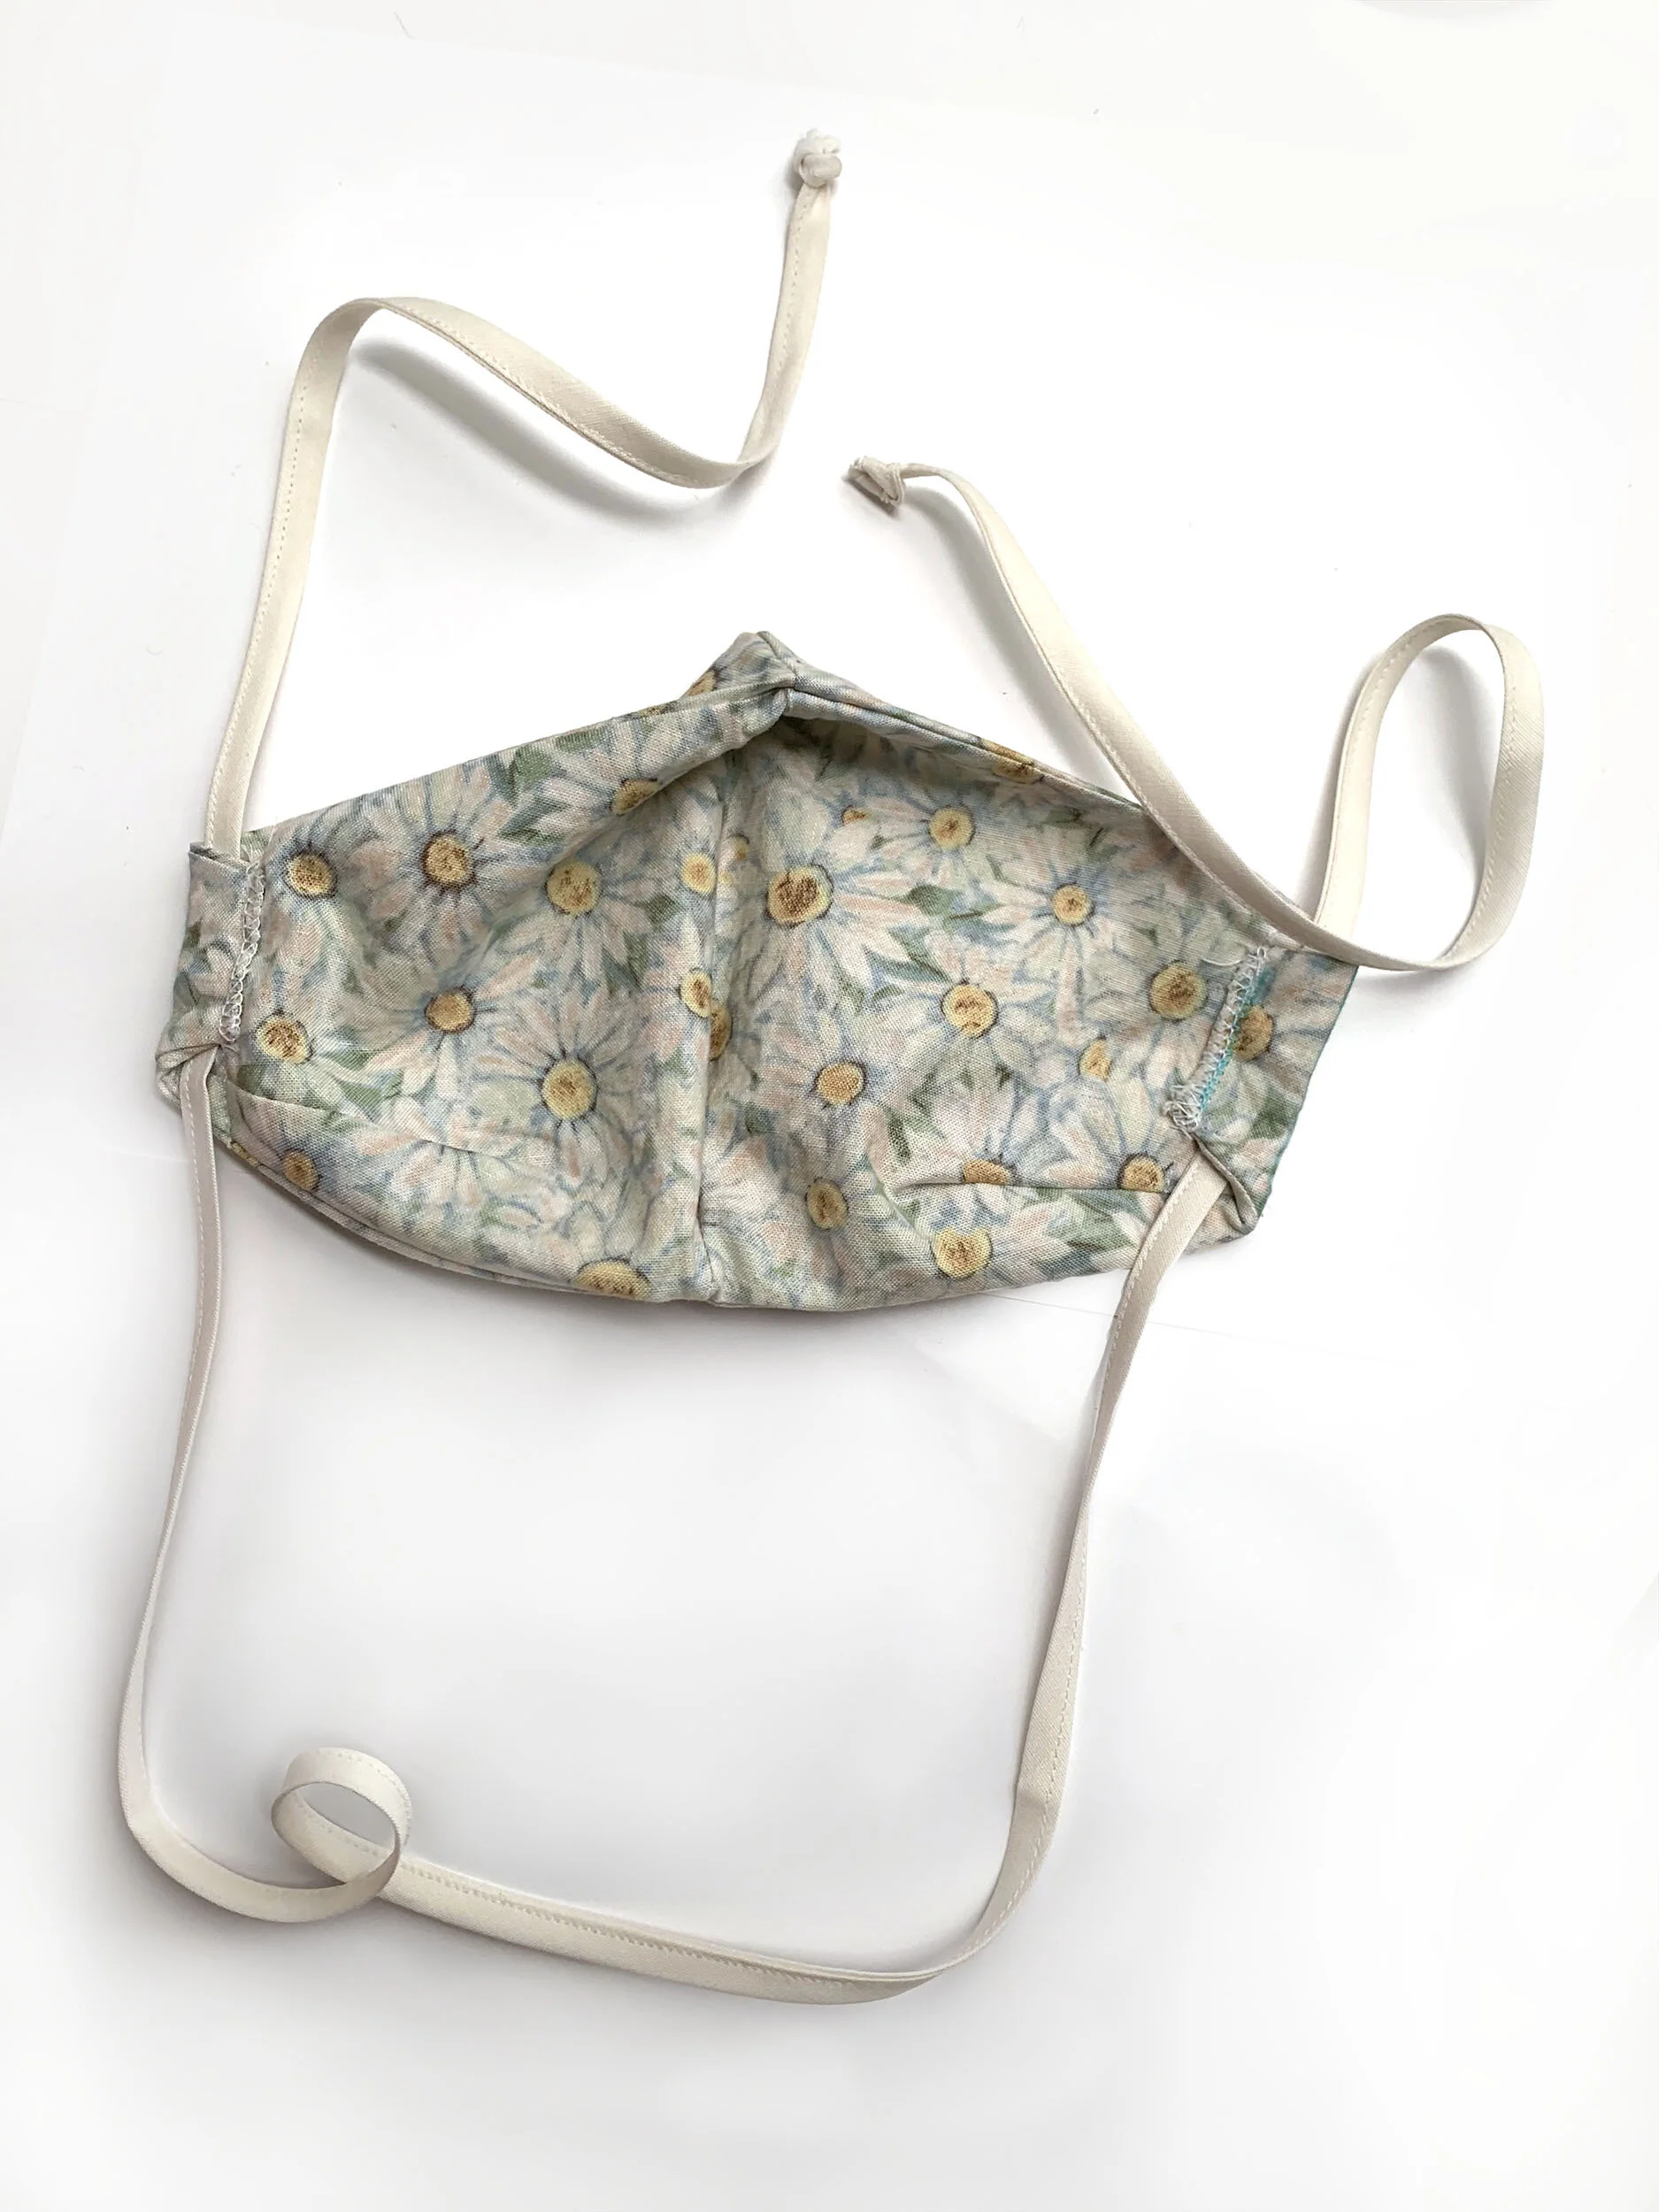
We’re in the home stretch now! Attach a safety pin to one end of your bias tape. Then thread each end of the bias tape through the channels starting at the bottom. Remove the safety pin, and tie a knot on both ends.

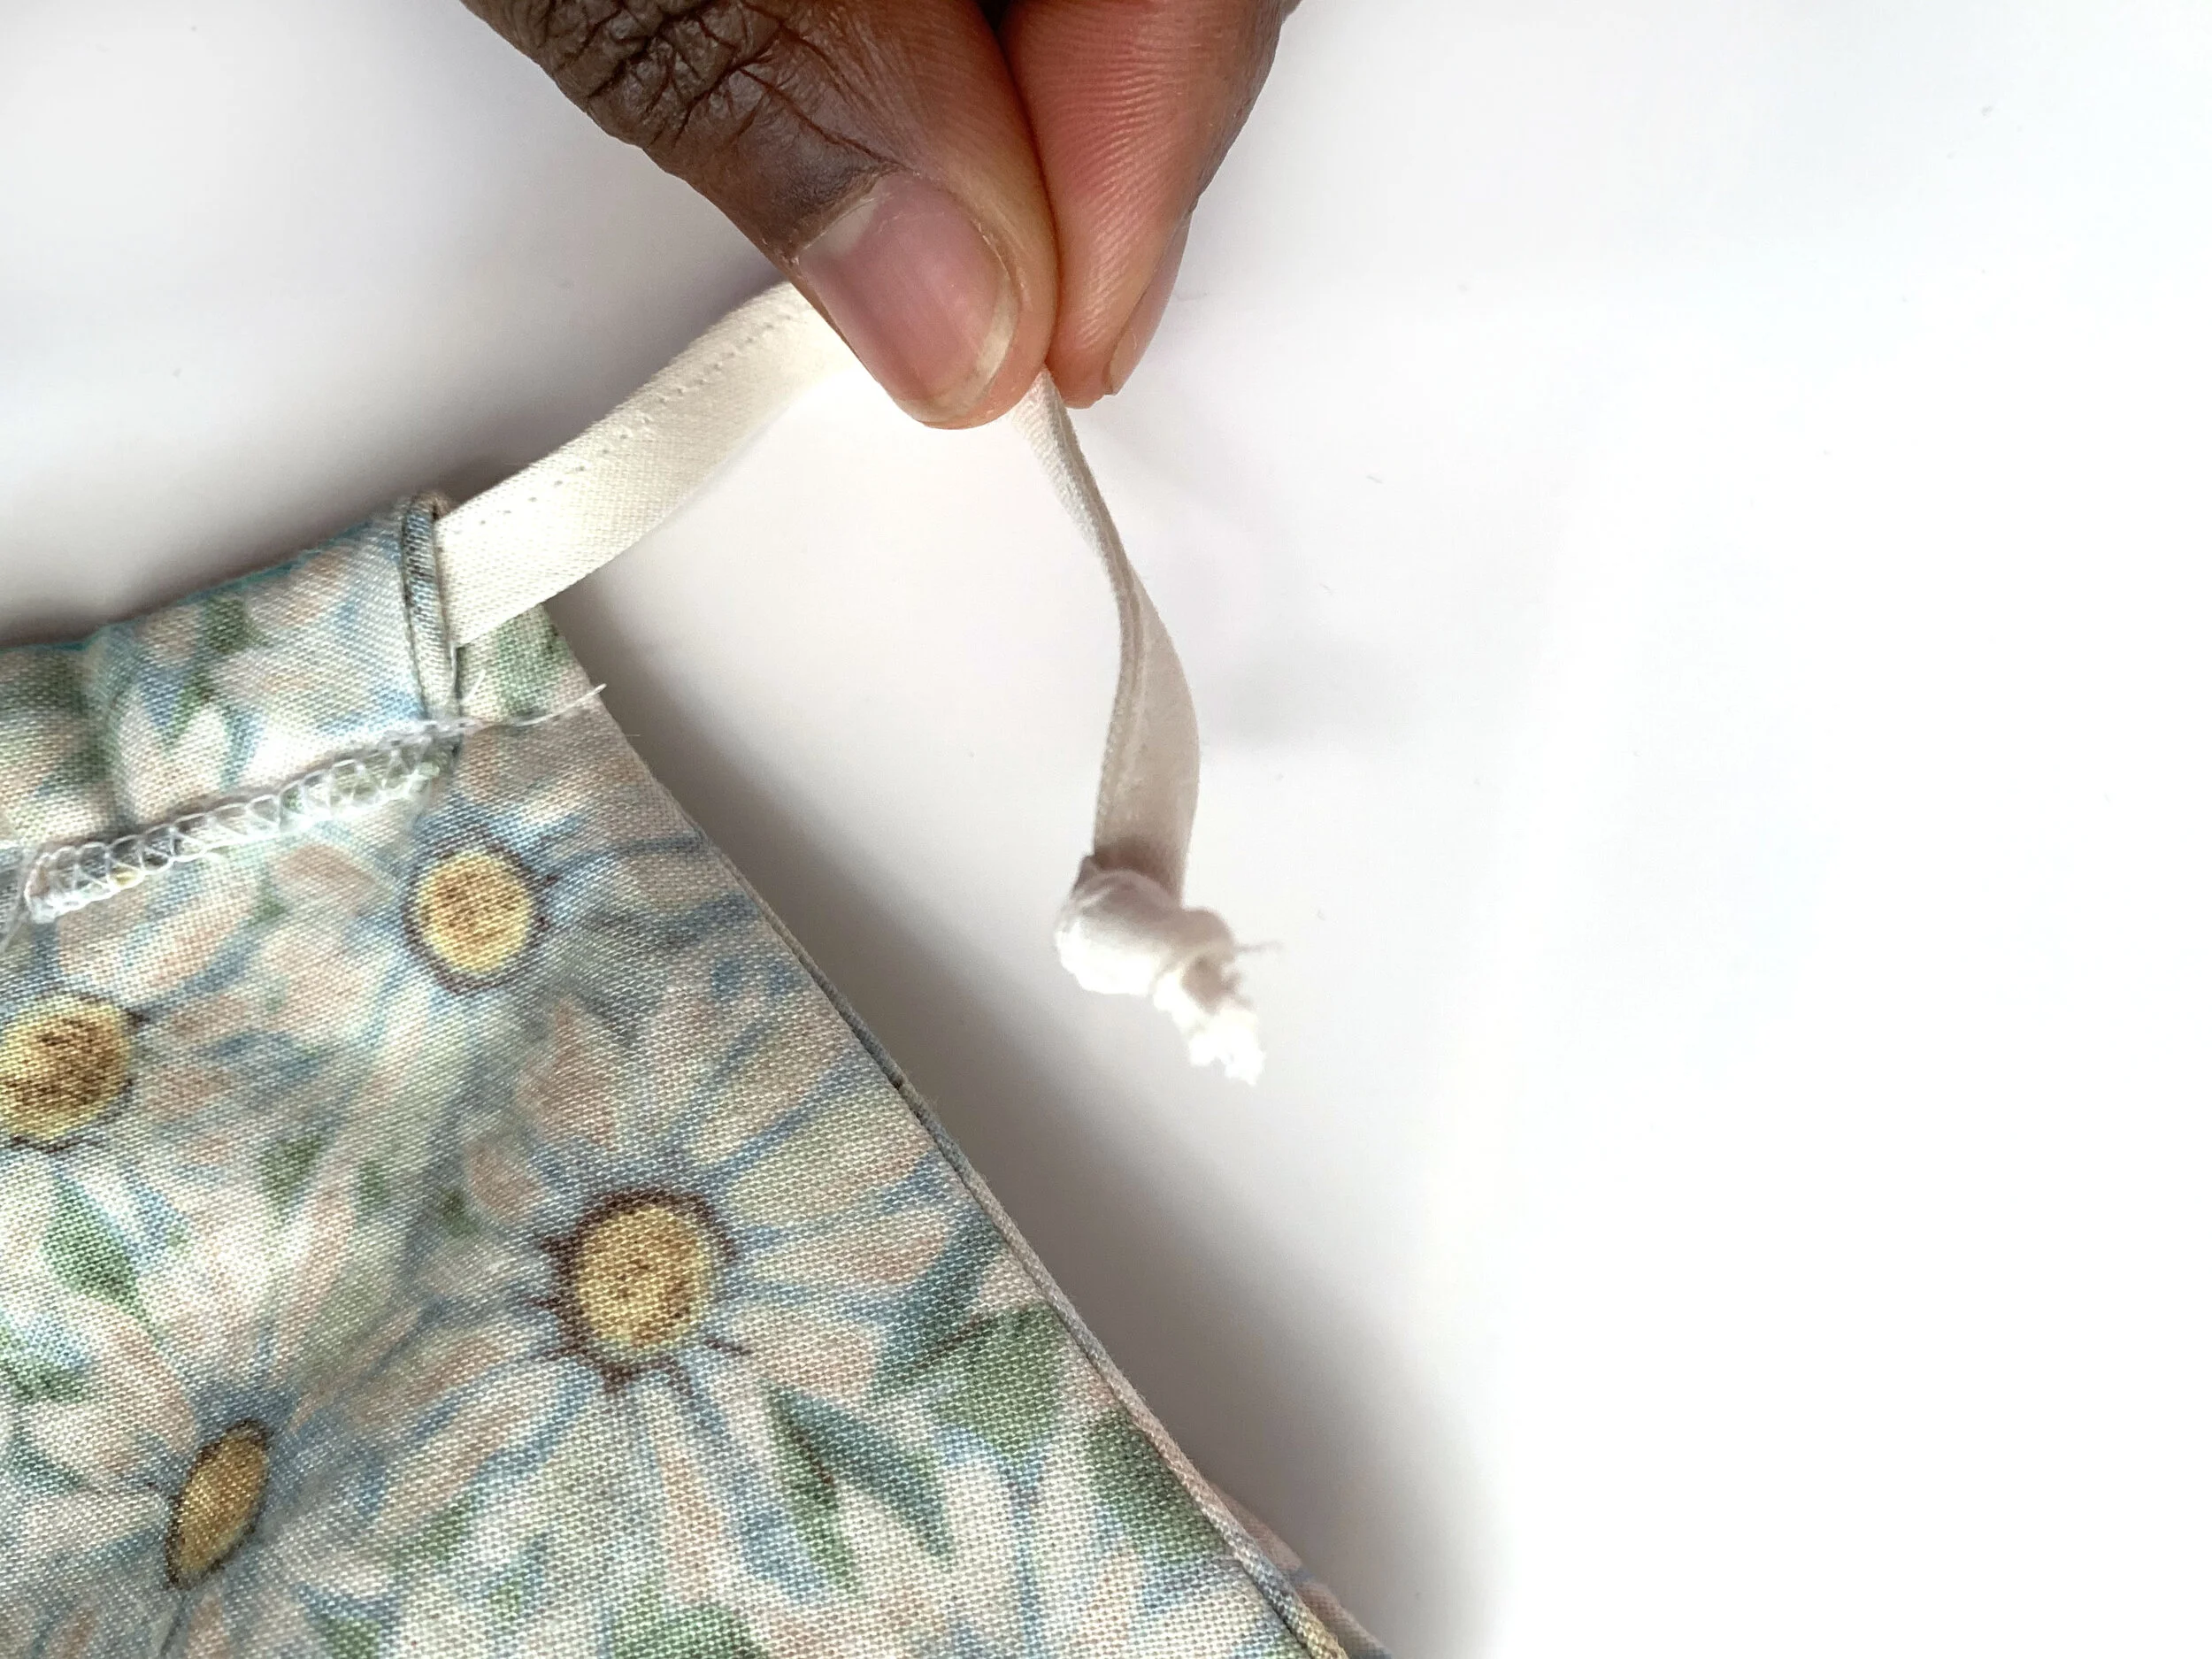
Viola’! You’re all ready to venture out in style, and no more dropping your mask in the parking lot.
To download the pattern, submit form below, and pattern will open in a new window.